Overview #
Editing a template file in WooCommerce seems complex and tiring? We understand it totally. But this doesn’t mean you should ever edit or delete the WooCommerce Template files directly. Your whole WooCommerce installation depends on these files.
Use the Template Editor plugin to edit your WooCommerce Template files effortlessly.
With this plugin installed on your store, there will be no need to follow the long process, i.e. creating the duplicate theme/template file and working on it. Instead, you will be able to edit any file of the template using the frontend editor from the template editor plugin itself.
How to Install the Template Editor Plugin on Your Store? #
- Download, install, and activate the plugin Booster for WooCommerce on your store.
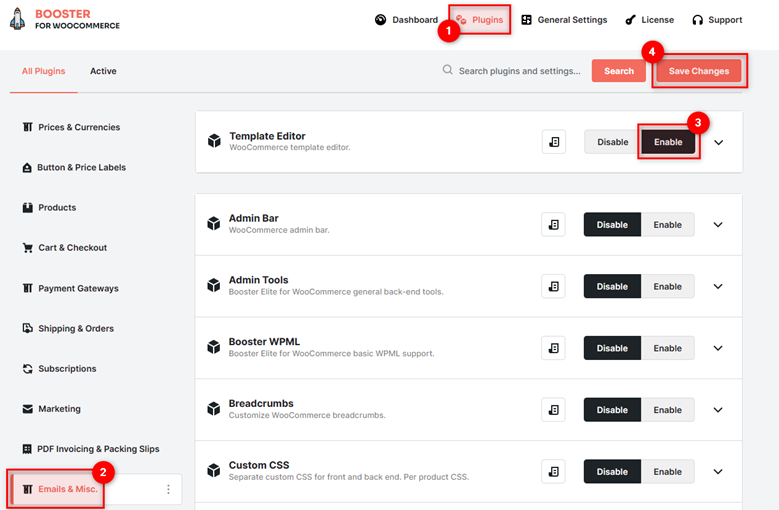
- Go to Booster > EMAIL & MISC. > Template Editor.
- Click on the Enable checkbox for the Template Editor
- Click on the Save Changes button.
General Options #
In this section, the administrator has to specify the Path(s) of the files to be edited.
You may specify one path per line relative to the following address (for your WooCommerce Template folder):
/var/www/html/booster.io/public_html/wp-content/plugins
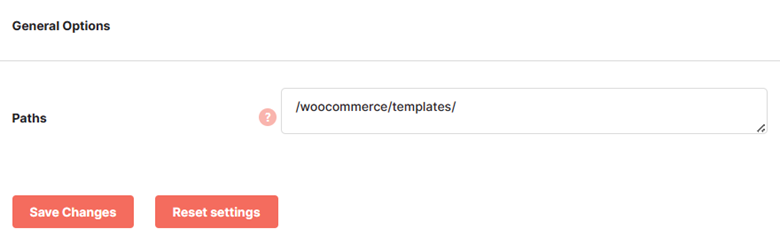
For example, if you just want to edit the files from the Auth folder in your WooCommerce template using the Template Editor Plugin, the path has to be “/woocommerce/template/auth”.
It will load the related files as options in the Template > Templates to Edit input field.
On the other hand, if you want to edit multiple WooCommerce Template files using the Template Editor Plugin for WooCommerce, the path will be “/woocommerce/templates/”.
It will make all the files of the WooCommerce template folder and its nested folders available for editing through the frontend editor.

As per the examples shared above, enter one path per line as per in the Paths field.
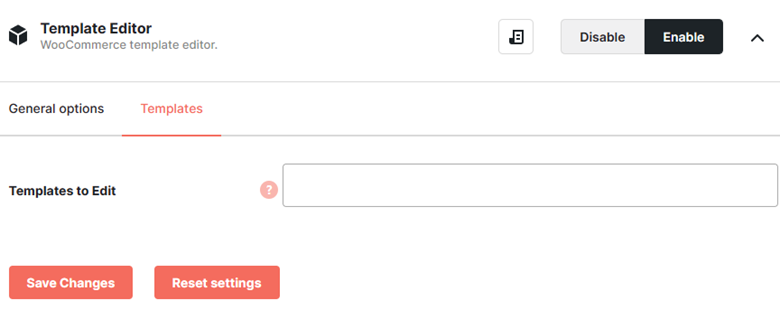
Templates #
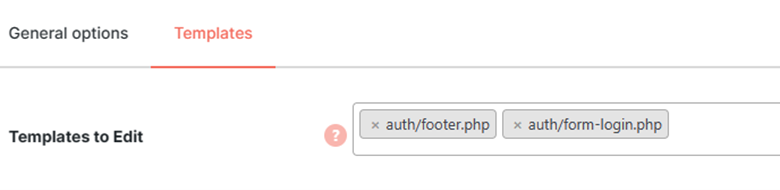
In the Templates section, you have got the options to select the template(s) to be edited and the template editor(s). The options in this field will depend upon the selection you’ve made in the General Options > Paths field.
- Select a template to edit using the dropdown in the Templates to Edit
- Click on the Save Changes button to load the selected file(s) in the Template Editor.
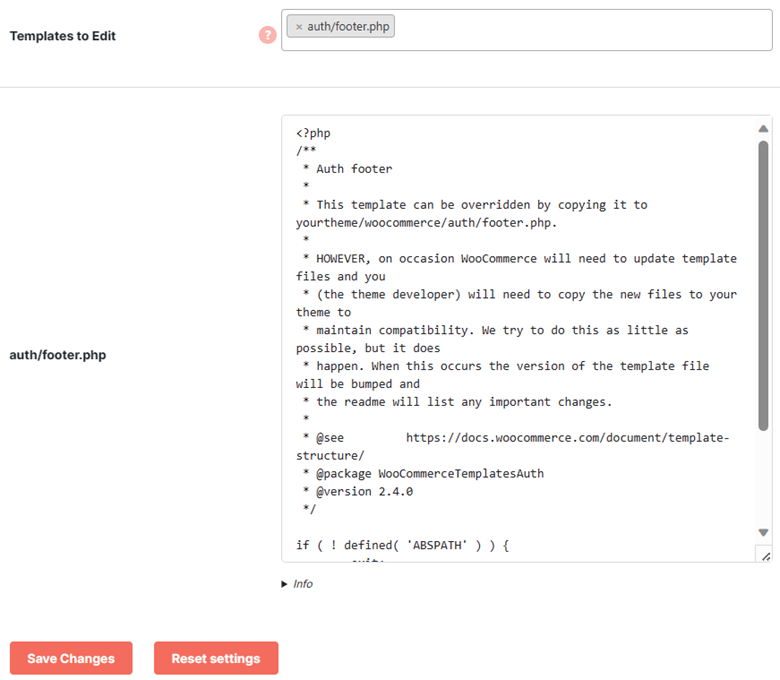
- To view the original/default and replaced path of the file, you may click on the Info accordion (the expandable and collapsible section).
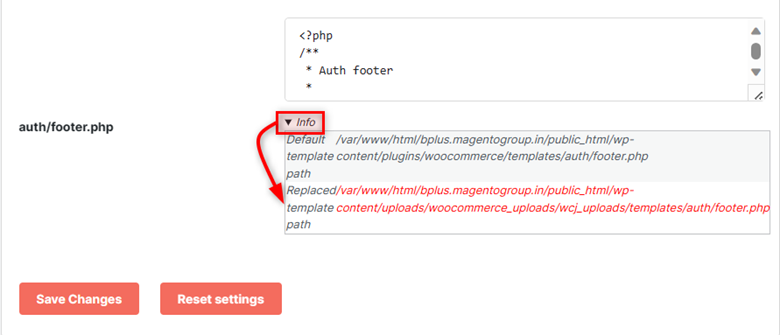
- Now, you can edit the file in the editor without worrying about messing the original code up. The Template Editor will automatically create a file for your input in the “woocommerce_uploads/wcj_uploads/templates”
- Click on the Save Changes button to apply changes to the file you are editing.
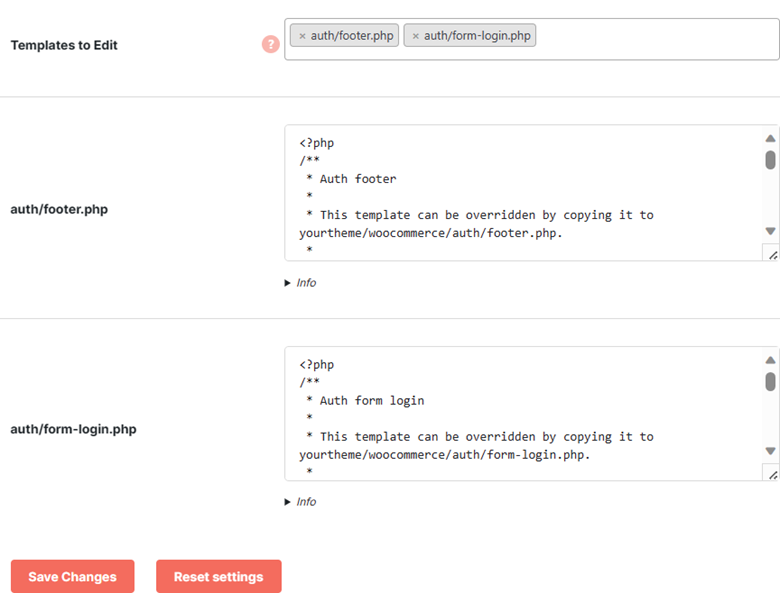
Similar to the above example, you may load 2 or more files in the Template Editor Plugin – Booster.
In this case, you will have multiple editor fields on the plugin settings page.
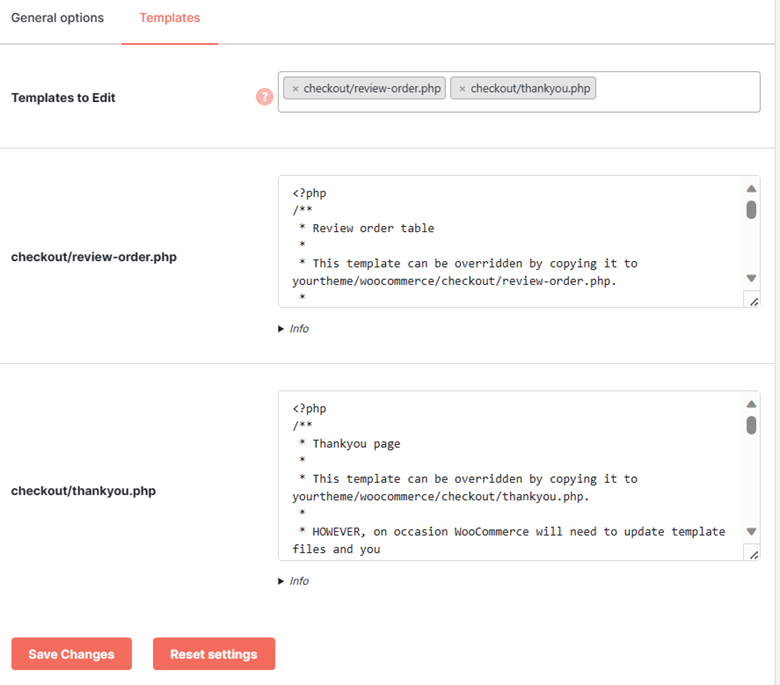
Here is another example with different WooCommerce template files selected for editing –
How to Find the path of the WooCommerce Template File to be edited? #
- Visit the Template List section of the page by clicking the given link.
- Click on the Expand to view links to the template files of all versions accordion, in order to view the list of various WooCommerce versions.
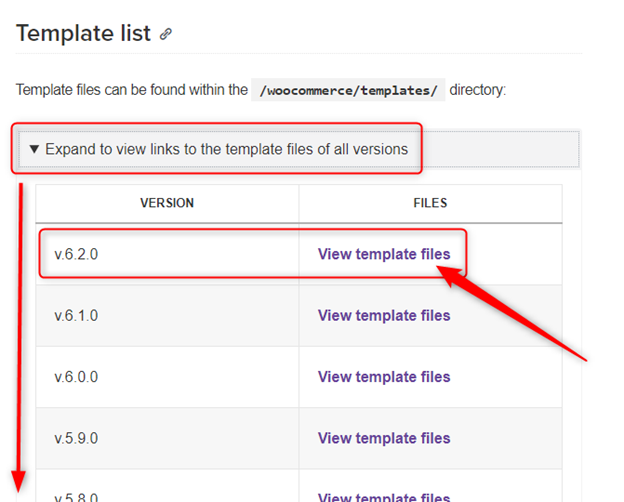
- Click on the View Template Files link, adjacent to your current WooCommerce version. For example, 2.0 files can be found here.
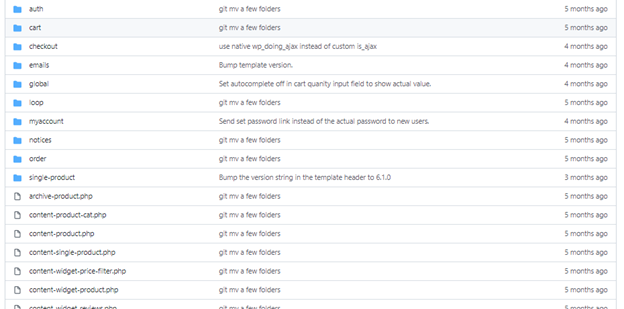
- Try to understand the folder structure and locate the file (or find the path) using the Github directory.
Reset Settings #
- Click on the Reset Settings
- Click on the OK button when the browser alert pops up. It will clear the edited WooCommerce template files from your store and restore the default plugin settings, meaning that your original WooCommerce template files will be in use again.


