Overview #
Adding columns to the Admin Products List allows store administrators to view important information about multiple products at a glance. It ends the need for opening dedicated pages to see this data for each product.
If you want to add columns in the Admin Products List (WooCommerce > All Products) or wish to change the order of columns in this list, the WooCommerce Admin Product List Plugin is the easiest way to do so. It will take less than 2 minutes to enable this setting in WooCommerce through this Booster Plugin.
You can display any Booster product shortcode, HTML content, or fixed value in these columns.
To summarize, this plugin has 2 main functions that you and your store admin(s) would love:
- Add custom columns to the Admin Product List
- Change the order of columns in the Admin Product list
How to Install the WooCommerce Admin Products List Plugin? #
- Install the Booster for WooCommerce Plugin.
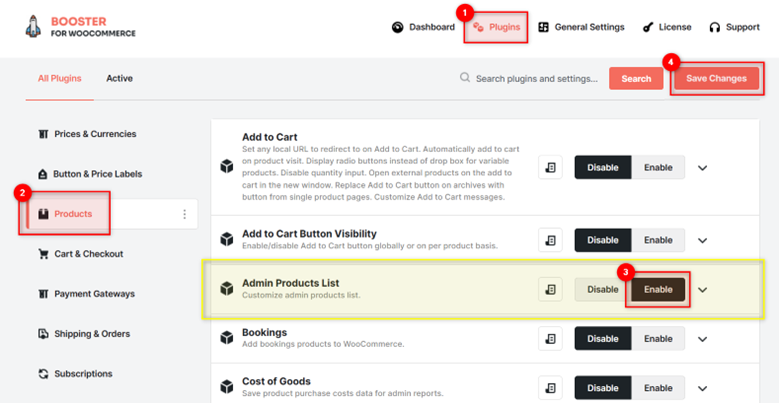
- Go to Booster > Plugins > Products > Admin Products List.
- To install the WooCommerce Admin Products List plugin on your shop, select the Enable option for it.
- Click on the Save Changes button.
How to Add Custom Columns in the WooCommerce Admin Product List? #
To add one or multiple custom columns to your Admin Product List –
- Go to the Custom Columns section.
- Select the Enable Section checkbox.
- Enter the Custom Columns Total Number. For example, to add 2 columns, enter “2” here.

4. Click on the Save Changes button.
Doing so will add multiple new fields and options on this page for you. For each custom column to be added to the All Products list of WooCommerce, you will have separate options.
Adding a Custom Column to the Products List in the Admin Dashboard
- Select Enabled for the Custom Column #n where ‘n’ is the serial number of the current custom column.
- Set a Label for your custom column. This label will be the Column heading for your admin Products list.
- Set a Value for the custom column. You can add a booster product shortcode, or an HTML value, or a fixed value here.
Afterward, repeat the same for all your content columns and Save Changes.
Here is an example Custom Column:
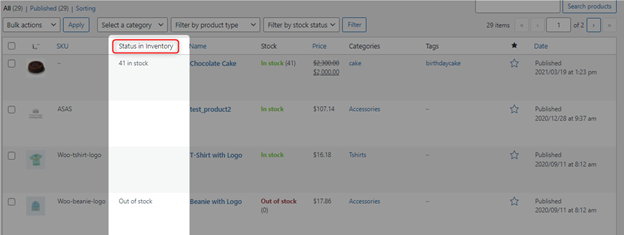
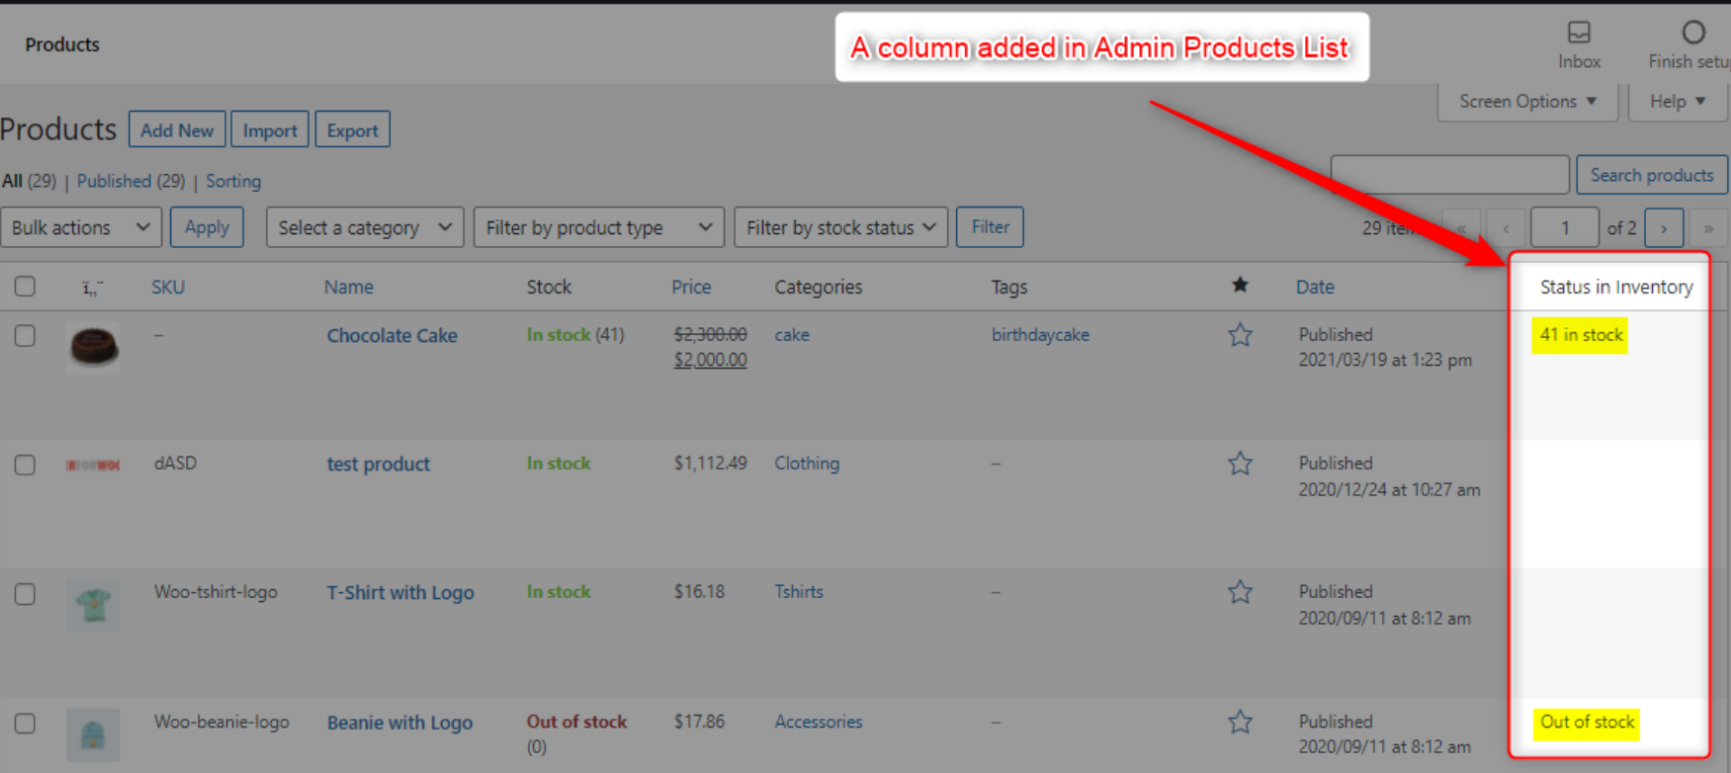
Output – A Custom Column “Status in Inventory” added to the Admins Product List
See another example where we add product variations in the All Products table (admin list)
Output – A Custom Column “Variations” added to the Admins Product List

How to Change the Order of Columns in the WooCommerce Admin Product List? #
Note: All custom columns, with no order defined in the Columns Order section, will be appended at the end of the list. Similarly, if you delete the names of one or several columns from this list, it won’t remove those columns from the Admin Product List. Instead, they all will appear at the end of the list.
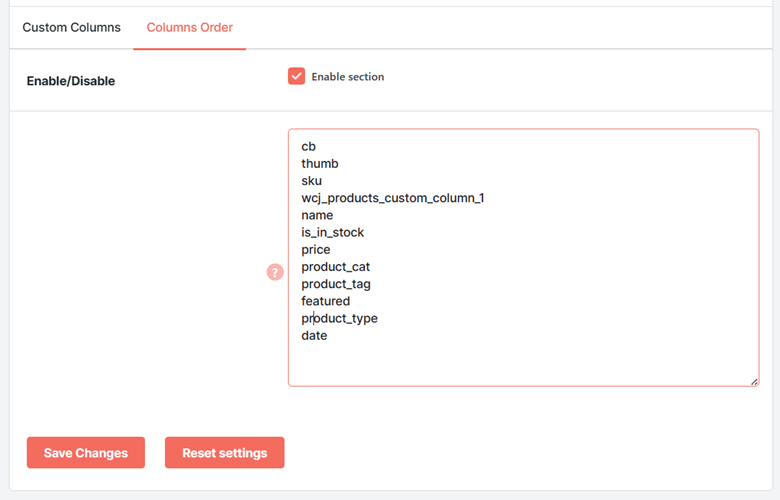
The Columns Order section is responsible for changing the order of columns in your store’s WooCommerce Admin Products List.
To make it work, do the following:
- Select the Enable option for the Enable/Disable field.
- Change the order of columns in the list the way you want.
- To insert the custom columns at a priority you want, copy its key ((for example, wcj_products_custom_column_1)) from the respective position in the Custom Columns section.
- Click on the Save Changes button.
See this. It is the default list added in the Columns Order text area field.
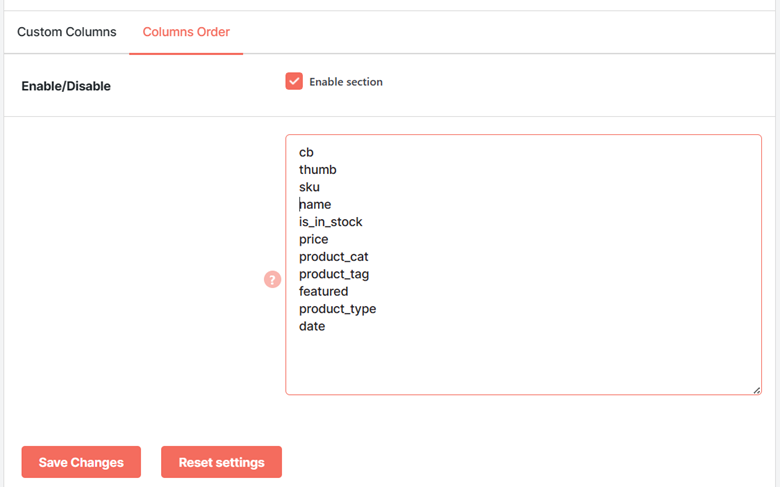
Now, we have inserted“wcj_products_custom_column_1” in our preferred position (4th) to change its order in the Admin Products List.
Store Preview: Displaying a Custom Column at a Preferred Position in Admin Products List
Here is the list after we have changed the order of the Admin Products list –