Description
When enabled, the WooCommerce custom payment gateway plugin allows you to add several payment gateways to your online store.
This means a lot of flexibility for your store. Also, it makes it for your customers to make payment via whatever means suits them.
The Booster Custom Payment gateway plugin module allows you to add up to ten custom WooCommerce payment gateways to your website.
Additionally, the plugin allows you to customize sections of your payment gateways however you please.
The best part is that this plugin is easy to use, and you don’t need to write any code to use it.
Key features of WooCommerce Custom Payment Gateways Module
Here are some of the interesting features of the WooCommerce custom payments gateways module:
- Allows you to customize your payment gateway’s title
- Allows you to create instructions for using a particular gateway
- You can add a minimum cart or order amount
- Allows you to set availability of certain shipping options
- Customize by adding an icon for the gateway
- It makes it possible for you to enable a payment gateway for virtual order
How to Create WooCommerce Payment Gateway
Here are the steps to follow to add a custom payment gateway to your WooCommerce website with ease:
Step 1: Install the Booster WooCommerce plugins to your website.
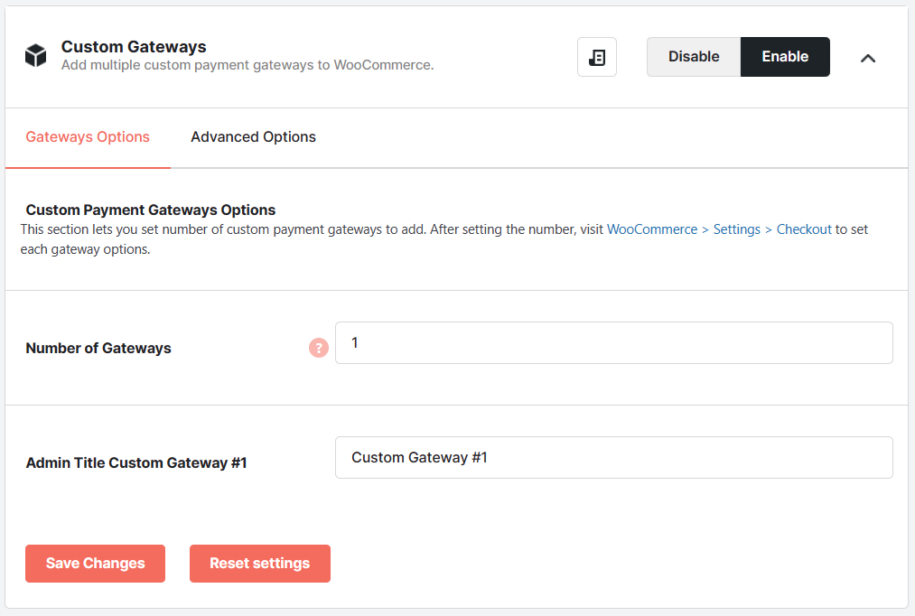
Step 2: After installation, navigate to WooCommerce > Settings > Booster > Payment Gateways > Custom Gateways.
Step 3: Enable the Custom Gateways Module Options by checking the box as shown below.
And with that, you will have multiple payment gateways enabled on your website.
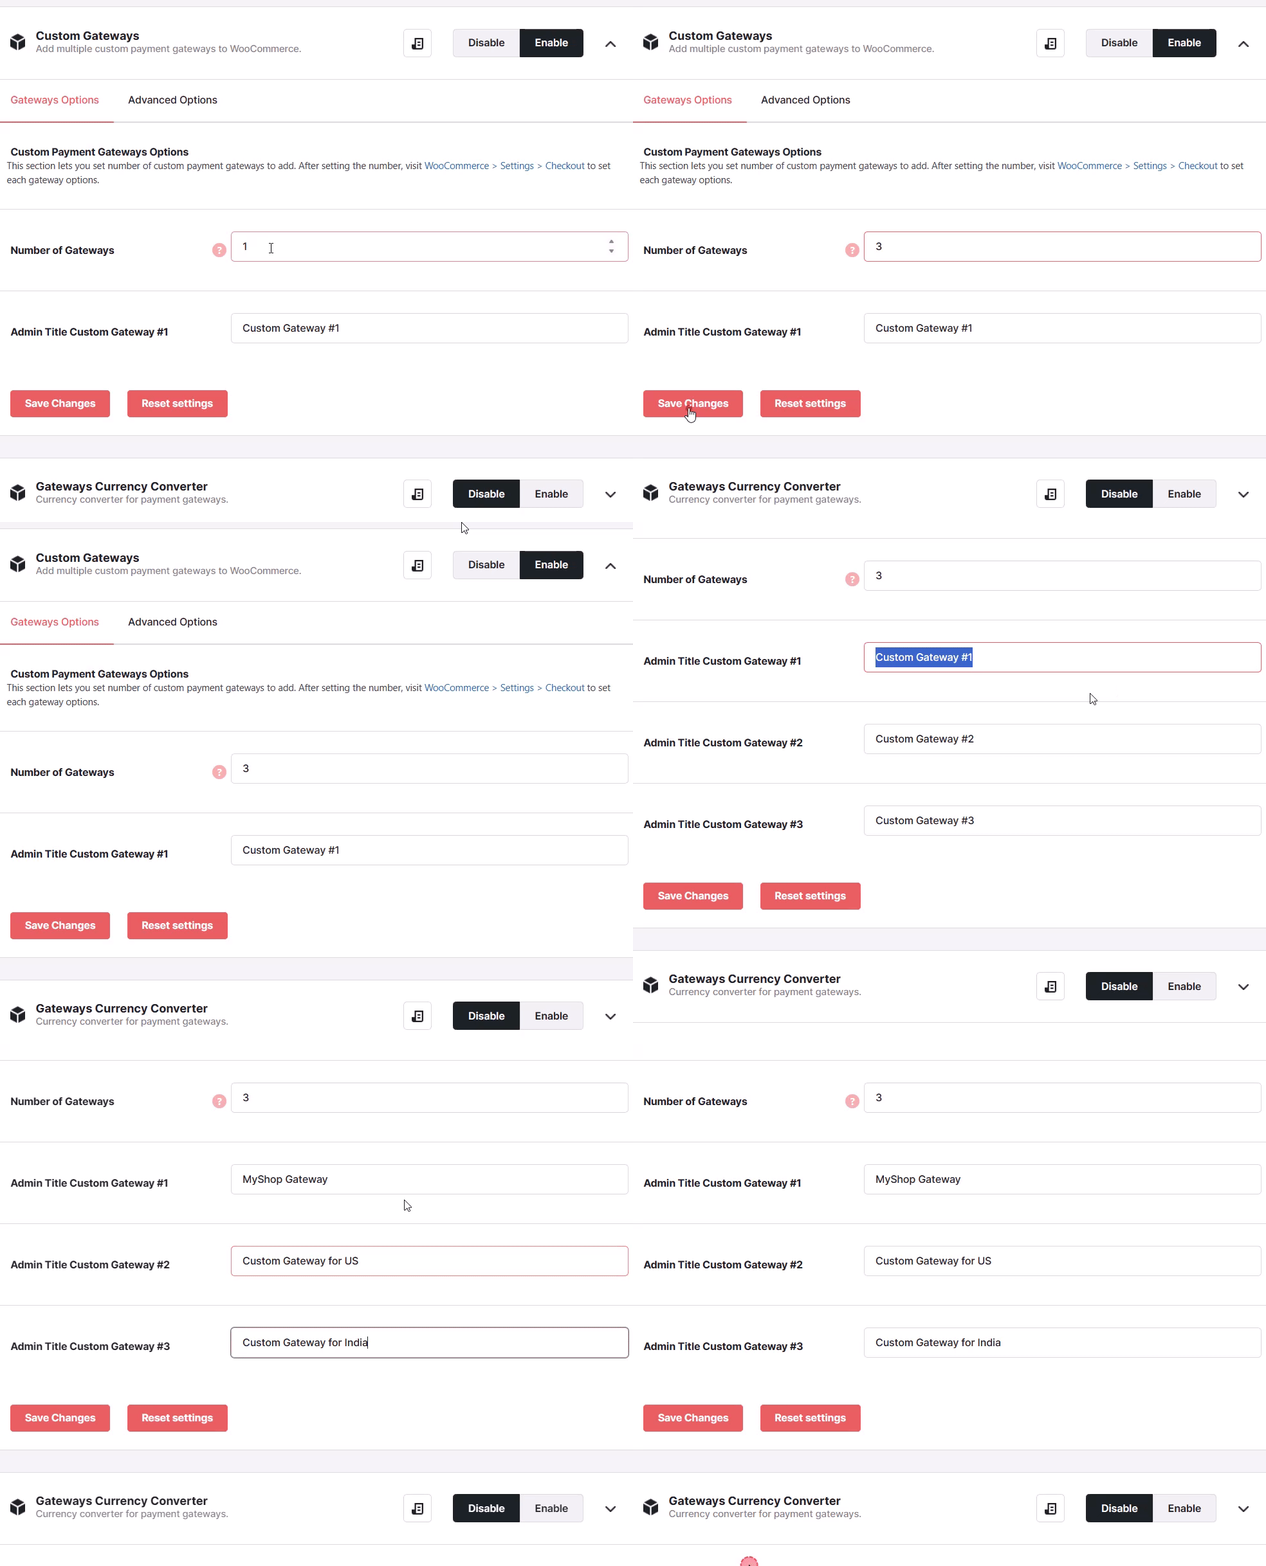
Start by setting the number of custom payment gateways you wish to add in WooCommerce > Settings > Booster > Payment Gateways > Custom Gateways:
Once you’ve entered the number of custom gateways to add, all other settings can be customized (as usual) in WooCommerce > Settings > Checkout:
Other Additional Settings
After enabling WooCommerce Payment Gateways, you can take things further by specifying the number of Gateways you would like to have.
On the free Booster plan, you are limited to just one payment gateway. But on the premium version, you can have as many as you desire.
You can also set a custom title for your payment gateway without breaking a sweat.
What’s more, Booster allows you to add a delete button to your custom payment gateway’s input field.
FAQs
What Is The Best Payment Gateway For WooCommerce?
To add a custom payment gateway to your WooCommerce website, you need a plugin. While there are a slew of plugins out there that you could use, Booster happens to be the best.
How To Make A Payment Gateway The Default In WooCommerce?
WooCommerce allows you to set a particular payment gateway as default. To do that, navigate to WooCommerce > Settings > Payments.
There, you will see a list of available payment gateways. To make one default, place it at the top of the list by clicking the ˄ icon next to it.
How To Test WooCommerce Payment Gateway?
After enabling custom payment gateways on your WooCommerce website, you must test them to ensure they are working correctly.
The first thing to do is to test their appearance on the front end of your website. After that, make a dummy purchase to see if everything is working fine.
How To Use WooCommerce Payment Gateway?
To add and use the WooCommerce payment gateway, first install the Booster plugin on your website. When you do, enable the custom payment gateway option.
Conclusion
Adding custom payment gateway in WooCommerce on your website allows your customers to make payments using their favourite payment option. This means more sales for your business.
The Booster WooCommerce plugin makes adding one easy.
- WooCommerce > Settings > Booster > Payment Gateways > Custom Gateways for WooCommerce
- WooCommerce > Settings > Checkout > Checkout Options
- WooCommerce > Settings > Checkout > Custom Gateway


