Overview #
The Custom CSS plugin in Booster lets the website/store owners customize their store’s frontend as well as backend without much effort. You just need to add all the custom CSS text in the given input boxes as necessary, and it will be applied to your website.
The main features of the Custom CSS plugin are:
- Add custom CSS code to the header or footer
- Enable custom CSS for your store’s frontend
- Add custom CSS to your backend (administrator dashboard)
- Add a default per-product custom CSS
- Add different custom CSS per product for your shop
To make changes, you can add CSS for classes, IDs, or names. For the per-product settings, you may also apply custom CSS on the HTML tags directly. Precisely, any kind of CSS code can be enabled for your whole store and admin dashboard using this plugin.
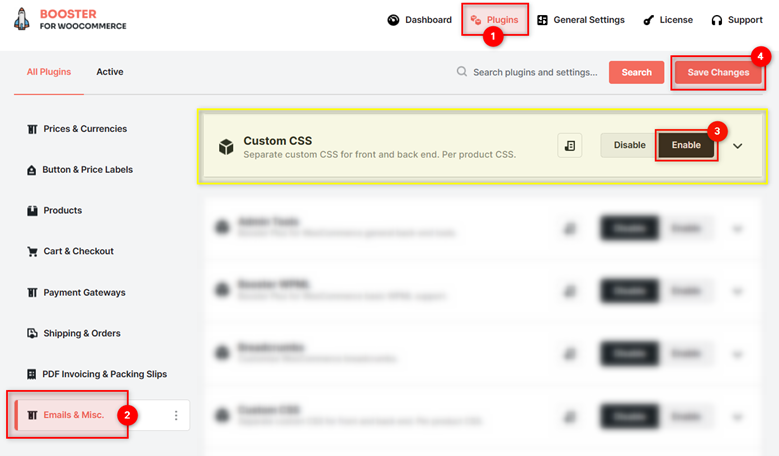
How to Install the Custom CSS Plugin with Booster? #
- Download and install Booster for WooCommerce Plugin on your online store. This plugin is a collection of 120+ features, including the Custom CSS functionality.
- Now, go to Booster > Plugins > EMAIL & MISC. page.
- Select the Enable checkbox for the Custom CSS plugin.
- Click on the Save Changes button
How to Add Custom CSS to My WooCommerce Store? #
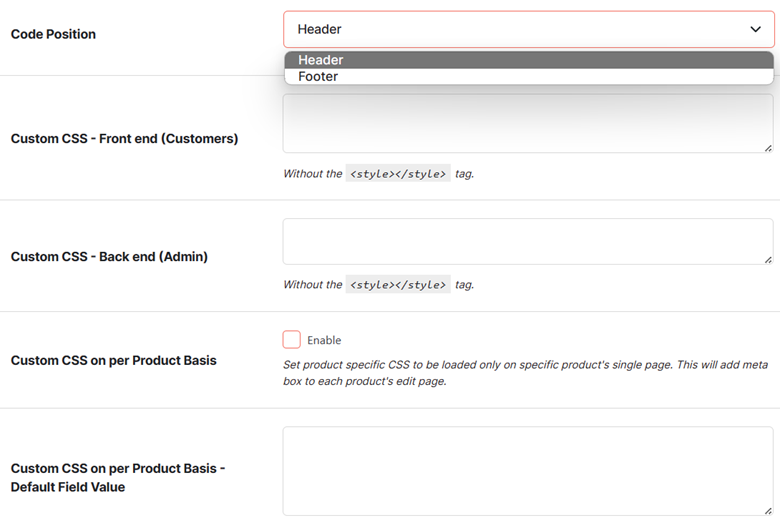
On the Custom CSS Plugin settings page, accessible through WooCommerce > Settings > Booster > EMAIL & MISC., scroll down to the Options section.
- Depending upon whether you want to add your CSS code in the Header or in the Footer, select the desired option for the Code Position.
- Enter the Custom CSS – Front End (Customers) code in the relevant input field.
- Enter the Custom CSS – Bank End (Admin) code in the relevant input field.
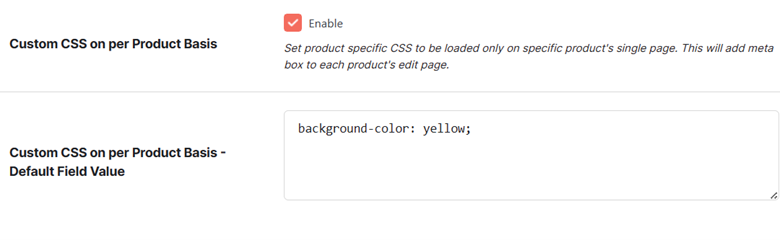
- Now, if you want to enable the per product CSS or want to apply specific code on all your single product pages, select Enable for the Custom CSS on the Per Product Basis Option.
- Enter the Custom CSS on Per Product Basis – Default Field Value in the relevant input field. It will work for all your single product pages with Custom CSS enabled and the Custom CSS input field empty.
6. Click on the Save Changes button.
How to Apply Different Custom CSS per Product for Your Online Store? #
To apply custom CSS specific to different single products in your online store, follow the below-mentioned steps:
- Go to the Booster > Plugins > EMAIL & MISC. and enable the Custom CSS plugin.
- Specify the default value of the per-product custom CSS. It will be applied to all single product pages.
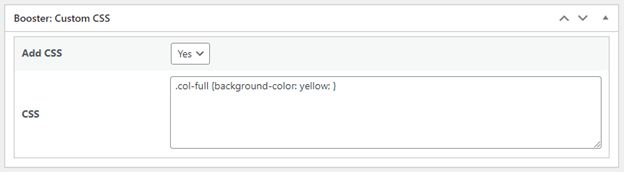
3. To add a different custom CSS code snippet for any of your products, open the product page in editing mode.
4. In the Booster: Custom CSS section, select Yes from the dropdown for the Add CSS option.
5. Edit/Add the CSS code in the given input field.
6. Click on the Update button to save these changes for your product page.
Now, you can edit/add custom CSS for all your product pages using the same steps.
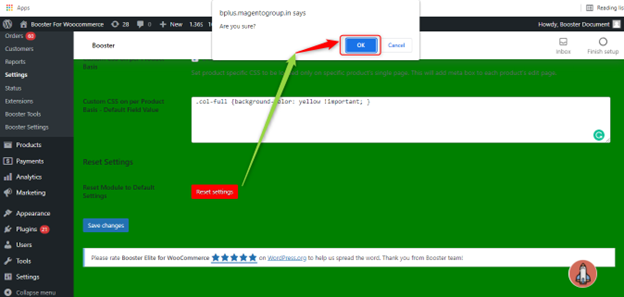
Reset Settings #
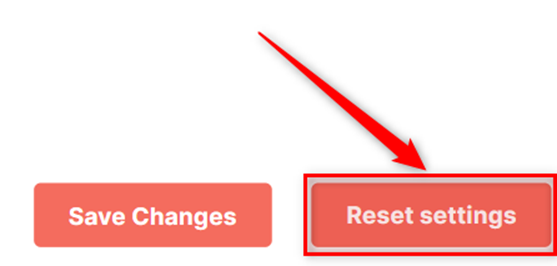
Have you enabled custom CSS for many single product pages and are not in the mood to clear the data one by one?
Click on the Reset Settings button to clear all the Custom CSS Plugin settings at once. This way, whenever needed, you can start configuring new custom CSS settings through the plugin for your store in a few seconds again.
Store Frontend Previews #
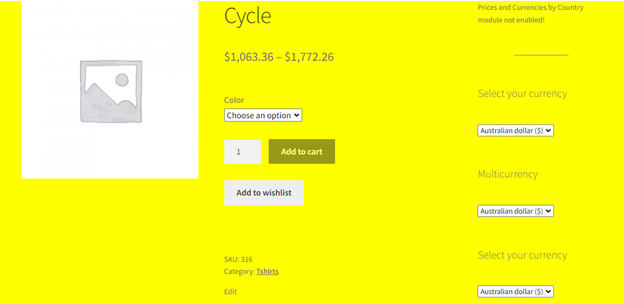
Input – Custom CSS for Single Product Page
.col-full {background-color: yellow; }
Output:
Input – Custom CSS for Admin Dashboard/Backend
#wpbody {background-color: green; }
Output:
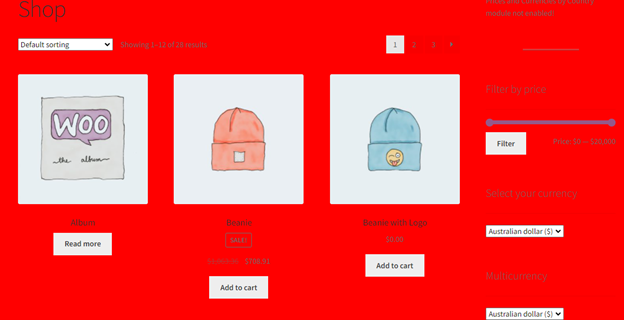
Input – Custom CSS for the Online Store (i.e. Frontend for the customers)
.col-full {background-color: red; }
Output:
Why use the Custom CSS Plugin Rather than Editing your WordPress’s “Style.css”? #
WordPress’s core files, such as “functions.php,” “style.css,” etc., are updated every time you update your store/website WP version. This means that you will insert the custom CSS directly in your style.css file. All the changes will be cleared on the update.
To cope with the above, you will always have to have a backup of your custom CSS. This backup CSS text needs to be appended to the updated style.css after each update.
If you missed taking the backup of minor or major changes to this file before taking the backup, you will have to make the same changes again.
That’s not the case with the custom CSS inserted for your WooCommerce shop using the Custom CSS Plugin. No update or other reasons can clear your CSS until you decide to disable or clear settings for this plugin.


