Overview #
Activate the WooCommerce Products XML Feeds module with your Booster configuration to create and auto-export products’ XML feeds. The module can generate multiple XML files through the configured cron job automatedly. In each feed, you can:
- Include or Exclude products
- Include or Exclude product categories
- Include or Exclude tags
- Set the maximum product count for your XML feed
- Sort products by date in your feed
- Sort products in ascending or descending order in your feed
- Set the block size (i.e. total number of product entries in the file)
- Set product scope to any of these options:
- All products
- Products in sale
- Products not in the sale
- Featured products
- Products that are not being featured
What Can you Export?
One can export product details like barcode, ID, meta, image URL, short description, product URL, product height, and its width in the XML being generated. Also, product author information such as name, author link, link to the author’s all posts, and author avatar can also be exported in XML files.
Update Period (Cron Job Information)
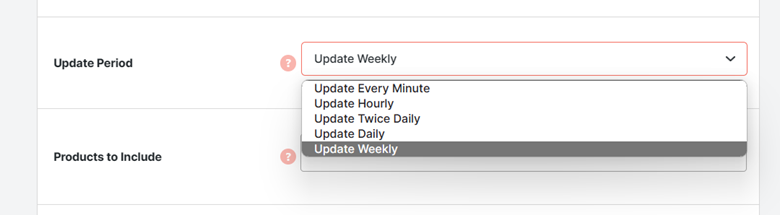
You can set a cron job for every minute, every hour, twice a day, daily, or weekly for each of your products’ XML feed being exported using this module.
The Need for Products XML Feeds #
The XML format is considered the best for storing or transferring products information. There are various reasons why your WooCommerce store might need to do so using the WooCommerce Products XML Feeds module. Here’s what you can do with the collected and exported information –
- Store or Display Product Details in JSON, Spreadsheet, Word, PDF, HTML format
You can convert the XML data in your desired format, such as JSON, excel, word, pdf, or HTML. So, the data fetched in the XML format can be displayed, stored, and sent the way you prefer.
For example, you can embed details of 5 products on sale in a promotional email or you may display 5 featured WooCommerce products on your other store in real-time.
You can even create a spreadsheet of your shop’s products for internal use with it. Opportunities are endless!
- Use the XML Feed for Updating Your Other Shops or Seller Profiles
It is quite possible that you sell products through various online means, and not just through this WooCommerce store alone. Exporting XML feeds in real-time can help you keep your products’ information synchronized across multiple stores without doing it manually all the time. Isn’t it great?!
Benefits of the WooCommerce Products XML Feeds #
- Synchronized updating of your products’ details across various channels
- Easy information export and viewing for inventory, sales, and packaging teams
- Regular updates to bulk buyers or vendors
- WooCommerce store performance Analysis and monitoring
- Simplified life for store admins!
Installing the Products XML Feeds Module with Booster #
Note: Make sure that you have the Booster for WooCommerce Plugin installed on your store already. If you do not have it yet, get it here.
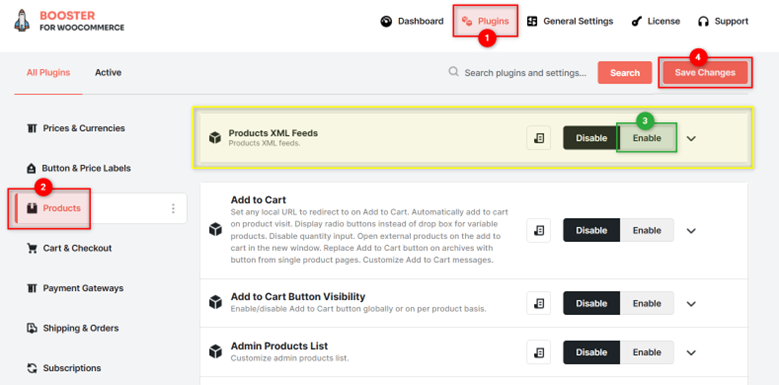
- Sign in to your WordPress website’s dashboard.
- Go to Booster > Plugins > Products.
- Select the Enable option for the Product XML Feeds
- Click on the Save Changes It will activate the WooCommerce Products XML Feeds module for you.
Products XML Feeds Options #
Using the WooCommerce Products XML Feeds module with Booster, store administrators can enable the creation of any number of XML files (being updated at regular time intervals) with different settings for different purposes.
By default, the module lets you enable configuration for 1 XML file. If you want to create more files, enter a desired value in the Total Files field and save changes.
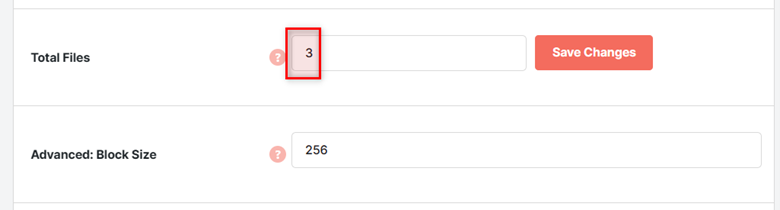
If you wish to change the Advanced: Block Size from its default value ‘256’ for the WP_Query call, you can do it too. However, only do it when you are sure about your action and your store has a large number of products.
Creating an XML File #
As told above, you can create one or multiple XML files using the WooCommerce Products XML Feeds module. For each XML file, follow the steps enlisted below:
- Enable or disable your XML file’s creation by setting the value for the Enable field.

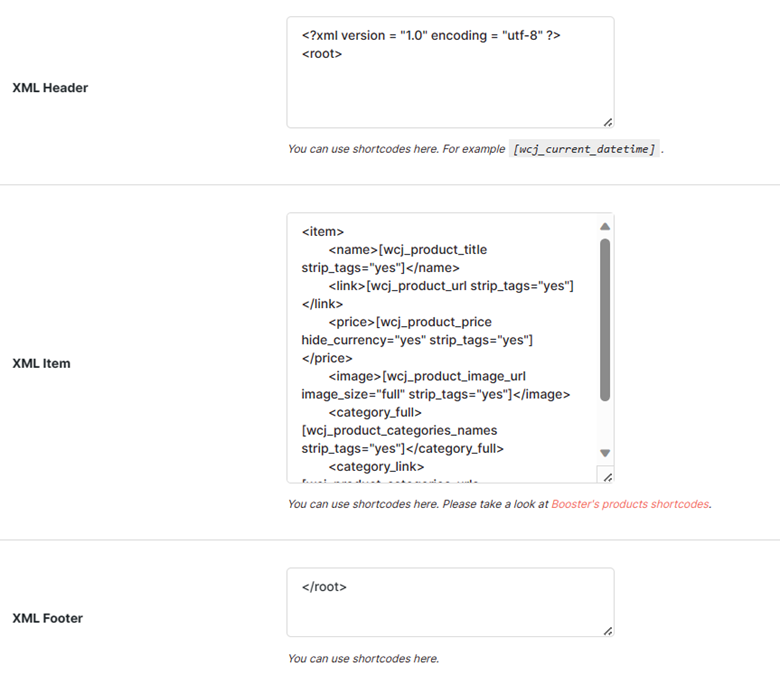
2. Set the XML Header, XML Item, and XML Footer details in respective fields. Please note that you can refer to the Booster shortcode list on this link or at the bottom of this page. Use shortcodes to fetch required values from the WooCommerce store in the XML file.
3. Set your XML file’s export path and give this file a name by entering relevant details in the XML File Path and Name field.

4. Select an Update Period for the automated cron job. You can set its value to ‘every minute’, ‘every hour’, ‘every 12 hours’, ‘every week’, or ‘every month’ as per your shop’s requirements.
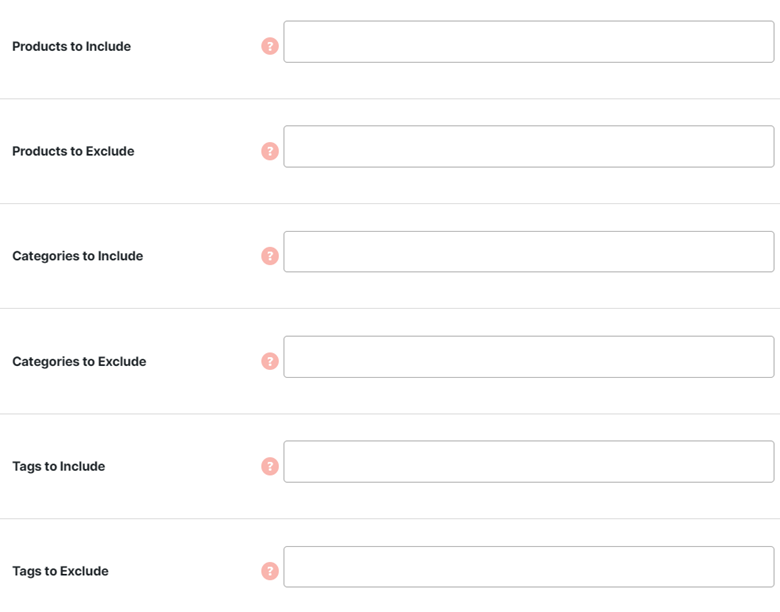
5. Provide information about the products, product categories, and the tags to be included or excluded in the XML file. For this, you can click each input field, start typing the value to be added and select it from the JQuery dropdown list. Multiple values can be added to each of these fields using the same process.
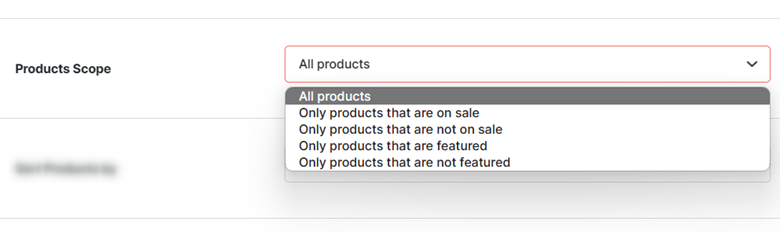
6. Select your products’ scope for the current XML feed. It could be storewide, limited to products on sale, limited to the products not on sale, limited to featured products, or limited to the products that are not being featured.
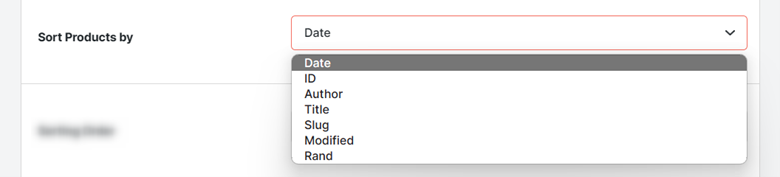
7. Select a parameter for sorting the products in your XML feed. You can sort products by ID, by author, by date, by title, by slug, by modified timestamp, or randomly.
8. Set the Sorting Order as ascending or descending.

9. If you want to put an upper limit on the total number of products to be added in your XML feed, change to the value of Max Products to your desired value. To include all products matching your set measures, set (or leave) this value to -1, i.e. the default value of the field.

10. Repeat the same for other XML files you’ve created (optional).
11. Save changes.
Reset Settings #
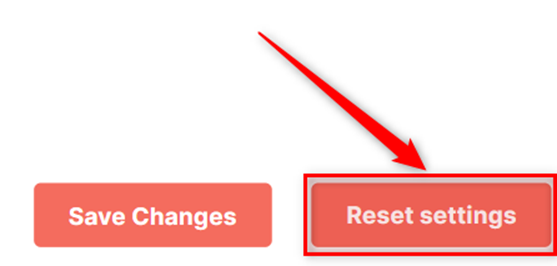
To reset the module configuration at any point in time, open the module dashboard, scroll down to the bottom and click on the Reset Settings button.
Shortcodes You May Use in the Products XML Feeds #
| Shortcode | Purpose |
[wcj_product_barcode] |
Add the current product’s barcode to the XML feed |
[wcj_product_id] |
Add the current WooCommerce product ID to the XML feed |
[wcj_product_author_link_all_posts] |
Add WooCommerce product author link to all author’s posts to the XML feed |
[wcj_product_author_link] |
Add WooCommerce product author link to the XML feed |
[wcj_product_author_avatar] |
Add WooCommerce product author avatar to the XML feed |
[wcj_product_author] |
Add WooCommerce product author to the XML feed |
[wcj_product_meta] |
Add the current product’s meta to the XML feed |
[wcj_product_image_url] |
Add the current product’s image URL to the XML feed |
[wcj_product_short_description] |
Add the current product’s short description to the XML feed |
[wcj_product_url] |
Add the current product’s URL to the XML feed |
[wcj_product_height] |
Add the current product’s height to the XML feed |
[wcj_product_width] |
Add the current product’s width to the XML feed |


