Overview #
Display custom fields on the product page, allowing your customer to fully customize their order on your WooCommerce-powered store.
With the Product Input Fields feature enabled, your customers can give you more information before they add an item to their cart so that they always get exactly what they want, whether it’s gift wrapping, different sizes or the quantity of the product. For example, adding a custom message for gift-wrapped orders. As the admin, you can add a placeholder message to give your customers an example of what to type or to prompt them to provide more info (i.e. “Please enter more details” or “Please ensure that you have filled out all fields”).
Add custom input fields globally (all WooCommerce products at once) or on a per-product basis.
Each field can be customized with the following settings:
- Type: Text, Textarea, Number, Checkbox, File, Datepicker, Weekpicker, Timepicker, Select, Radio, Password, Country, Email, and Phone
- Checkbox type only: text value for ON
- Checkbox type only: text value for OFF
- Checkbox type only: default value (checked or not checked)
- File type only: accepted file types
- File type only: max file size
- Datepicker and weekpicker types only: date format
- Datepicker and weekpicker types only: min date
- Datepicker and weekpicker types only: max date
- Datepicker and weekpicker types only: year selector
- Datepicker and weekpicker types only: year range (if year selector is enabled)
- Datepicker and weekpicker types only: first week day (Sunday, Monday, Tuesday etc.)
- Timepicker type only: time format
- Timepicker type only: interval (in minutes)
- Select and radio types only: selectable options list
- Is required
- Title
- Placeholder
- Message on required
See the accepted input field types for the Product Input fields plugin and examples for where you might prefer using them:
| Input Field Type | Suggested Usage |
| Text | To take short instructions from customers. |
| Textarea | To receive long messages or requests regarding customization, delivery time, etc. |
| Number | To fetch more details about delivery or service in numeric format. |
| Checkbox | To let users select multiple options or add-on items/services with the product. |
| File | To receive file attachments (e.g. a picture to be printed on a customizable pillow) |
| Datepicker | To take input in the date format (e.g., delivery date preference) |
| Weekpicker | To let the customer pick a week of the month. |
| Timepicker | To enable customers to enter a time (e.g., preferred delivery time) |
| Select | To let the buyer select one option from the dropdown list. |
| Radio | To present multiple options in a list format, out of which, only one can be selected. |
| Password | To let buyers enter a secret code (e.g., OTP, discount code, access key, etc.) |
| Country | To receive the input in the form of a country’s name. |
| To enable the buyer to share a valid email address. | |
| Phones | To fetch customer phone numbers for boost delivery, assistance, or service quality. |
Enabling the Product Input Fields Feature #
To add custom input fields to products, you must first download and install the Booster for WooCommerce plugin on your site. After activating the Booster for WooCommerce plugin, to enable the feature:
- Go to WordPress Dashboard > Booster > Plugins > Products > Product Input Fields.
- Mark the checkbox for Product Input Fields to enable the plugin.
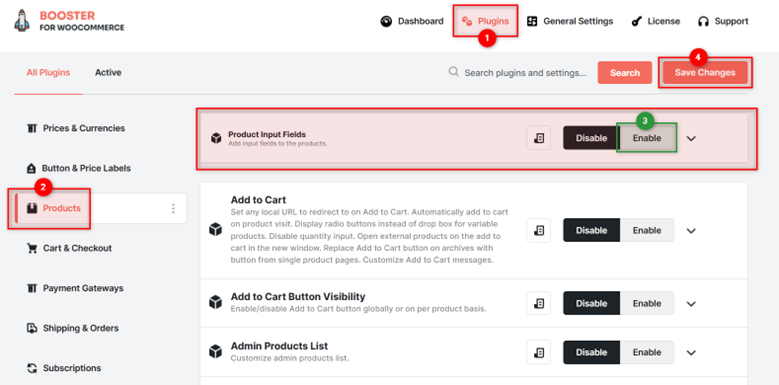
Enabling the plugin
- Click the Save changes button.
Enabling and adding custom input fields per product #
You can choose to add custom input fields per product on your website. For example, a custom logo design needs to be uploaded for a t-shirt on your store or a name for custom personalized merchandise.
Note: Only 1 custom input field is allowed in the free version of Booster.io. Get Booster Plus to add unlimited custom input fields to your products.
To enable and add custom input fields per product:
- Go to WordPress Dashboard > Booster > Plugins > Products > Product Input Fields.
- In the Per Product Options, mark the checkbox for Product Input Fields – per Product to enable it.
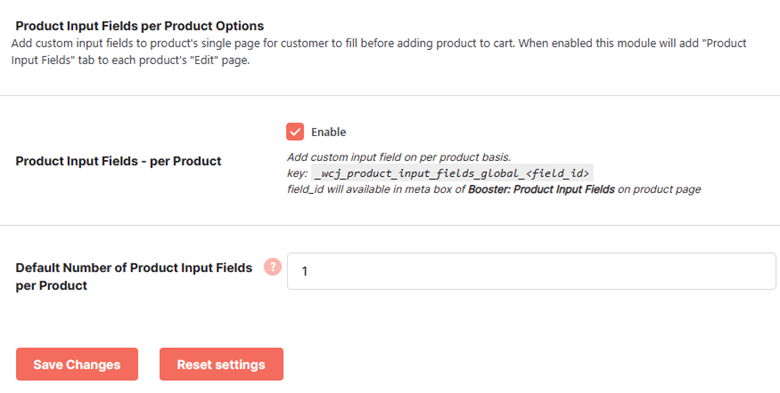
Enabling custom input fields per product
3. Click the Save changes button.
After enabling this option, the plugin adds the Booster: Product Input Fields tab to each WooCommerce product’s Create and Edit page.
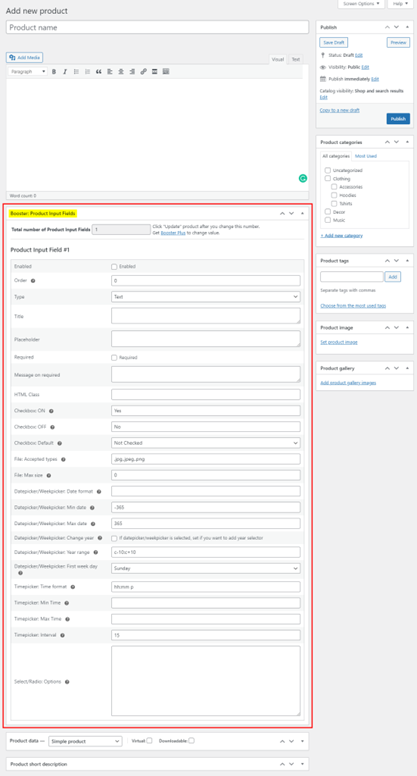
Booster: Product Input Fields tab on Create product page
Configuring the custom input fields per product #
Let’s add a custom input field to upload a file to a custom logo t-shirt product. For this example, we’ll edit an existing product and configure the input field that enables the customers to upload a logo file (jpg/jpeg/png) when they add a product to their cart.
To configure the custom input field(s) per product:
- Go to WordPress Dashboard > WooCommerce > Products and click the Edit button for the product you wish to edit.
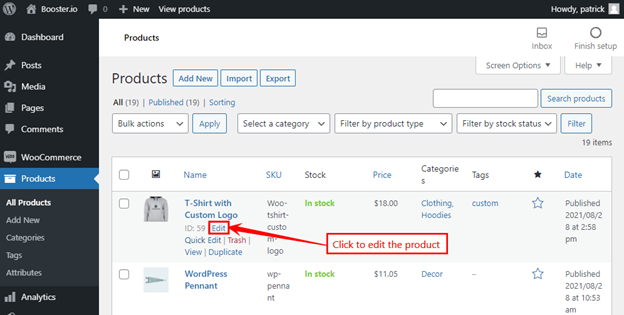
Editing an existing product
2. In the Booster: Product Input Fields tab, mark the checkbox for the input field to enable it on the single product page.
-
- Select the File type of field from the dropdown.
- Add a title, and placeholder text for the field.
- Mark the Required checkbox so that customers have to upload a file to add the product to their cart.
- Set the accepted file types and maximum file size for the field.

Configuring a custom input field for a product
3. Click the Update button to add the new custom input field to the product.

Custom input field preview
Enabling and adding custom input field(s) globally #
You can choose to add custom input field(s) to all products on your website. For example, you can add a custom message textbox for personalized gift messages on your store.
Note: Only 1 custom input field is allowed in the free version of Booster.io. Get Booster Plus to add unlimited custom input fields to your products.
To enable and add custom input field(s) to all products:
- Go to WordPress Dashboard > Booster > Plugins > Products > Product Input Fields.
- In the Product Input Fields per Product Options, mark the checkbox for Product Input Fields – All Products to enable it.
- Enter the number of fields to be added to all the products in the Product Input Fields Number textbox.
Enabling custom input fields for all products globally
4. Click the Save changes button.
Configuring the custom input field(s) globally (for all products) #
Let’s add a custom input field to add a gift message to all products. For this example, we’ll add a textbox for custom messages that enables the customers to add a custom message when they add a product to their cart.
To configure the custom input field(s) for all products:
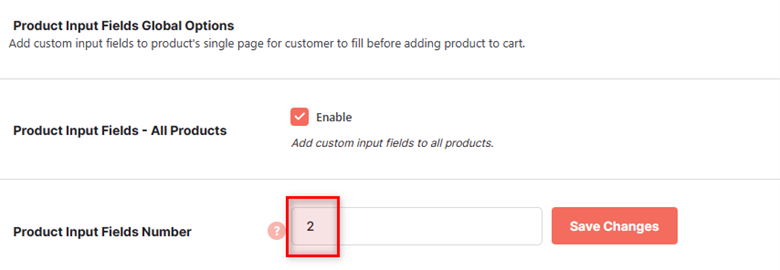
- Go to WordPress Dashboard > Booster > Plugins > Products > Product Input Fields > Product Input Fields – All Products.
- In the Product Input Fields Global Options section, mark the checkbox for the input field to enable it on all products.
- Select the Textarea type of field from the dropdown.
- Add a title and placeholder text for the field.
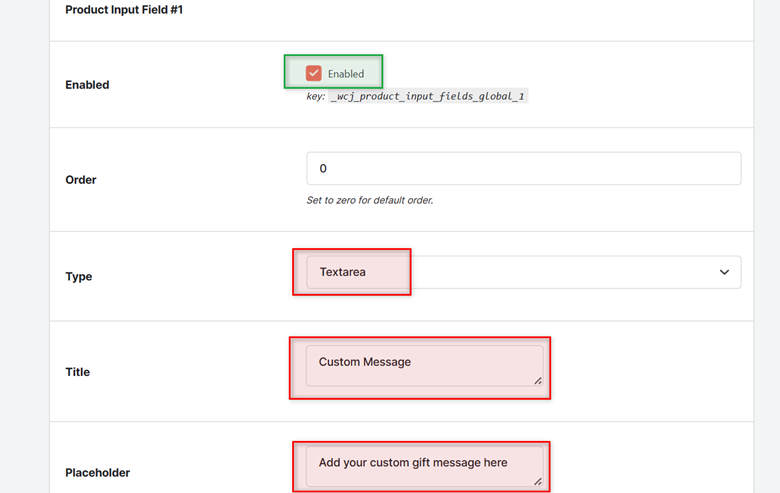
Configuring a custom input field for a product
3. Click the Save changes button to add the new custom input field(s) to all products.
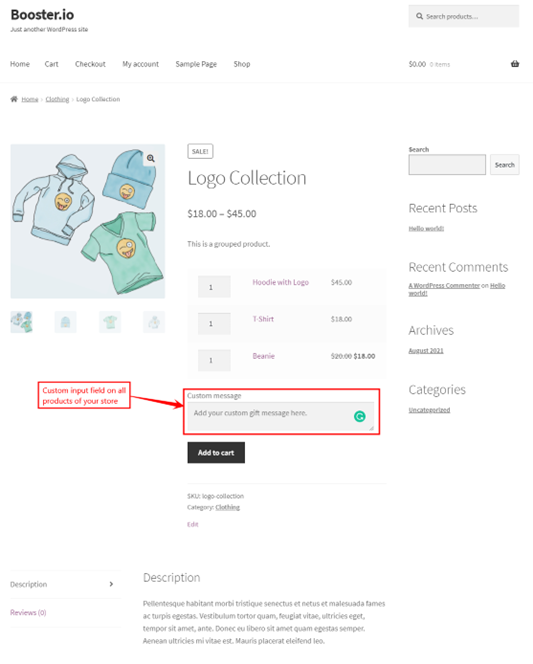
Custom input field on all products preview
Note: You can choose to include or exclude these custom input fields based on product categories, product tags, and specific products.
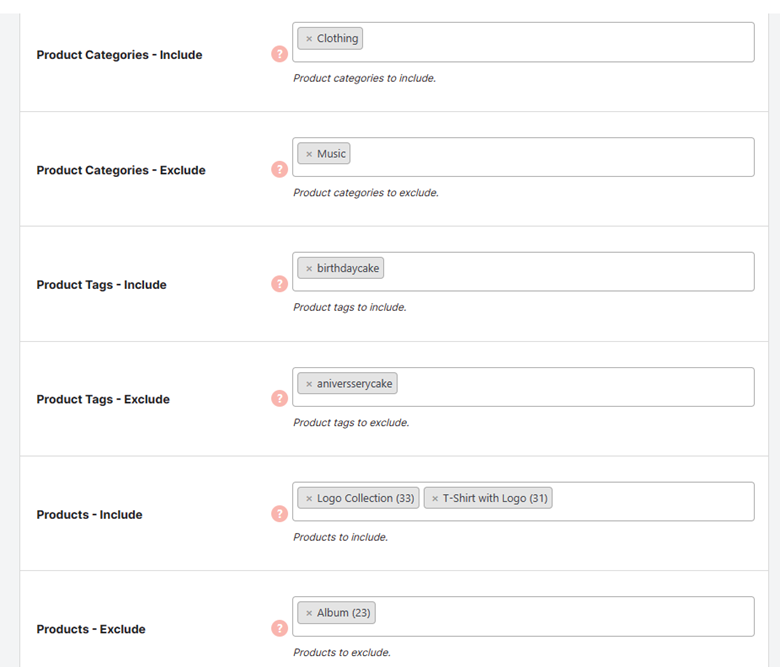
Choosing to include or exclude the custom field


