Overview #
Use the General Plugin by Booster to configure general settings for your online store, related to shortcode usage, IP detection, CSS/JavaScript loading, PHP limits, sessions, and custom user roles. You can also enable the User Roles Changer tool for several user roles to let them switch user roles and use the store backend more efficiently.
Besides the above, if you want to enable different PayPal IDs per product, configure the related functionality through the Booster – General Plugin.
The major features of the General plugin include:
- Enable Booster as well as Non-Booster shortcodes for your WP text widgets
- Disable Booster shortcodes throughout your store
- Change IP detection methods for your shop
- Specify different PayPal Email per Product
- Change Session Expiration limits
- Modify the default PHP load time and memory limits
- Create and manage custom user roles for your WooCommerce store
- Enable re-calculating Cart Totals on every page load
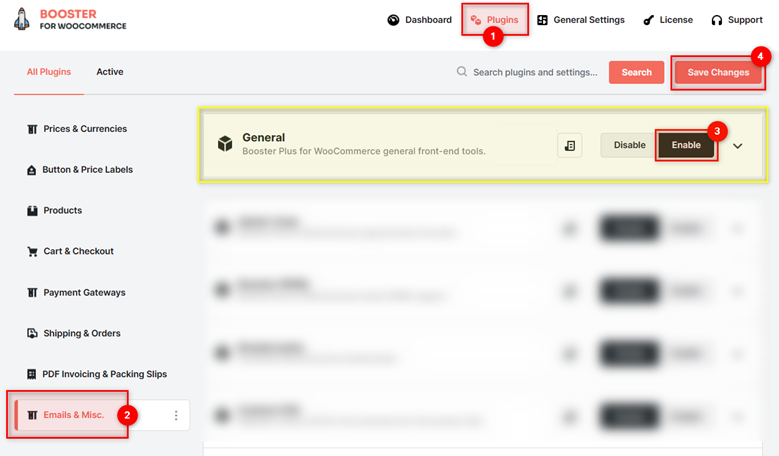
How to Install the General – Booster Plugin on your Online Store? #
- Install and activate Booster for WooCommerce plugin.
- Go to the Booster > Plugins > EMAIL & MISC.
- Select the Enable option for the General
- Click on the Save Changes
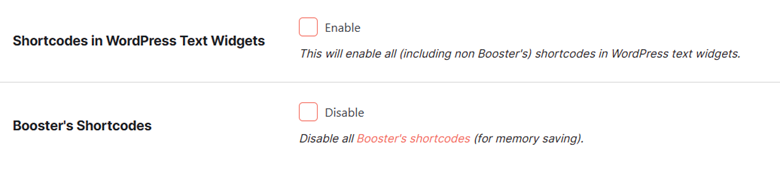
Shortcode Options #
The Shortcode Options section has all settings related to enabling and disabling Booster and non-Booster shortcodes.
- Select Enable for the Shortcodes in WordPress Text Widgets It will make your Booster, as well as non-Booster shortcodes, work for all your WordPress text widgets.
- Select Disable to make your Booster Shortcodes non-functional for the store in case you do not need them. It will save memory.
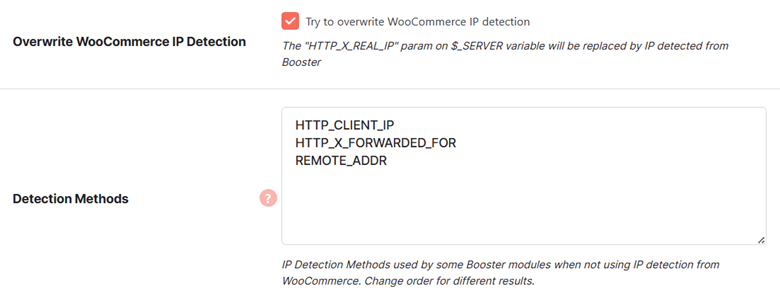
IP Detection #
If you do not want to use the default WooCommerce IP Detection method, select the Try to overwrite WooCommerce IP detection option. It will overwrite the HTTP_X_REAL_IP value with the IP detected by Booster’s method.
In case, you have selected WooCommerce as the IP detection method for some of your plugins, you need to specify the Detection Methods in the given field.
The default method sequence is:
- HTTP_CLIENT_IP
- HTTP_X_FORWARDED_FOR
- REMOTE_ADDR
Change the order for different results, as per your needs.
Advanced Options #
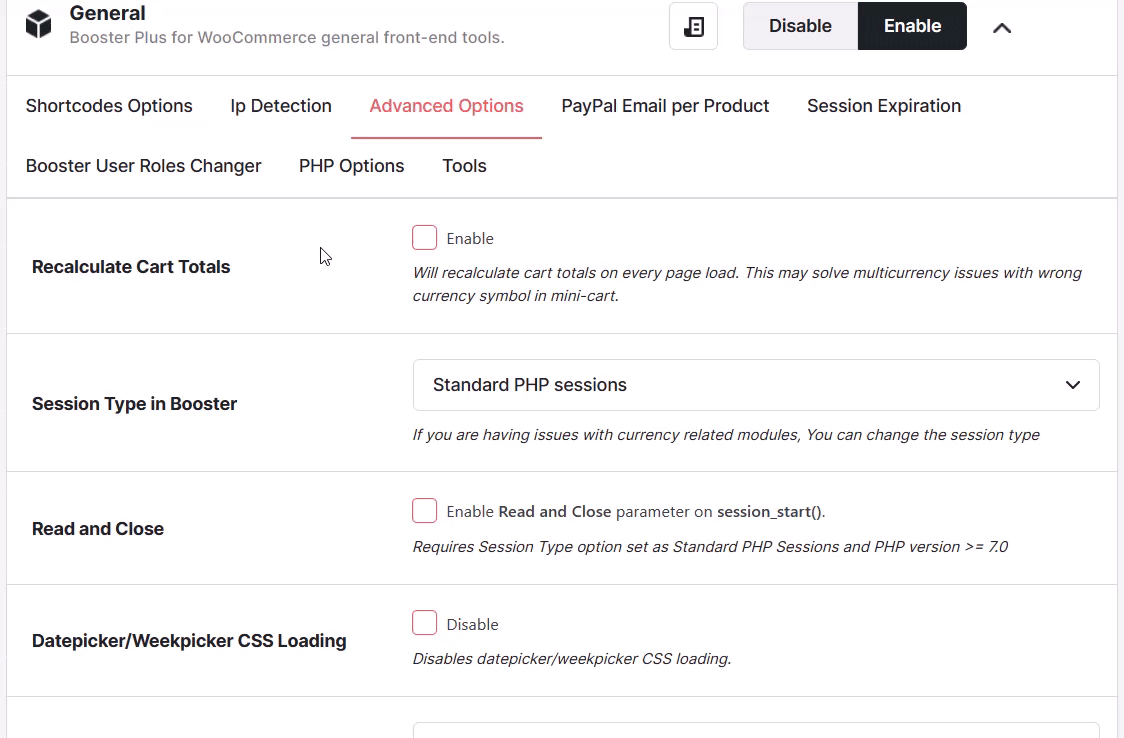
Use the advanced options to change miscellaneous WooCommerce settings, such as:
- Enable the Recalculate Cart Totals option to verify/re-calculate cart total every time a page loads. For the features like WooCommerce mini-cart, where currencies and amounts change frequently in your store, this option can prove to be very useful.
- Select the Session Type in Booster as per your needs. Your options are – Standard PHP Sessions and WC Sessions. It can help you overcome a few currency-related issues that you might be facing in your store.
- To avoid locking of sessions or files, select the Enable Read and Close parameter on session_start()
- Select the value as Disable for the Datepicker/Weekpicker CSS Loading option if you want to disable CSS loading for this element.
- If you want to use any external library, such as jQuery UI for your datepicker, specify/change the CSS source (relative URL) in the Datepicker/Weekpicker CSS Source
- Select Disable for the Datepicker/Weekpicker Javascript Loading option if you want to disable JavaScript loading for this element.
- Select Disable for the Timepicker CSS Loading option if you want to disable CSS loading for it.
- Select Disable for the Timepicker Javascript Loading option if you want to disable Javascript loading for it.
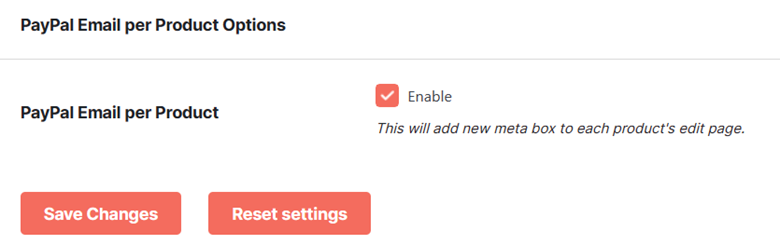
PayPal Email per Product Options #
If, instead of the same email address throughout the store, you want to specify different PayPal Email IDs for different products in your store, use the option present in the PayPal Email per Product Options.
- Select Enable for the PayPal Email per Product
- Click on the Save Changes button at the bottom of the plugin settings page.
After following the above-mentioned steps, you will see a meta-box named “Booster: General” added to each of the product (edit) pages in your online store for the administrator login.

Session Expiration Options #
To increase or decrease the WooCommerce store session time, you must use the options given in the Session Expiration Options section.
- Select the Enable Section for the Session Expiration
- Change the values for Session Expiring and Session Expiration The plugin accepts the input in seconds.
- Click on the Save Changes

Booster User Roles Changer Options #
If you want to switch user roles from the backend to check the access rights or capabilities of different user roles, Booster User Roles Changer Options can help you out.
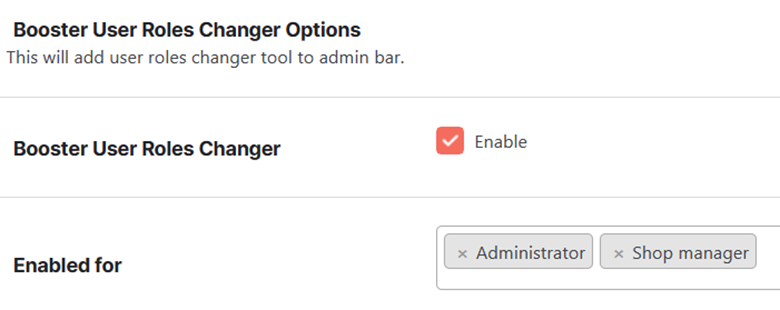
- Enable the Booster User Roles Changer.
- Select user roles in the “Enabled for”
- Click on the Save Changes
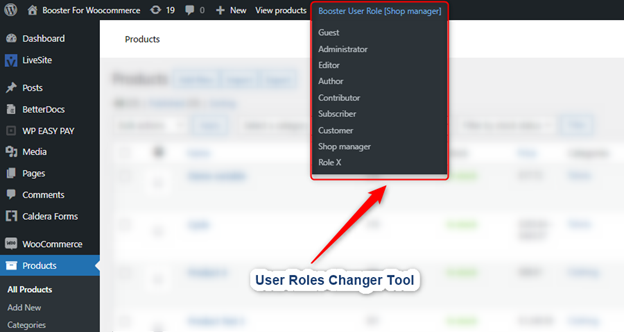
The people using the credentials of selected user roles will be able to see a User Roles Changer Tool in the admin bar (top row).
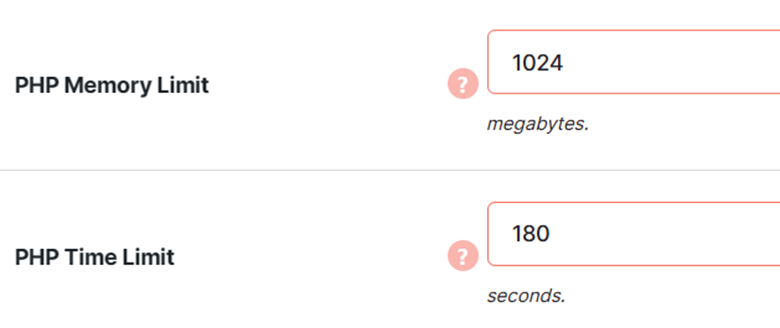
PHP Options #
PHP’s default memory limit is 256M, and the default time limit is 30 seconds. However, if your program requires processing a lot of information or doing a lot of computations, you might want to increase one or both of these limits for your WooCommerce store. Alternatively, you might want to reduce this limit for performance or security reasons.
To change these limits for PHP in WooCommerce, do the following:
- Go to the PHP Options section of the General Plugin’s Settings (Booster > Plugins > EMAIL & MISC. > General).
- Specify the new PHP Memory Limit in Megabytes.
- Specify the new PHP Time Limit in seconds.
- Click on the Save Changes
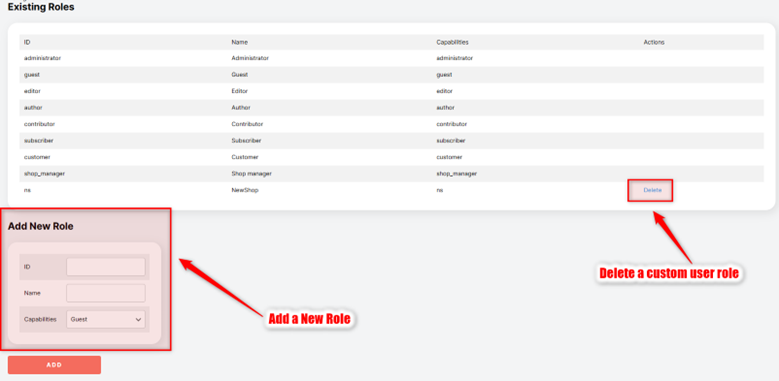
Tools – Add/Manage Custom Roles #
The General plugin has one Booster tool named “Add/Manage Custom Roles” that can be accessed and used from the plugin settings.
Note: Make sure to Enable the General Plugin in order to use this tool or apply its settings.
- To open this tool, click on the Add/Manage Custom Roles link in Tools > Module Tools.

- Use the Add New Role section to create the custom user roles.
- Specify an ID for the new user role.
- Assign a Name to this user role.
- Determine the Capabilities of the custom user role. You can enable the same capabilities as any of your core user roles for it.
- Use the Delete button to delete an existing custom-created user role.
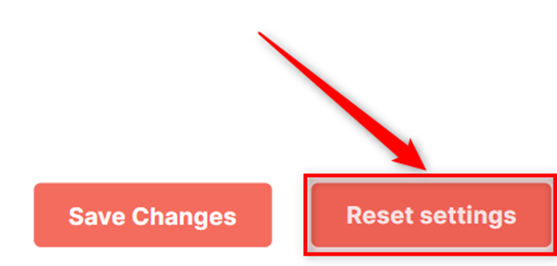
Reset Settings – General Plugin #
To restore the default settings of the General Plugin, click on the Reset Settings button. It will clear your configured settings from the WooCommerce store immediately.