- Overview
- Where Should I Let My Customers Use the Open Pricing Functionality?
- How Do I Install the WooCommerce Product Open Pricing Plugin?
- How do I design the ‘Name Your Price’ Input Section for my Product Pages?
- Product Open Pricing > Global Settings
- Product Open Pricing > Product Bundles
- WooCommerce Product Open Pricing Setting for each Product in the Shop
Overview #
For those who run online art galleries, reverse auctions for charity, reverse auctions for their unique/antique products, or the ones who simply want their buyers ‘suggest’ a price for their products, the Product Open Pricing (Name Your Price) plugin in the Booster plugin can simplify your life.
Now get started with “Open Pricing” in no time. This plugin lets you add a customized input section where your buyers can tell the price they would like to offer for a product. The main features include:
- Set minimum, maximum, and default price for a product;
- Let the customer place an order at his price (within the min-max range);
- Enable alerts for a price that is not within the min-max range you’ve set;
- Enable or disable the ‘Name Your Price’ functionality for quantity input (1+ items;
- Display or hide the product price info in archives;
- Show or hide the “Open Pricing” status in the Admin product list;
- Allow open-pricing for default currency only or all currencies in the shop;
- Apply ‘Name Your Price’ Functionality on product bundles in various ways.
Where Should I Let My Customers Use the Open Pricing Functionality? #
“Name Your Price,” or open pricing, is an interesting concept. It is often referred to as ‘reverse-auction’ too. In this approach, you (optionally) give your customer a price range and let him set the purchase price for the product.
You might be thinking that allowing your buyers to set a price is an idea prone to losses, but the opposite is true. Many businesses use this functionality and make more profit than they’ve made using the regular pricing approach!
However, we agree that the functionality is not suitable for all kinds of businesses. So, here is a quick 5-scenario list, where we think, ‘Name your Price’ can increase the revenue for you (or your client websites):
1. Service Providers who expect Tips/Bonus
There are many services where customers might give you tips or extra money when they are happy with your quality of service. For example, hotels, restaurants, boutiques, flower shops, decorators, event organizers, and so on. However, ‘online shopping’ might be a factor that’s discouraging them from doing so. With the Product Open Pricing (Name Your Price) plugin, you can easily give them a chance to do that.
2. Charity Sites (Nonprofit Donations)
If your non-profit has fixed-price options (e.g., $5, $10, $100, etc) for the donors, you might receive fewer donations. Why not allow everyone to set their amount for donation and pay it?
3. Auction of Old Items in a ‘Pay As You Can’ Campaign
Let’s say you have outdated items that are receiving no buyers. As these goods are anyway not selling, you can run a ‘pay as you can’ or ‘First Come First Serve’ campaign to clear your stock.
4. Real Auctions
The ‘name your price’ functionality can also be used to run real auctions through your WordPress website. For this, in the product description, you must mention that the site administrator is free to accept or reject the received orders. This way, you can accept the order from the highest bidder for your product and reject the rest.
Artistic works, highly-valued products, antique items, and other similar articles can be sold using this method.
5. Sell Bundles at a Good Rate
Let’s say you have a few product bundles that give you a high margin but are sold less. To increase sales, you may fix for yourself a lower profit margin and create a min-max range for buyers. Your customers will be more interested in making their price, resulting in higher sales.
How Do I Install the WooCommerce Product Open Pricing Plugin? #
- To get started, download and install the Booster plugin on your WooCommerce-powered site (in case you do not have it). Open Pricing is one of the Booster’s 120+ plugins.
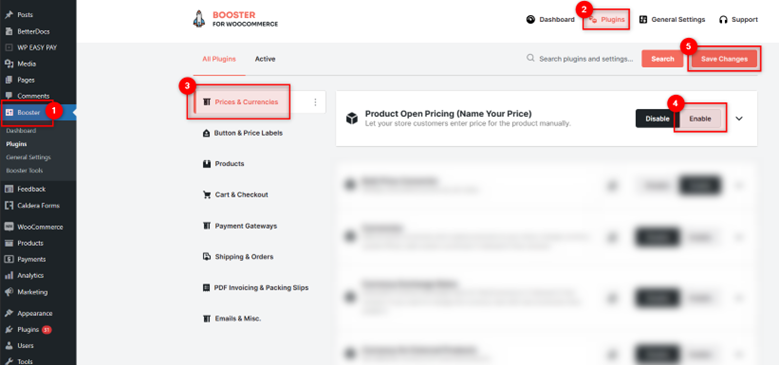
- Now, go to Booster > Plugins.
- Click on the Prices & Currencies category tab.
- Select the Enable option for the Product Open Pricing (Name Your Price)
- Save changes to get started with using open pricing functionality for your store.
How do I design the ‘Name Your Price’ Input Section for my Product Pages? #
To enable the Name your Price functionality for your products, you must first focus on the frontend appearance of your ‘suggest price’ section.
- In the plugin settings, go to the Options section for this.
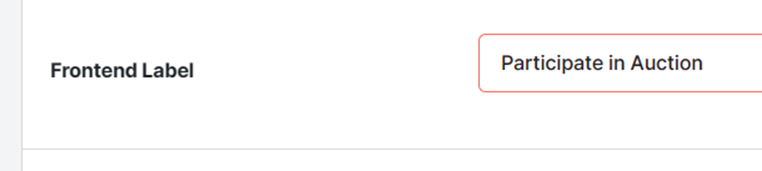
- Set a value for the Frontend Label. This value will appear before the ‘Make Your Price’ input field. So, you must provide a meaningful label to let your buyer know about this advanced functionality.
- Set a Frontend Template. As this Booster plugin creates your customized template for the open pricing functionality, you may design it the way you want.
 The template accepts the following variable inputs:
- %frontend_label%: Label Text
- %open_price_input%: Open Price Input field (box for entering the suggested price)
- %currency_symbol%: Currency active on the store at present
- %min_price_simple%: Minimum acceptable price for the simple product
- %max_price_simple%: Maximum acceptable price for the simple product
- %default_price_simple%: Default price for the simple product (suggestion, also used when no buyer input is received)
- %min_price%: Minimum acceptable price
- %max_price%: Maximum acceptable price
- %default_price%: Default price (suggestion, also used when no buyer input is received)
Example Frontend Template:
<label for=”wcj_open_price”>%frontend_label% (%currency_symbol%)</label>%open_price_input% <br /><br />
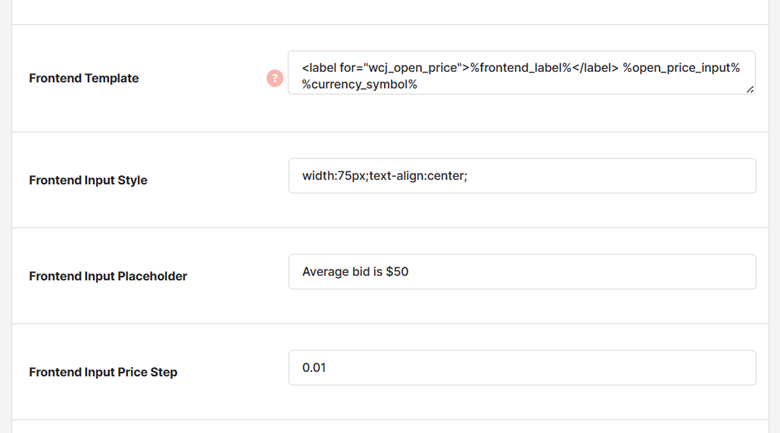
4. Next, you may set a Frontend Input Style, i.e. the inline CSS for the input field that takes the open pricing value from the customer.
Example: Width:75px;text-align:center;
5. In the Frontend Input Placeholder field, you can provide a value to guide your buyers on what needs to be entered in this field.
Note: If a Default Price is set for your price, the placeholder won’t be shown.
6. Set the Frontend Input Price Step (the increment counter for the input field).
7. Decide the position for your open pricing section on the product page. Its values can be:
-
- Before the cart;
- After the cart.
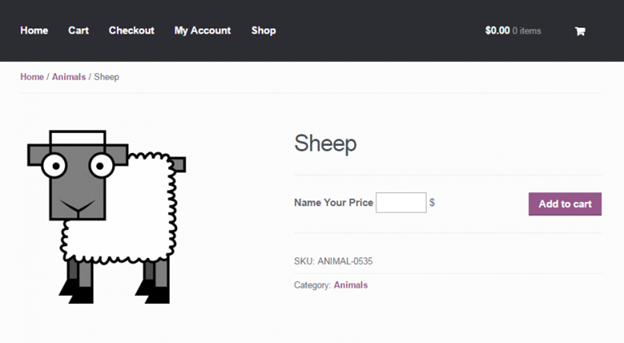
Frontend Screenshot: A Preview of ‘Name Your Price’ section in an Online Shop (with details)

Product Open Pricing > Global Settings #
After activating the Open Pricing functionality for your store and setting its appearance, you can edit the following settings for the WooCommerce Product Open Pricing (Name Your Price) plugin:
- Set an alert message when the buyer leaves the price field empty and there is no default price set.
- Set an alert message for the cases where the buyer enters a price, lower than the minimum amount you have set.
- Set an alert message for the cases where the buyer enters a price, higher than the minimum amount you have set.

Frontend Screenshot: An Alert Displayed for ‘Price too Small’

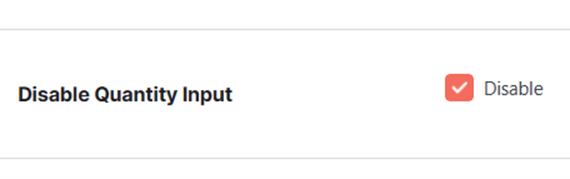
4. If you do not want a buyer to buy more than 1 item of a product when the Name your Price setting is enabled for the product, enable the Disable Quantity Input for your shop.
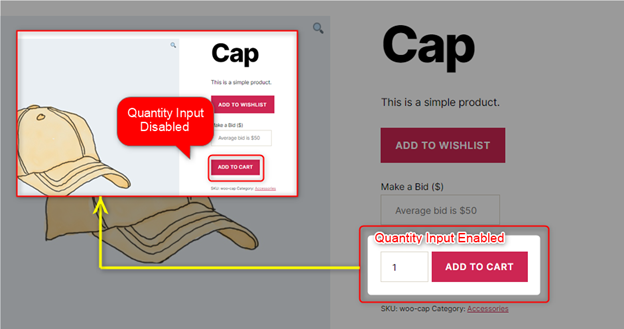
Frontend Preview: With Quality Input Enabled and With Quantity Input Disabled
5. If, instead of (or with) showing alerts for minimum and maximum Open Price for your store, you want to add instant (JavaScript-based) validation for your buyers, enable the Enable JS Min/Max Validation option. It will block the ‘Add to Cart’ action until a valid input is given in this field.

Frontend Preview: Showing a JS Min/Max Validation Alert

6. If you want to show product price details in the archive section/page too, enable the Display Product Price Info in Archives settings. You may set an HTML template for displaying the price.
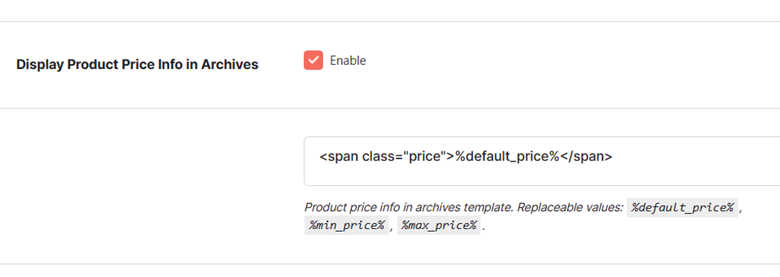
The price detail template in the Archive section accepts 3 variables:
%default_price%: The default price of the product;
%min_price%: The minimum acceptable price for the product;
%max_price%: The maximum acceptable price for the product.
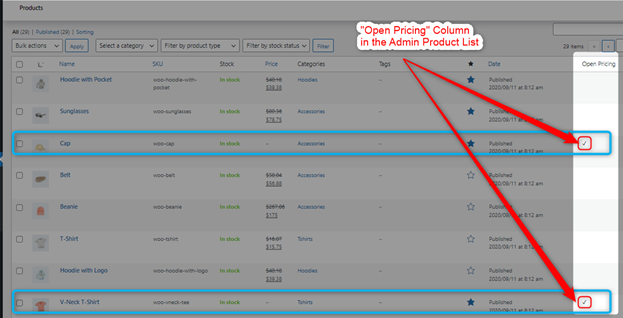
7. If you want to quickly go over the list of products with an ‘open pricing’ facility, then you can enable the Add “Open Pricing” Column to Admin Product List option.
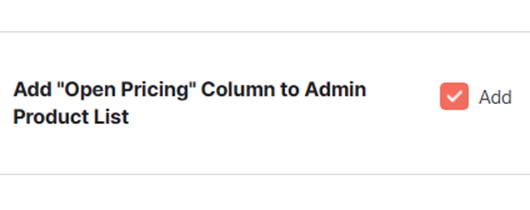
It will add a column named Open Pricing to your shop’s WooCommerce > All Products page.
8. If your shop has multiple currencies enabled, you may choose to enable the Name Your Price functionality for all currencies or in the default shop currency only. Select the relevant option for the Advanced: Multicurrency (Currency Switcher) plugin (set through this plugin).

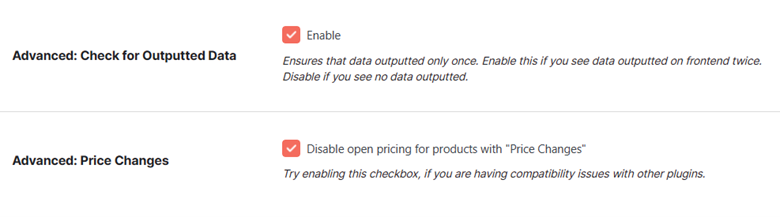
9. If your frontend is displaying the output for Open pricing settings for more than one time due to reasons unknown, enable the Advanced: Check for Outputted Data option. This option ensures that output is displayed only once.
10. If your plugin is showing incompatibility issues with other plugins, try enabling the Advanced: Price Changes option.
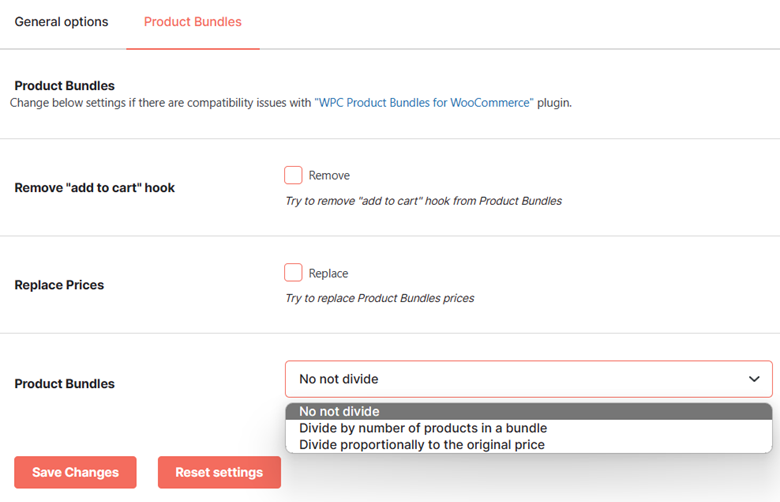
Product Open Pricing > Product Bundles #
The options for enabling the Open Pricing for the Product Bundles are present in the ‘Product Bundles’ section of the WooCommerce Product Open Pricing (Name Your Price) plugin.
Save changes once you have made the required changes in settings. With this, you will be able to apply open pricing features for your product bundles.
WooCommerce Product Open Pricing Setting for each Product in the Shop #
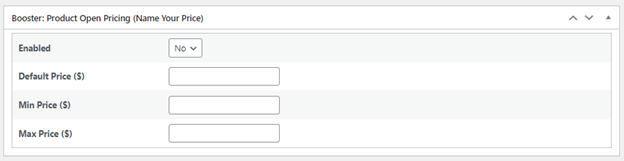
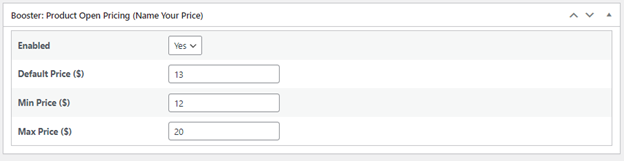
Go to the product page (in Editor), for which, you want to enable the Open Pricing or the Name Your Price settings. If the plugin is enabled (see the instructions above), you will see a section named Booster: Product Open Pricing (Name Your Price) on the product’s edit page. This section will have several meta boxes.
- Set the value for Enabled to Yes.
- Specify the default, minimum, and maximum (all optional) prices for the open pricing configuration for this product.
For example:
3. Update your product page in the editor and check your product page’s frontend.
Frontend: A Product Page with Name Your Price functionality.