Overview #
The Custom Payment Gateways for WooCommerce plugin allows you to add customized gateways to your WooCommerce store. Using it, you can add multiple gateways and, thus, offer your customers the flexibility of paying via the gateway of their choice.
It lets you customize sections of the gateways based on your requirements, such as title, description, instructions, icon, minimum order amount, email message, default order status, and custom return URL (i.e., URL of the thank you page). You can use it to send additional order emails to the admin and customer.
The Custom Payment Gateway for WooCommerce is a great way to add tens of custom gateways to your shop, as required. The plugin can be enabled for virtual products (digital goods), too.
Enabling Custom Payment Gateways for WooCommerce #
To enable and use the Custom Payment Gateways for WooCommerce plugin, you should first download and install Booster for WooCommerce.
- Navigate to WordPress Dashboard > Booster > Plugins > Payment Gateways.
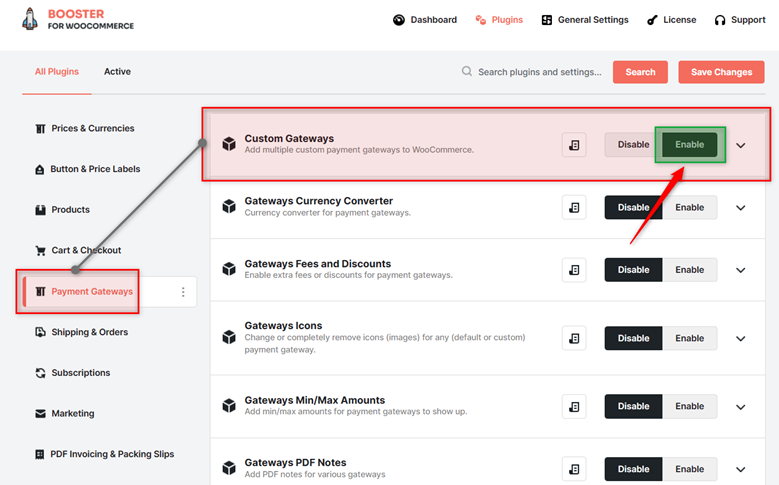
2. In the Custom Gateways section, select the Enable option.
3. Click Save Changes.
The Custom Payment Gateways for WooCommerce module will then be activated on your site.
Creating Custom Payment Gateways in WooCommerce #
This section explains how to add custom payment gateway in WooCommerce using the Booster plugin. You can set the number of custom payment gateways that you want to add to your WooCommerce site using this option. Once this is done, you can configure the settings of each gateway under the WooCommerce > Settings > Payments section, which is explained in detail in the next section.
This feature allows you to create Custom Payment Gateway for WooCommerce setups with ease.
Gateway Options #
This tab lets you create custom gateways for Your Online Store
- Enter the number of gateways you want to add to your WooCommerce site in the Number of Gateways field. Click Save Changes.
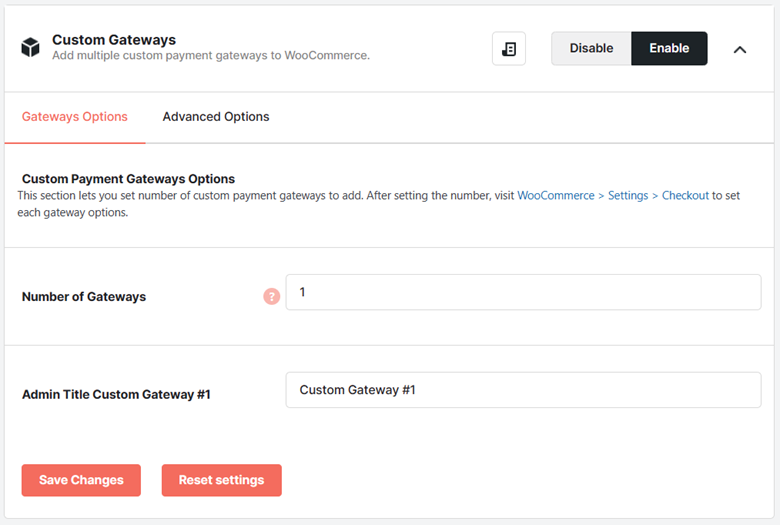
- Enter the title of the gateway in the Admin Title Custom Gateway field.
- To add a Delete button to the input fields, of your custom gateways, in the admin order meta box, check the box for the Gateways Input Fields field.
- Click Save Changes.
The specified number of custom payment gateways will be added to your site. To configure the settings of each payment gateway, refer to the rest of this document.
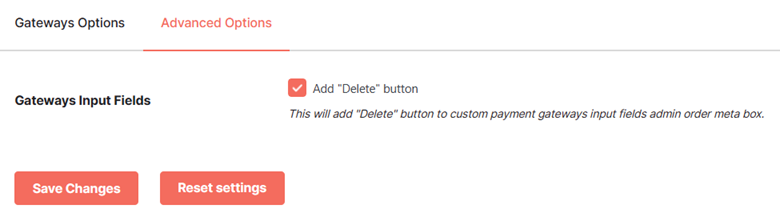
Advanced Options #
If you want to add a Delete button to the custom payment gateway’s input field’s admin order meta-box, enable this setting and click Save Changes.
Configuring WooCommerce Custom Payment Gateway Settings #
You can customize each Custom payment gateway for WooCommerce integration by following this process:
- Navigate to WooCommerce > Settings > Payments.
The Payment Methods page will be displayed.
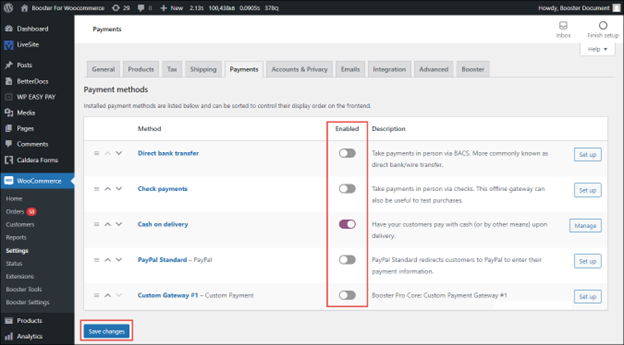
- Toggle the switch under the Enabled column for the gateway that you want to configure. For example, enable Custom Gateway #1 if you want to modify the settings of your custom gateway.
- Click Save Changes.
The gateway(s) will be enabled.
- Click Set up for the gateway that you want to configure.
The settings of the gateway will be displayed.
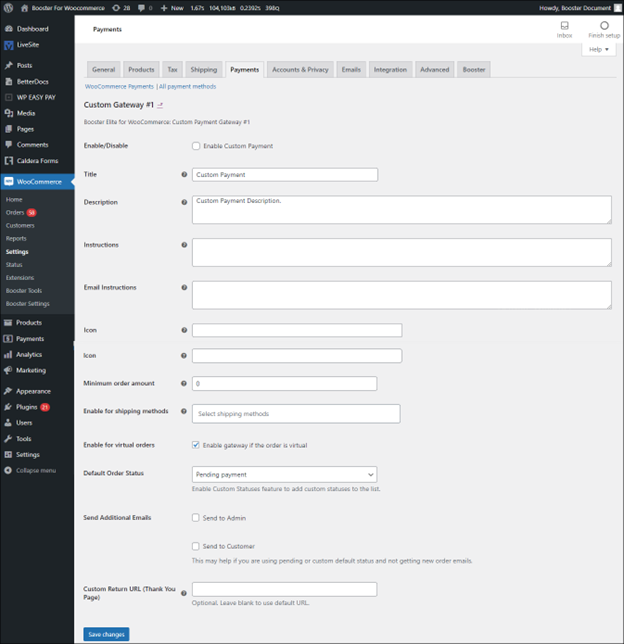
- Enter/select the required values for the fields.
| Field | Descriptions |
| Enable/Disable | Specifies if the payment gateway is enabled |
| Title | Name of the payment gateway |
| Description | Short summary of the Custom payment gateway for WooCommerce method |
| Instructions | Instructions that will be displayed on the Thank You page |
| Email Instructions | Instructions that will be added to the emails |
| Icon | URL of the icon that you want to be displayed for the gateway on the site |
| Minimum order amount | Minimum order amount, excluding any checkout fees, for which the payment gateway will be displayed on the site |
| Enable for shipping methods | Select one or more shipping method(s) for which the payment gateway will be displayed on the site |
| Enable for virtual orders | Specifies if the payment gateway is enabled for virtual orders |
| Default Order Status | Order status for which the payment gateway will be displayed on the site |
| Send Additional Emails – Send to Admin | Specifies if additional emails will be sent to the Admin for new orders |
| Send Additional Emails – Send to Customer | Specifies if additional emails will be sent to the customer for new orders. Enable this option if you are using pending or custom default status and not getting new order emails. |
| Custom Return URL (Thank You Page) | Custom return URL that will be displayed on the Thank You page. |
- Click Save Changes.
The custom gateway settings will be configured.
Output #
A sample checkout page where the custom payment gateway – Custom Payment is enabled for a minimum cart amount of $10.00 is shown in the screenshot below:
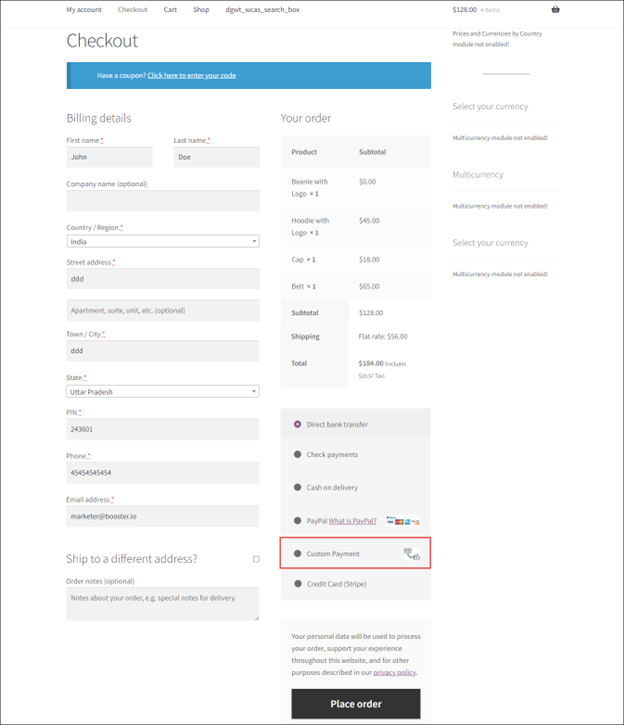
This example highlights how easy it is to add custom payment gateway for WooCommerce configurations using Booster.


