Overview #
Want to display extra information about your product to help & impress buyers throughout their buying journey in your store? The WooCommerce Product Info plugin can help you in this case.
The plugin lets you add any number of blocks in various positions on the single product pages in your shop. The list includes:
- Before single product
- Before single product summary
- Inside single product summary
- After single product summary
- After single product
- Before all to cart form
- Before add to cart button
- After add to cart button
- After add to cart form
- Product meta start
- Product meta end
Similarly, for the archive/category pages, store owners can introduce one or multiple blocks in the following positions:
- Before product
- Before product title
- Inside product title
- After product title
- After product
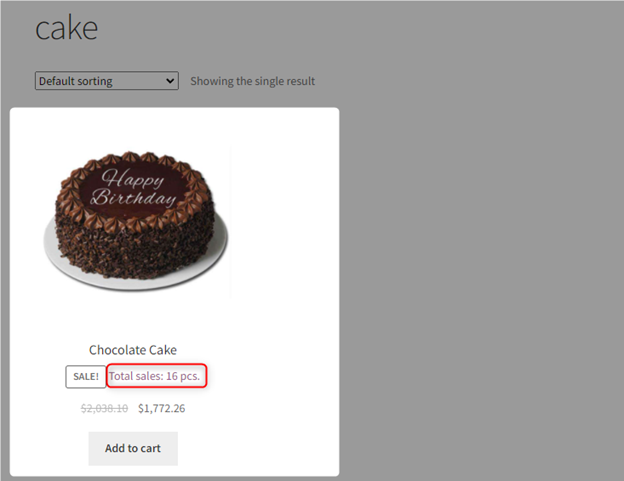
Store Preview: Two Blocks added to the Single Page using WooCommerce Product Info

How to Install the WooCommerce Product Info Plugin? #
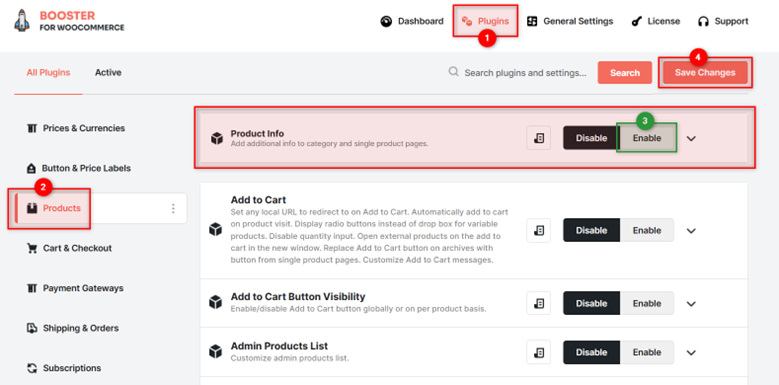
- The Product Info plugin comes packaged in the mega-plugin, Booster. So, to install it, you must first buy, install, and activate the Booster for WooCommerce plugin (a bundle of 120+ WooCommerce features).
- Go to the Booster > Products tab and click on the PRODUCTS category here.
- Select Enable for the Product Info
- Click on the Save Changes
How to Add Product Info Blocks on Single Product Pages? #
The WooCommerce Product Info plugin lets you add any number of blocks on your single product pages. However, you must balance the elements & their position on the page in order to deliver the best user experience.
- Scroll down to the Single Product Pages
- Enter the number of blocks you want to add per single product page in the Total Blocks
- Click on the Save Changes
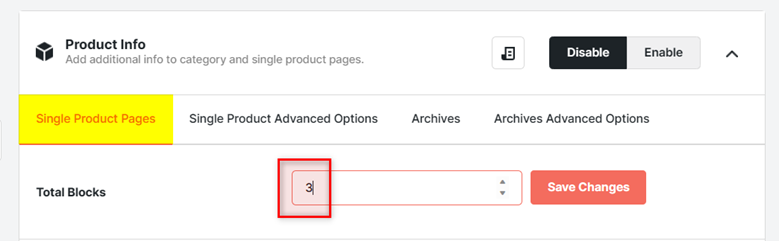
Saving the number of blocks per single page will modify the number of input fields on the plugin settings page so that you could enter all required information easily.
Specifying Details for a Single Product Page Block #
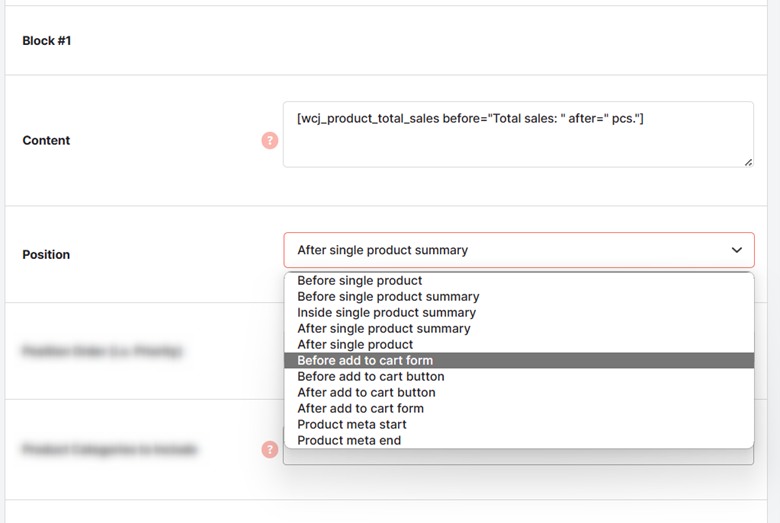
- Enter the Content for the block. You can use Booster Product Shortcodes and HTML tags in this field. You may also add attributes like visibility for your shortcodes (if applicable) to show the block to one or a few user roles (e.g. administrator, store manager).
- Set the position of your block on the single page among the following options:
- Before single product
- Before single product summary
- Inside single product summary
- After single product summary
- After single product
- Before all to cart form
- Before add to cart button
- After add to cart button
- After add to cart form
- Product meta start
- Product meta end
- Specify the position order for your blocks. In the case of multiple custom product info blocks in the same position, use high-to-low priority for your blocks to sort them as you like.
- Specify the product categories, product tags, and products to exclude and include this product info block. Make sure that you specify either Exclude options or Include options per input set (for product categories, for product tags, or for products).

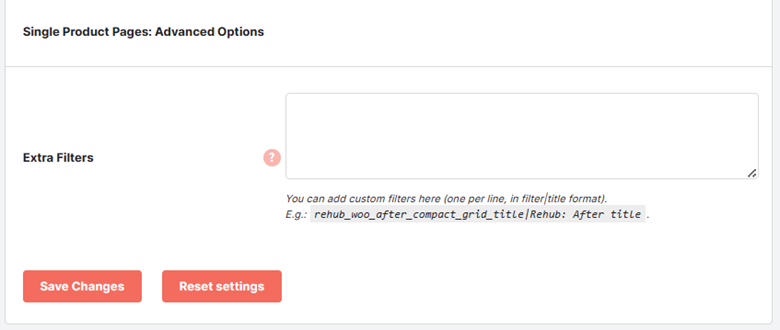
Single Product Pages: Advanced Options #
To be able to apply custom filters to your blocks on Single Product Pages and use custom positions, add filter details in the input textarea in the Single Product Pages: Advanced Options section. Use the filter|title format while adding one filter detail per line.
How to Add Product Info Blocks on Archive Pages? #
As the WooCommerce Product Info plugin allows users to add multiple blocks on archive pages. Follow these steps to specify the total blocks per archive page for your online store:
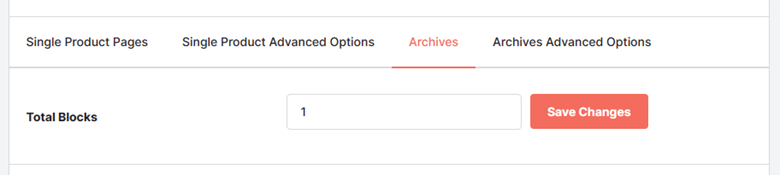
- Go to the Archives
- Specify the Total Blocks count to be added per Archive page.
- Click on the Save Changes button to load additional options so that you could enter all essential details on the WooCommerce Product Info plugin settings page.
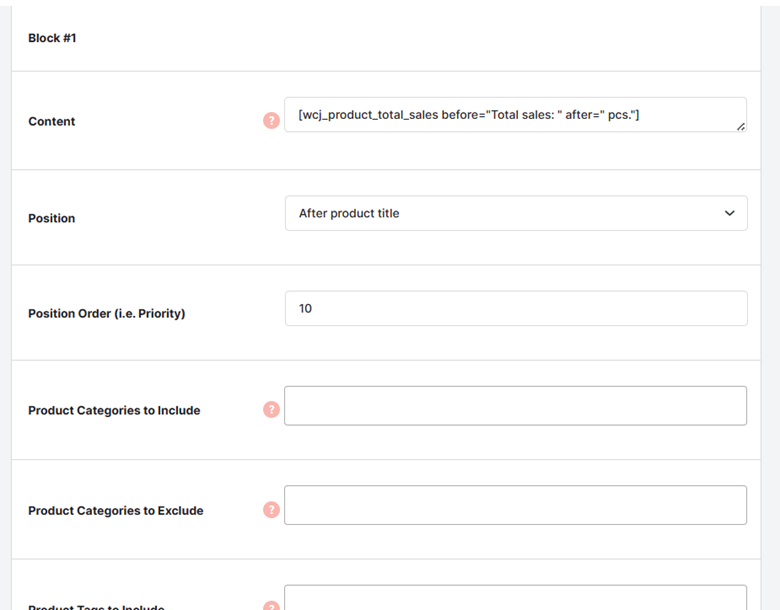
Specifying Details for an Archives Block #
- Provide the Content to be rendered in this block on your archive pages. You can use product shortcodes (and attributes), HTML tags, and normal text in this field.
- Set the position for your block in the product display section on the archive pages. Your options are:
- Before product
- Before product title
- Inside product title
- After product title
- After product
- Set the priority (position order) for this block on your archive page (for each product).
- Apply the above settings (of this section) on several products, product categories, and tags by including or excluding them.
- Click on the Save Changes
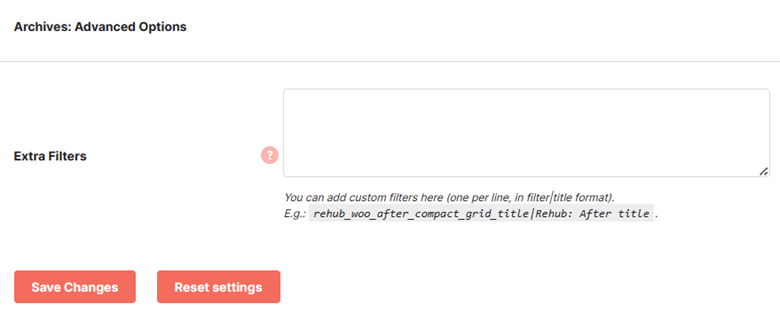
Archive: Advanced Options #
If you want to apply custom filters to position your Archive blocks, add their details in the filter|title format in the Archive: Advanced Options input box. You can add one filter detail per line.
Reset Settings #
If you want to clear all single product page blocks and archive pages blocks at once for your store frontend, use the Reset Settings button. It will restore the default plugin settings.
When your preference is to change WooCommerce product info settings rather than disabling these settings, this option is the best. However, be careful, because if you will mistakenly use this option, setting up the same information in the plugin settings might take some time.

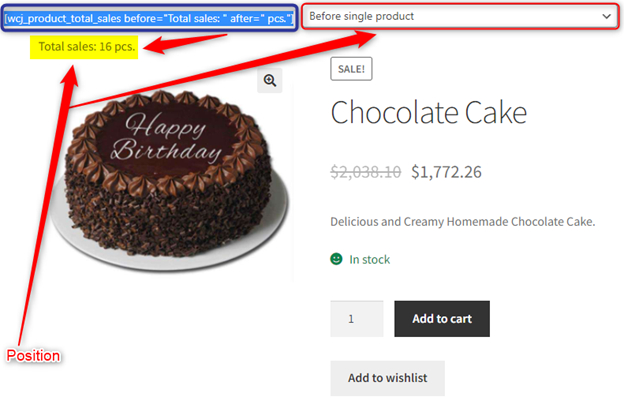
Store Preview: A WooCommerce Product Info Block on a Single Product Page
Store Preview: A WooCommerce Product Info Block on an Archive/category Page