Overview #
The WooCommerce Left to Free Shipping plugin allows you to set customized messages to be displayed when your customers reach the free shipping minimum amount on your WooCommerce site. Use it to display details about:
- A custom message telling the customer about the amount left for free shipping
- A custom message when the Free shipping limit is reached
The plugin allows you to add the left to free shipping information to the cart, mini cart, and checkout pages. However, you can also add the left to free shipping info on other pages using the following:
- Booster – Left to Free Shipping widget,
- [wcj_get_left_to_free_shipping content=””] shortcode or
- `wcj_get_left_to_free_shipping( $content );` function.
In the content, you can use %left_to_free% and %free_shipping_min_amount% shortcodes, which will be replaced by appropriate amounts.
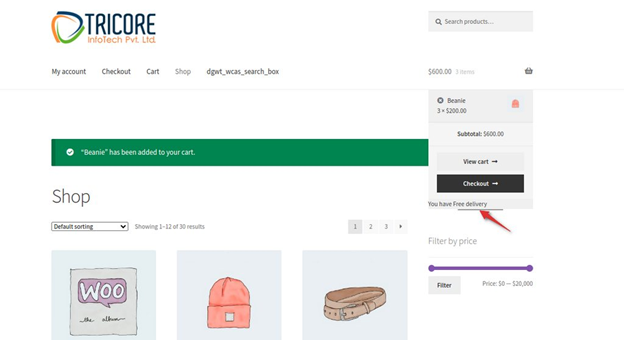
Screenshot #1: When a user is about to touch the free shipping limit #

Screenshot #2: When the user is eligible for a free shipping facility #
How to Enable Left to Free Shipping for WooCommerce? #
To enable and use the Left to Free Shipping plugin, you should first download and install Booster for WooCommerce.
1. Go to Booster > Shipping & Orders > Left to Free Shipping in your WordPress Dashboard.
The Left to Free Shipping Module Options page will be displayed.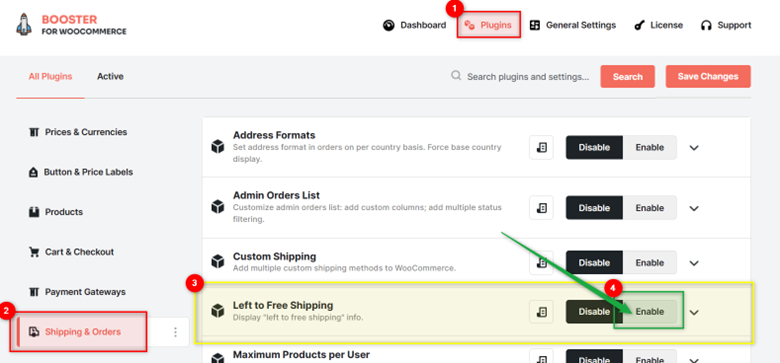
- In the Left to Free Shipping section, check the box for Enable Module field.
- Click the Save Changes button, present on the top right in your plugin dashboard.
The WooCommerce Left to Free Shipping plugin will be enabled for your site.
How to Specify the Minimum Order Amount for Free Shipping in WooCommerce? #
Note: The Left to Free Shipping plugin won’t work if your WooCommerce settings have no minimum order specified for the free shipping method. Also, it will only work for the shipping addresses that fall in the shipping zone eligible for free shipping. This shipping zone must have a minimum order amount specified.
So before explaining plugin settings, let’s tell you how to configure related settings.
1. Go to WooCommerce > Settings > Shipping Zones.
2. Now, add the Free Shipping shipping method to all the zones for which you want to enable free shipping and display the Left to Free Shipping or Free Shipping Reached message.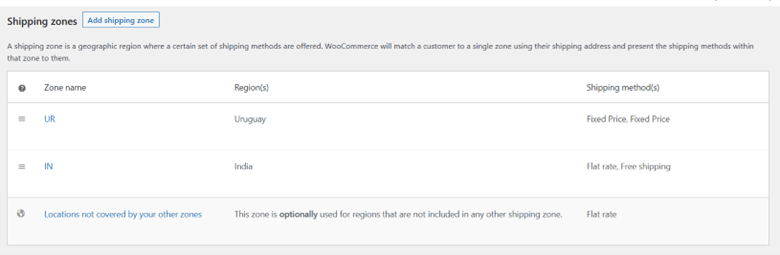
3. For each of these shipping zones:
- Select

2.Select Edit for the Shipping Methods > Free Shipping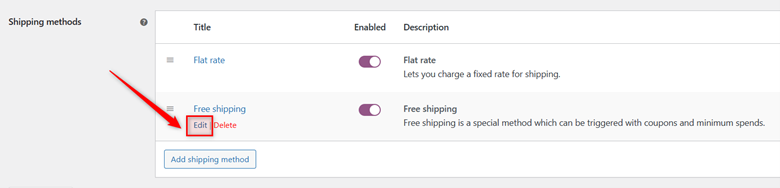
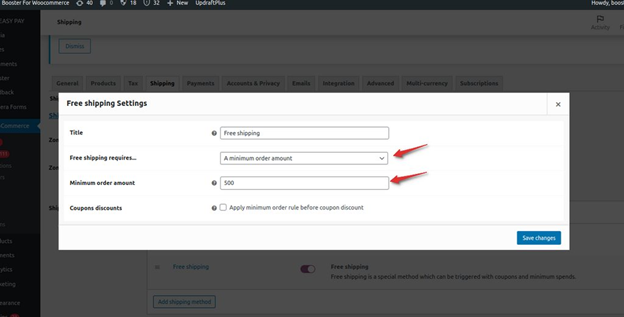
3. When the Free Shipping Settings popup appears, choose A minimum order amount for the option Free Shipping requires…
4. Set your preferred value as the Minimum order amount (for example, $500).
5. Click Save Changes.
How to Configure Left to Free Shipping Settings in WooCommerce? #
Note: Make sure to specify a minimum order amount for Free Shipping for all the eligible shipping zones in your store. Check the previous section and follow the steps to do so.
Using the Left to Free Shipping plugin, you can enable the left to free shipping and Free shipping reached message for the following areas in your WooCommerce store:
- Cart page
- Mini Cart
- Checkout page
Go to your WordPress dashboard and navigate to Booster > Plugins > Shipping & Orders > Left to Free Shipping and enable this option for one or multiple areas from here. For example, select Enable for the Info on Cart area to enable the left to free shipping message for the cart page.

Now, for these 3 areas, you can choose from around 20 positions and display the left to free shipping text in your preferred position. The positions supported by our plugin are:
- Before cart
- Before cart table
- Before cart contents
- Cart contents
- Cart coupon
- Cart actions
- After cart contents
- After cart table
- Cart collaterals
- After cart
- Before cart totals
- Cart totals: Before shipping
- Cart totals: After shipping
- Cart totals: Before order total
- Cart totals: After order total
- Proceed to checkout
- After cart totals
- Before shipping calculator
- After shipping calculator
- If cart is empty
You can also specify the content to display and position order (priority) for each of these areas separately.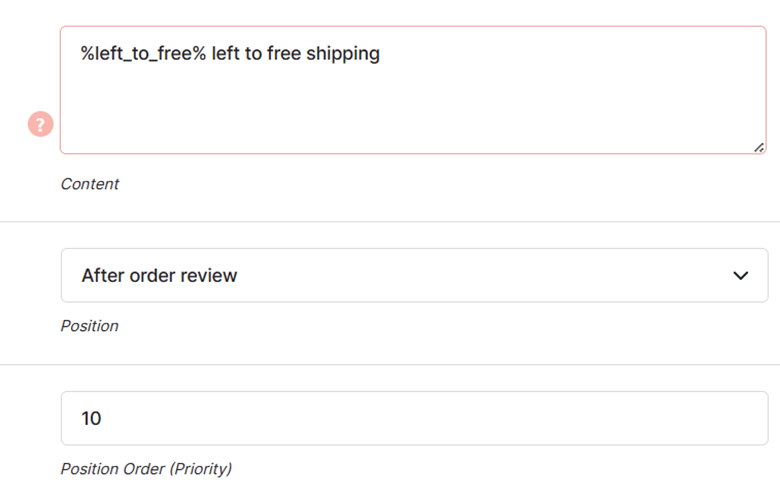
The plugin also gives you an important to set a common message for all areas in case the customer is finally eligible for free shipping. Enter the text to be displayed in the Message on Free Shipping Reached field.

Save Changes, and your settings should be applied.
—
To add the left to free shipping or free shipping reached info on other pages, please use the following:
- Booster – Left to Free Shipping widget
- [wcj_get_left_to_free_shipping content=””] shortcode or
- `wcj_get_left_to_free_shipping( $content );` function.
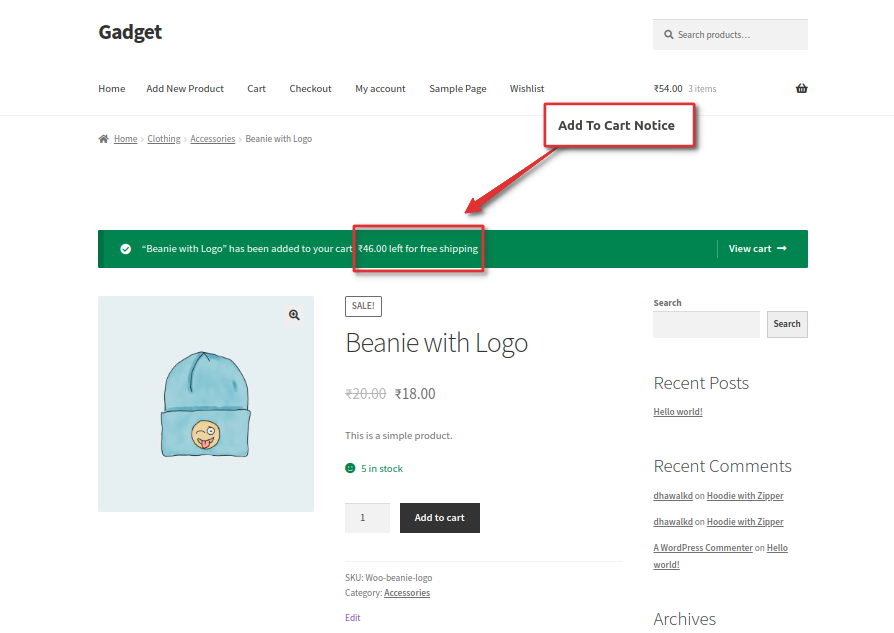
Add to cart Notice #
- Go to your WordPress dashboard and navigate to Booster > Plugins > Shipping & Orders > Left to Free Shipping > Add to cart Notice and check the box for the Enable/Disable – Enable field.
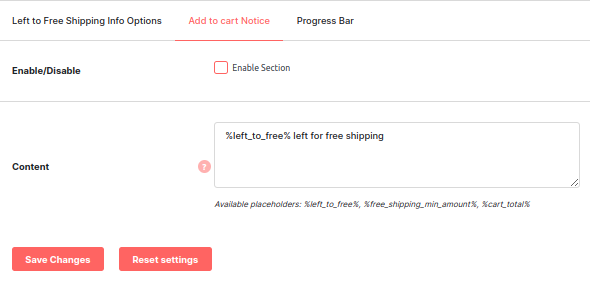
- Enter/select the required values for the fields. Refer to the table below for field descriptions:
| Field | Description |
| Content | Enter the message you wish to display in the Add to Cart Notice. You can also utilize the following placeholders:
|
Frontend Output #
Progress Bar #
- Go to your WordPress dashboard and navigate to Booster > Plugins > Shipping & Orders > Left to Free Shipping > Progress Bar section tab.
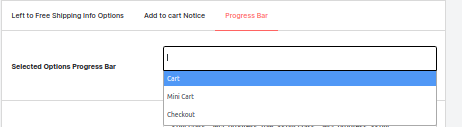
- Choose an option to display a progress bar on the front end. The selected options will replace the ‘Left to Free Shipping’ info with a progress bar. You can also utilize the following options : Cart, Mini Cart and Checkout.
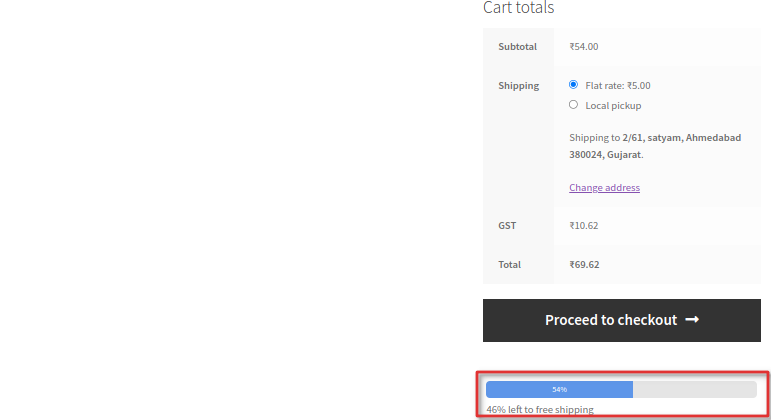
- If you desire to customize the progress bar, use this option. We can modify the Progress Bar Color, Progress Bar Background Color, and Progress Bar Text Color.

Frontend Output #
- Info on Mini Cart.

- Info on Cart.
- Info on Checkout.

Shipping Bar #
The Shipping Bar feature allows you to display a notification bar on different pages of your website, positioned either at the top or bottom of the page.
To customize the Shipping Bar, you can use the following options:
- Enable/Disable: Toggle this option to turn the shipping bar on or off.
- Bar Position: Select where the bar should appear—either at the top or bottom of the page.
- Display Pages: Choose specific pages where the shipping bar should be displayed.
- Message Template: Customize the text shown in the shipping bar to match your needs.
- Mobile Display: Enable or disable the shipping bar on mobile devices.
- Bar Colors: Personalize the bar’s color, including the text color, to match your design preferences.

Frontend Output of Shipping Bar #
- Shipping Bar at the Top of Page.

- Shipping Bar at the Bottom of Page.

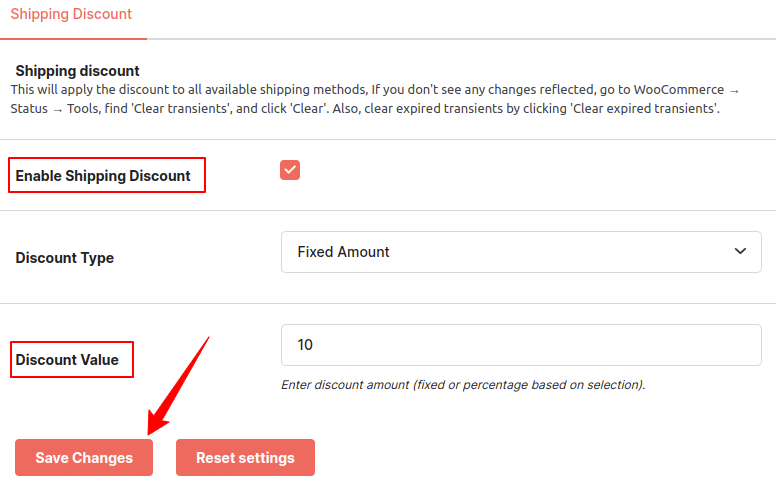
Shipping Discount #
The Shipping Discount feature allows you to apply a discount to each shipping method.
To configure the Shipping Discount, use the following options:
- Enable Shipping Discount: Toggle this option to enable or disable the shipping discount.
- Discount Type: Choose between a Fixed Amount or Percentage discount.
- Discount Value: Enter the discount amount, either as a fixed value or a percentage, based on your selection.