- Overview
- How to Start using WooCommerce Cost of Goods for your Shop?
- How to Add Various Price Fields to Products’ Edit Pages?
- How to Add Custom Price Fields to Add the Cost of Goods for Products?
- (Info Fields) Taking Extra Inputs for Inventory Management
- Products List Custom Columns
- Orders List Custom Columns
- Enabling Expense Detail Capturing & Calculations for Variable Products
- WooCommerce Cost of Goods Tools
- Reset Settings
- Adding Cost of Goods through the Product in Product Page [Edit Mode]
- Exporting the WooCommerce Cost of Goods [For Developers and Administrators]
Overview #
The WooCommerce Cost of Goods plugin in the Booster toolkit enables store administrators to save various types of product pricing details with your default product description. This functionality ensures easy selling-price calculation, profit computation, inventory management, record-keeping, and references for future purchases.
Using this plugin, you can capture a few or all of these details for your products in your eCommerce store:
- Purchase Cost
- Shipping Cost
- Affiliate Cost
- Seller’s details
- Last/previous purchase date
- Purchase Information
Besides the above, you can also create custom price fields and save more details (e.g., transportation, import duty, storage cost, etc.). So, all in all, the Cost of Goods plugin will help you flawlessly manage your store’s records, inventory, and product pricing.
Utilities #
- Calculate Product Selling Price Rationally
You can use the Cost of Goods plugin to calculate a product’s actual purchase price while including all expenses involved in the process. Margin or markup calculation is also possible through this plugin. So, if you could develop a rational product price calculation formula to achieve certain profit levels, the WooCommerce Cost of Goods plugin will enable the process.
- Manage records better
You can save all kinds of costs or expenses related to your products using this plugin. From shipping expenses to the money invested in affiliates, purchasing, marketing, taxes, transportation, etc. – all data can be kept here. Also, you can store the seller’s details, last purchase date, and purchase information alongside the above-specified data using the Cost of Goods plugin.
- Do better inventory management
The Cost of Goods plugin in Booster for WooCommerce plugin lets your store administrators save purchase date, seller information, and other details with the product description without publishing the same for the store buyers. Using this information, your team can make purchase decisions and decide when to buy the same product the next time.
- Manage your Vendors better
You can save the seller’s information for each of the products using this plugin of Booster plugin. With it, you can directly see who sold the current batch of items of a particular product to you in the dashboard. Also, previous purchase records can be exported and managed easily with the WooCommerce Cost of Goods plugin.
Considering all the above, you will be able to store seller information, compare the product quality, see sales statistics, notice complaint frequency, and make up your mind about which seller will be suitable for your store in the long term or when to switch your seller.
How to Start using WooCommerce Cost of Goods for your Shop? #
The WooCommerce Cost of Goods plugin can only be enabled if your online store is already using the Booster Plugin. If you do not have Booster yet, get it now and install it before following the steps given below.
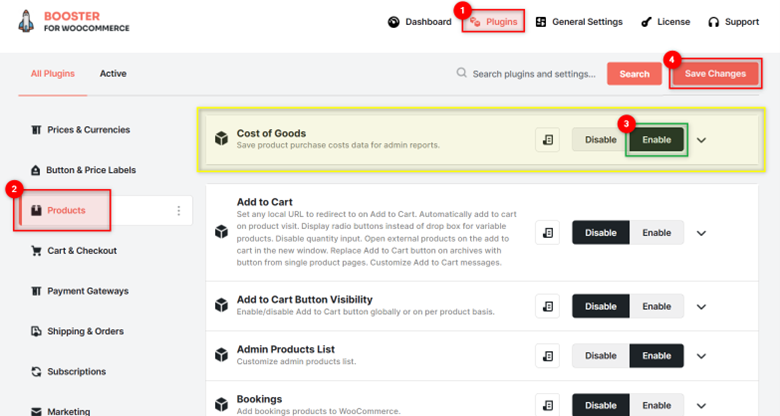
- To configure the cost of goods plugin, log in to your WordPress admin dashboard.
- Look for the Booster section in the menu, and click Plugins in this section.
- On the Plugins page, you will see multiple tabs for various Booster categories. Go to the Products category.
- On the newly-opened page, select Enable for the Cost of Goods Plugin.
- Click on the Save Changes button.
How to Add Various Price Fields to Products’ Edit Pages? #
To note the cost of goods, you must take all the expenses on the product into account, for example – shipping cost, import cost, purchase price, and commission being given to the affiliates to boost your sales. Using the WooCommerce Cost of Goods plugin, one can keep records regarding everything we’ve mentioned a few seconds back.
In the price field section, you can enable filling multiple expenses on your goods, such as:
- Product’s purchase cost
- Extra expenses on shipping and transportation like operations
- Affiliate Commission
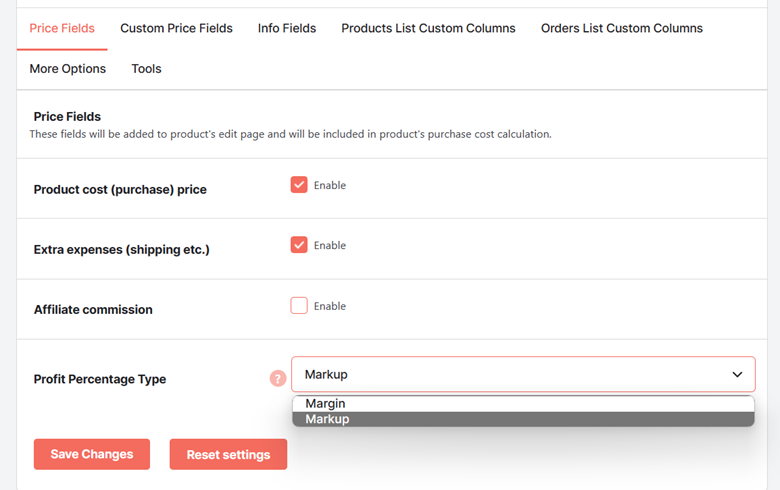
The store administrator can save all the above-mentioned expense details for each product page (when viewing it in the editor). Using it all, the plugin will calculate the total expense related to the product, i.e. the total purchase price of a product for your shop.
You can also select the Profit Percentage Type, as markup or margin.
As per your choice, the plugin will calculate the margin or markup for each product.
Note:
- Margin = Profit / Selling Price
- Markup = 100 * Profit / Purchase Price
How to Add Custom Price Fields to Add the Cost of Goods for Products? #
The custom price fields section lets sellers add multiple custom price fields to their product (edit) pages. You can add more pricing (expense on goods) details to your shop through it.
To get started, select the Total Custom Price Fields (in digits) and click on the Save Changes button. This action will add as many extra price fields in your shops as you’ve specified above.
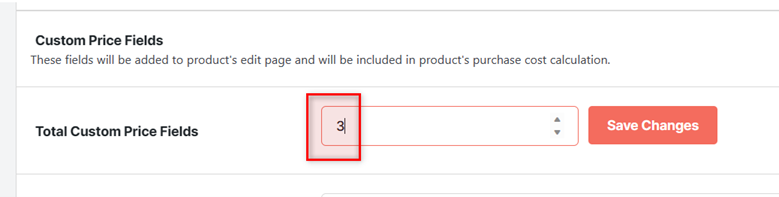
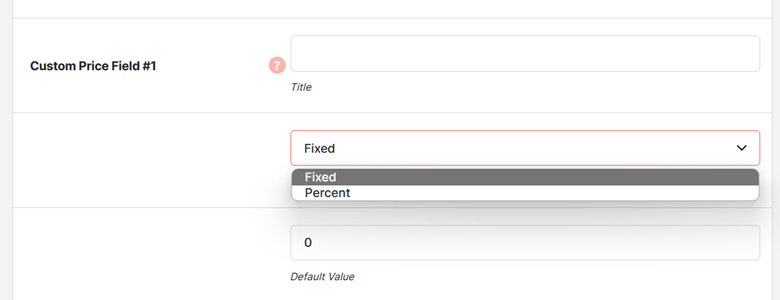
For each of the pricing fields, you need to provide the title (label for the field), cost type (fixed or percent, and a default value (optional).
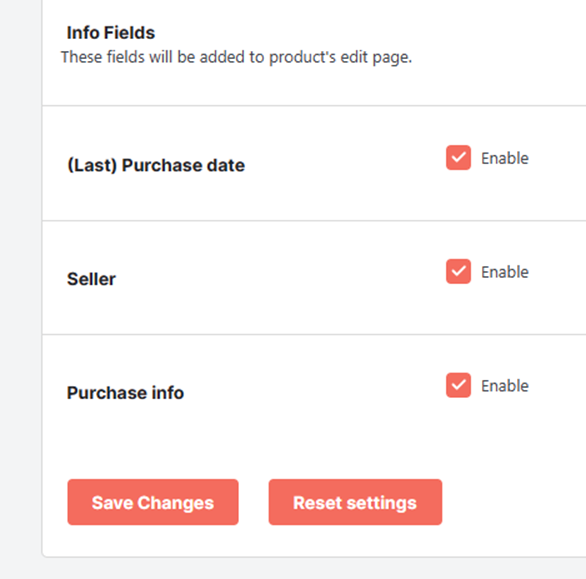
(Info Fields) Taking Extra Inputs for Inventory Management #
To maintain your eCommerce inventory better, it will be a great idea to track information related to the product purchase cycle and seller information. So, the WooCommerce Cost of Goods plugin lets you capture the same details.
You can easily save the last purchase date, seller information, and purchase date for each product using this plugin. Go to the Info Fields and enable all required options.
Products List Custom Columns #
Besides the rows of various types, as told above (purchase cost, extra expenses, spent on affiliates, purchase info, seller details, purchase date, and the custom fields), you can also enable 2 columns through the WooCommerce Cost of Goods plugin: Profit and the Purchase Cost.
These columns will be added to the Products page in WooCommerce and will be visible to the store administrator(s).
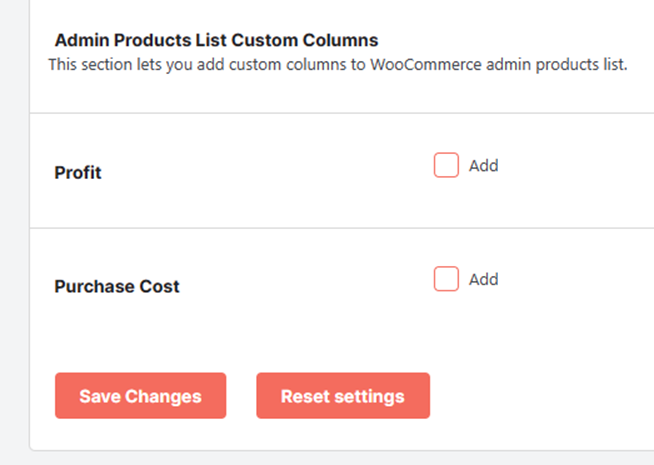
These details will be calculated by this Booster plugin on its own.
Orders List Custom Columns #
Besides the rows like purchase cost, extra expenses, spent on affiliates, purchase info, seller details, purchase date, and the custom fields, you can also enable 2 columns on the Admin Orders page using the WooCommerce Cost of Goods plugin. These are the Profit and Purchase Cost columns.

These details will be calculated by this Booster plugin on its own.
Enabling Expense Detail Capturing & Calculations for Variable Products #
Though variable products are just the variants of your products in the shop and can be treated similarly, do not forget they do not come for free. Product variants attract shipping, transportation, purchase, and other expenses, just as your other products do.
Keeping the above in mind, we have given our users the option to Treat Variable Products as Simple Products in the More Options section. Enable this option and the plugin will list and count variable products just like other normal products in your store.
E.g. T-shirt (with variable Blue, Green, Yellow, and Red) as one product will now be Blue T-shirt, Green T-shirt, Yellow T-shirt, and Red T-shirt i.e. 4 products.

WooCommerce Cost of Goods Tools #
Module Tools #
The WooCommerce Cost of Goods has one of its module tools for importing the data. Click on the tool’s link to get started with it.
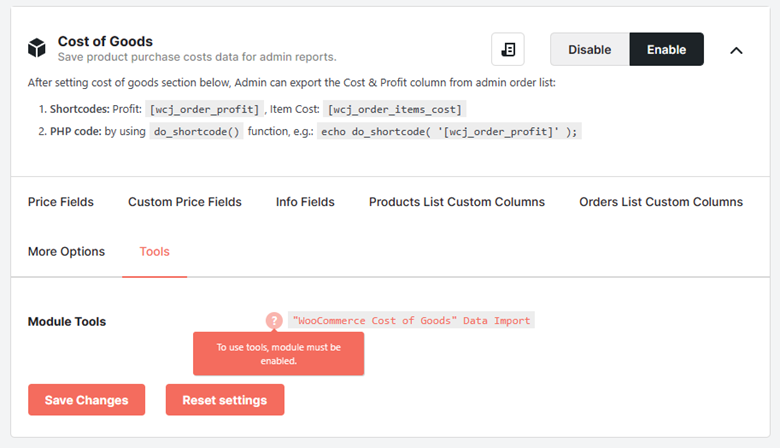
You can simply click on the Import button to start the process of copying the information from source to destination.

Click OK for the browser alert and the import will be done.

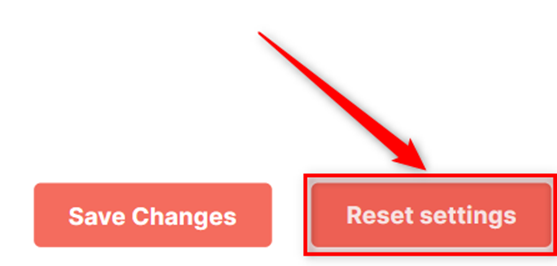
Reset Settings #
Click the Reset Settings button to restore the plugin’s default configuration for your store or to start customizing these details from the very beginning.
Adding Cost of Goods through the Product in Product Page [Edit Mode] #
Once you have configured the WooCommerce Cost of Goods plugin for your shop and enabled it for your products, you can go to any product’s edit page and see it rendered just below the product description editor section.
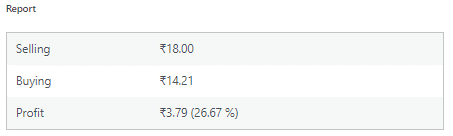
Here, you can provide the preferred details and click on the Save Changes button.

Once saved, you will be able to view the cost of goods report with auto-calculated details. Here is an example report, created by the WooCommerce Cost of Goods plugin of the Booster plugin.
Exporting the WooCommerce Cost of Goods [For Developers and Administrators] #
While there is no need to publish your trade secrets on the front end, you might need to fetch various details from the Cost of Goods reports. The purpose could be:
- Exporting it for managing cost records;
- Automating the calculation of product selling cost for your store (as per the preferred margin or profit);
- Displaying seller’s name/details in your store for added transparency.
Whatever be your purpose, you can use the below-mentioned information for this –
Shortcodes:
Profit: [wcj_order_profit]
Item Cost: [wcj_order_items_cost]
PHP Code:
Use the do_shortcode() function, e.g.: echo do_shortcode( ‘[wcj_order_profit]’ );
Similarly, to retrieve the cost array, you can use the following meta key:
_wcj_purchase_price
To fetch the main product cost, i.e. the total purchase price, one can use this line in code:
echo get_post_meta( $product_id, ‘_wcj_purchase_price’, true );
However, to fetch just the basic product purchase cost, you can use the following function:
wc_get_product_purchase_price( $product_id = 0 )
To print it, do:
echo wc_get_product_purchase_price( $product_id );
While exporting the Cost of Goods details, you can use the `wcj_get_product_purchase_price` filter on the final function’s output. For example:
apply_filters( ‘wcj_get_product_purchase_price’, $purchase_price, $product_id );


