Overview #
The WooCommerce Add to Cart Labels plugin allows you to change the Add to Cart button text based on the product type, the product category, or the individual products. It allows you to provide a customized experience to your customers.
Enabling Add-to-Cart Labels in WooCommerce #
To enable and use the More Button Labels plugin, you should first download and install Booster for WooCommerce.
- Go to Booster > Plugins > Buttons & Price Labels and look for the Add to Cart Labels plugin.
- Select the Enable option for this plugin and click Save Changes to proceed.
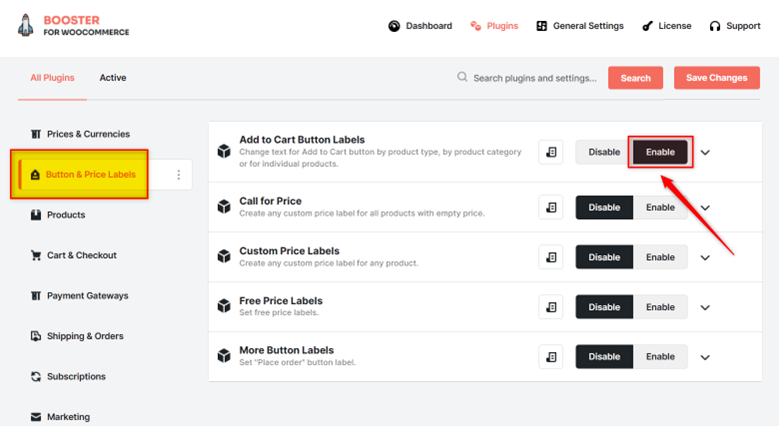
The WooCommerce Add to Cart Labels plugin will be enabled for your site.
Add to Cart Button Labels Plugin Settings #
Per Category #
You can customize the Add to Cart button for selected product categories using this option.
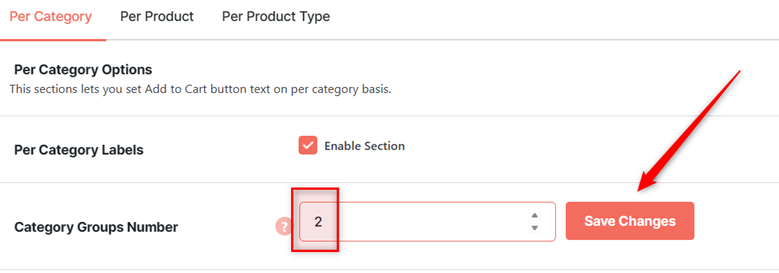
- To customize the Add to Cart button text for product categories, check the box for the Per Category Labels – Enable Section field in the Per Category Options section.
- Enter the number of categories for which you want to customize the Add to Cart button in the Category Groups Number field and click the Save Changes button next to it.
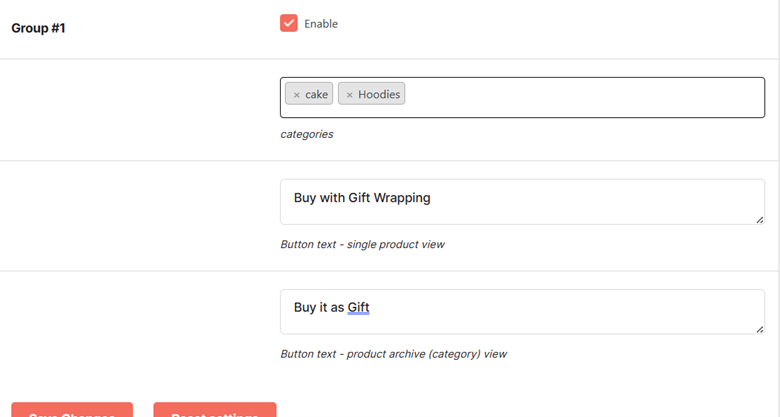
- Enter/select the required field values (for each Category Group). Refer to the table below for field descriptions:
| Field | Description |
| Enable | Specifies if the option to customize the Add to Cart button for the group is enabled |
| Categories | Product category(ies) for which the Add to Cart button is customized |
| Button text – single product view | Text/label of the Add to Cart button that will be displayed for single product views |
| Button text – product archive (category) view | Text/label of the Add to Cart button that will be displayed product category pages |
- Click Save Changes.
The Add to Cart button will be customized for the selected product categories.
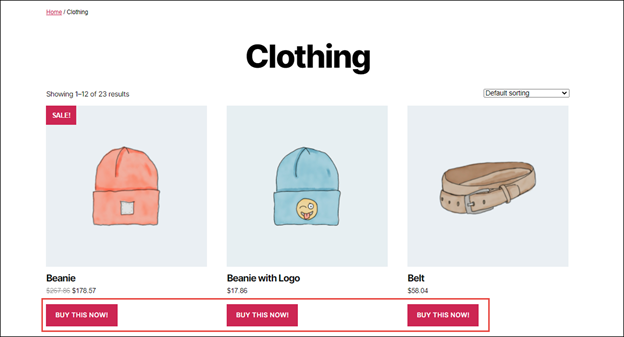
Sample Output #1 > Per Category #
A sample category page of the category Clothing with the Add to Cart button customized as BUY THIS NOW!
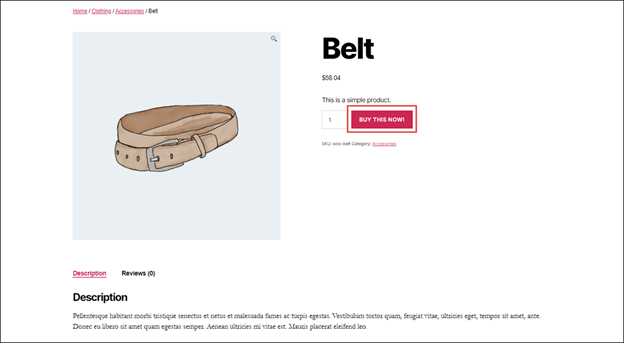
Sample Output #2 > Per Category #
A sample product page with the Add to Cart button customized as BUY THIS NOW!:
Per Product #
You can customize the Add to Cart button for selected products using this option.
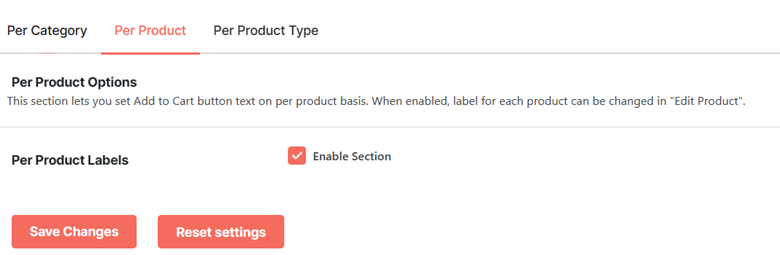
- To customize the Add to Cart button text for individual products, check the box for the Per Product Labels – Enable Section field in the Per Product Options section.
- Click the Save Changes button.
The Booster: Custom Add to Cart tab will be added to the edit mode of all product pages.
Now, to customize add-to-cart button labels for a particular product, follow these steps:
- Navigate to WordPress Dashboard > Products > All Products.
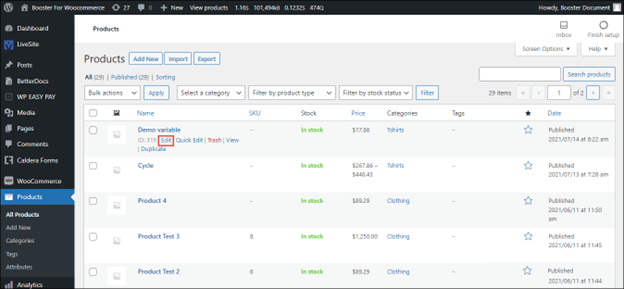
- Click Edit for the product to which you want to customize the button.
- Scroll down to the Booster: Custom Add to Cart section.
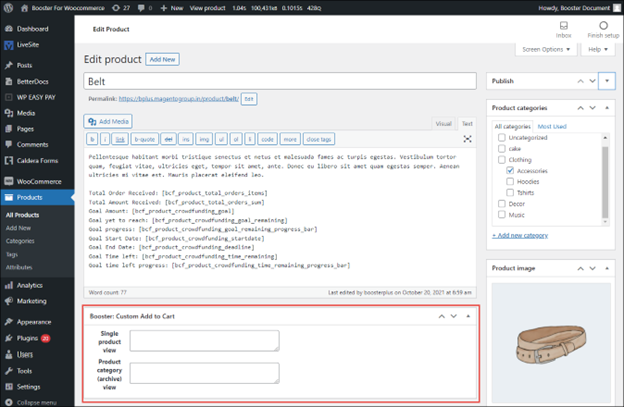
- Enter the text/label of the Add to Cart button that will be displayed on the product page in the Single product view field.
- Enter the text/label of the Add to Cart button that will be displayed on the product category archive pages in the Product category (archive) view field.
- Click Update.
Note: You must update the page to view the changes on your product page. You cannot preview the changes as you would preview any other changes on a WordPress page.
The WooCommerce add-to-cart button will be configured and reflected on the product page.
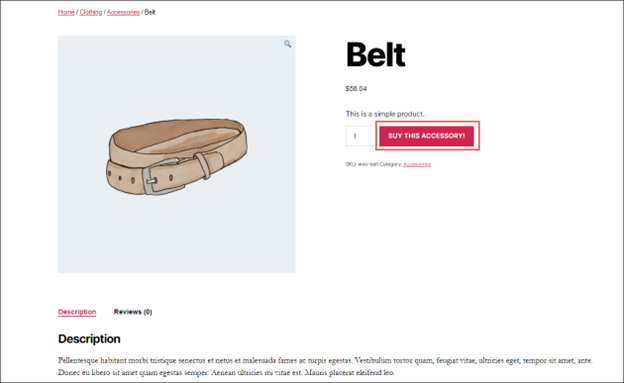
Output > Per Product #
A sample product with the Add to Cart button customized as BUY THIS ACCESSORY!:
Per Product Type #
To customize the Add to Cart button text for product types, check the box for the Per Product Type Labels – Enable Section field from the Per Product Type Options tab.
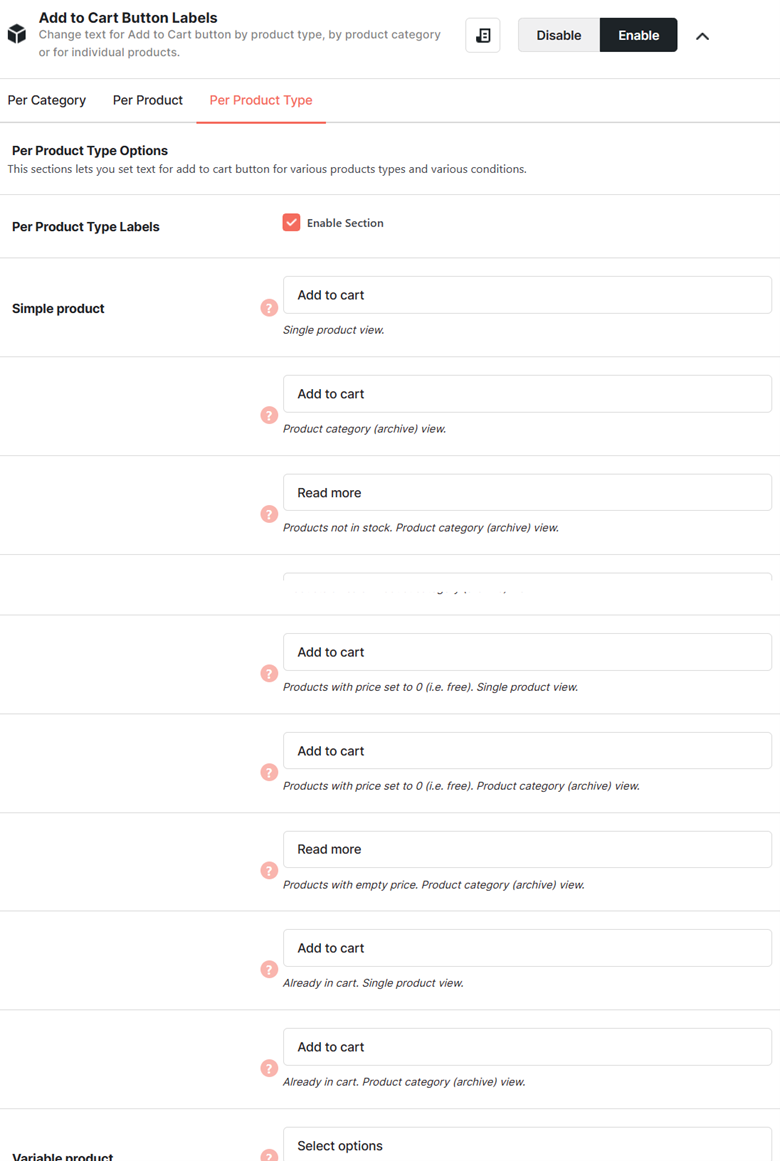
Now, you can customize the add-to-cart button labels for various conditions for the following types of products:
- Simple
- Variable
- External
- Grouped
- Other
For each of these product types, you can customize the add-to-cart button labels for the following cart conditions:
- Single product view.
- Product category (archive) view.
- Products not in stock. Product category (archive) view.
- Products on sale. Single product view.
- Products on sale. Product category (archive) view.
- Products with price set to 0 (i.e. free). Single product view.
- Products with price set to 0 (i.e. free). Product category (archive) view.
- Products with empty price. Product category (archive) view.
- Already in cart. Single product view.
- Already in cart. Product category (archive) view.
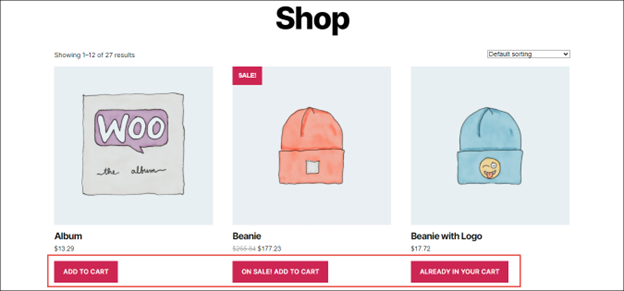
Output > Per Product Type #
A sample page with the Add to Cart button customized for different scenarios: