Overview #
The WooCommerce Bookings plugin can make your store’s products available for booking instead of (or alongside) the sale. Whether you have properties or services for booking, or you want to start booking/product-renting services through your existing eCommerce store, nothing is difficult when you are using this Booster functionality configured on your WooCommerce shop.
Using the WooCommerce Bookings plugin, a store owner or administrator can:
- Enable booking feature for desired WooCommerce products;
- Hide the ‘Product quantity’ selector from product pages when booking is enabled;
- Set dates and date range validations;
- Display alert messages on wrong bookings-related inputs;
- Calculate rates by number of days (bookings) for your variable products;
- Include or exclude weekdays from WooCommerce Bookings;
- Include or exclude months from WooCommerce Bookings.
Getting Started with WooCommerce Bookings #
To enable the WooCommerce Bookings plugin, it is essential to follow the steps mentioned below:
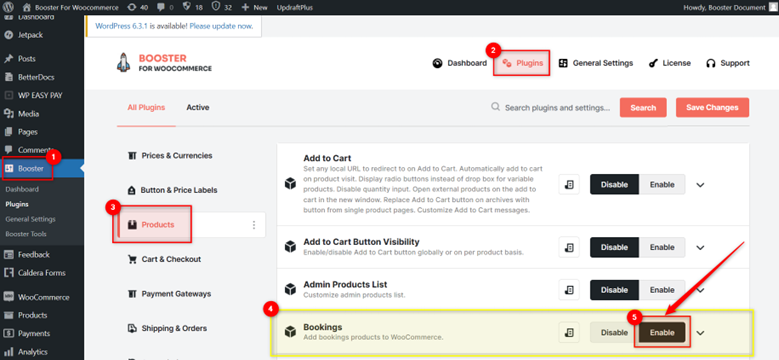
1. Bookings is among the most useful plugins of the Booster for WooCommerce Plugin. So, to get started with it, you must first enable Booster. Use the above link to download Booster, install it on your store, and activate it.
2.While logged in through your WordPress administrator credentials, go to the Booster > Plugins page.
3. Click on the Product link to load this category’s plugins now.
4.Select the Enable option for the Bookings plugin and click on the Save Changes button.
5. Expand this plugin’s settings to get started with it.
Now, you will be able to enable bookings of your store products rather than just selling them. This functionality is useful when you have properties or products that can be rented for a specific time from your store, and returned or vacated later on.
Labels and Messages #
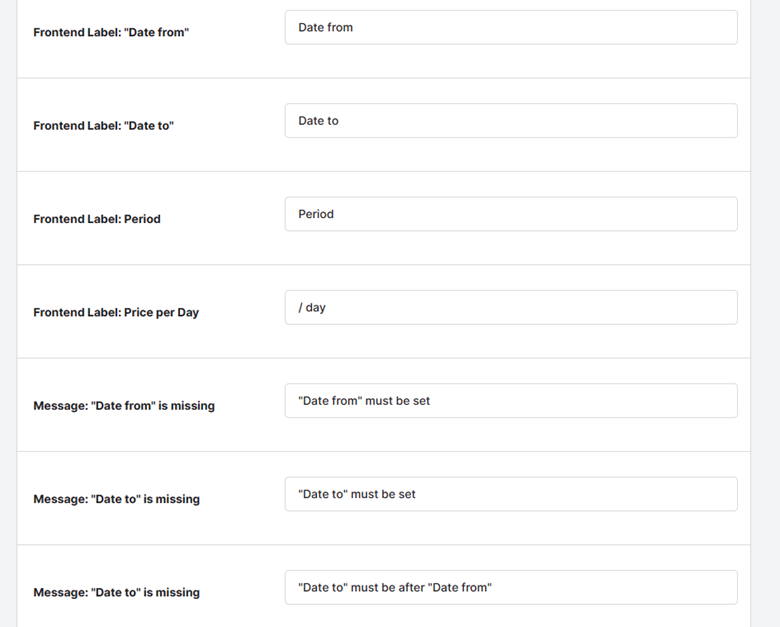
Once the WooCommerce Bookings plugin is activated, you need to go to the Labels and Messages section to edit or add various display texts in your store. You can specify the labels for:
- Frontend Label: “Date from” – It will be displayed before the “date from”, i.e. the option to select the start date for the booking.
- Frontend Label: “Date to” – It will be visible before the “Date to”, i.e. the option to choose the end date for the booking.
- Frontend Label: Period – It will be shown before the booking period field in your shop.
- Frontend Label: Price per Day – This label will define the purpose of your “price per day” field and details.
The messages for the WooCommerce Bookings that you can set for your prospects are:
- Message: “Date from” is missing – The alert text when the customer misses to add a start date for the booking.
- Message: “Date To” is missing – The display text when the customer misses adding an end date for the booking.
- Message: Invalid date range – As the “Date to” must be after “Date from”, you can enable showing a notification to your buyers when they want to make a booking but use an invalid date set.
WooCommerce Bookings Options #
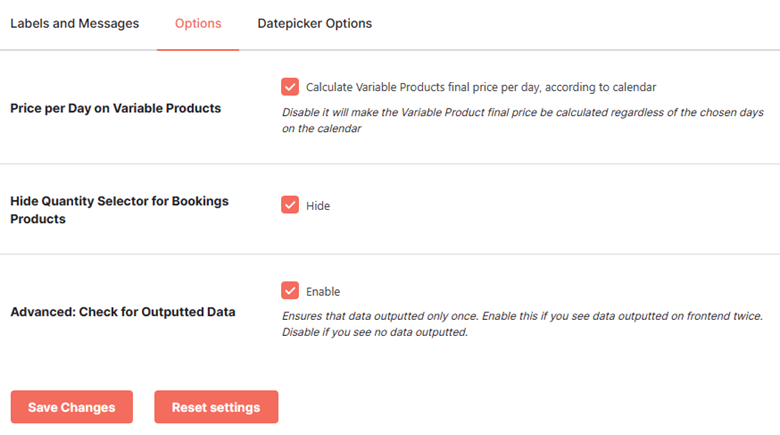
In the Options section on the WooCommerce Bookings settings page, you have the options for making your booking functionality work as per your shop.
- Price per Day on Variable Products
This option can be enabled when you want to change the per-day booking price for variable products when the Bookings feature is enabled for it.
For example, a variable product with its cost of $20 will be priced at $20 for 5 days when this option is not enabled. If enabled, product booking will be charged at $100 (i.e., $20 * 5).
- Hide Quantity Selector for Bookings Products
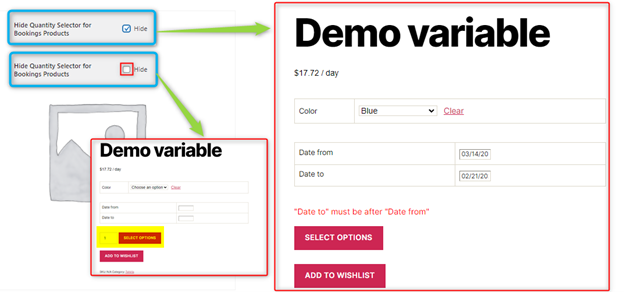
When you enable hiding the quantity selector for your products with the booking facility, your buyers won’t see the field to add ‘item count’ on the single product page anymore. It means that customers can only make 1 booking and set the duration of several days for it.
However, when you have multiple items (e.g., multiple houses or hotel rooms) available for booking, you can skip enabling this option.
- Advanced: Check for Outputted Data
If, due to some flaw, your website frontend is showing the WooCommerce Bookings output twice, enable this option. It will check for the same and display the output once.
Alternatively, if your website does not show the expected output for the WooCommerce Bookings even once, see if this option is enabled. Try disabling it and checking if the output is visible now.
Datepicker Options – WooCommerce Bookings #
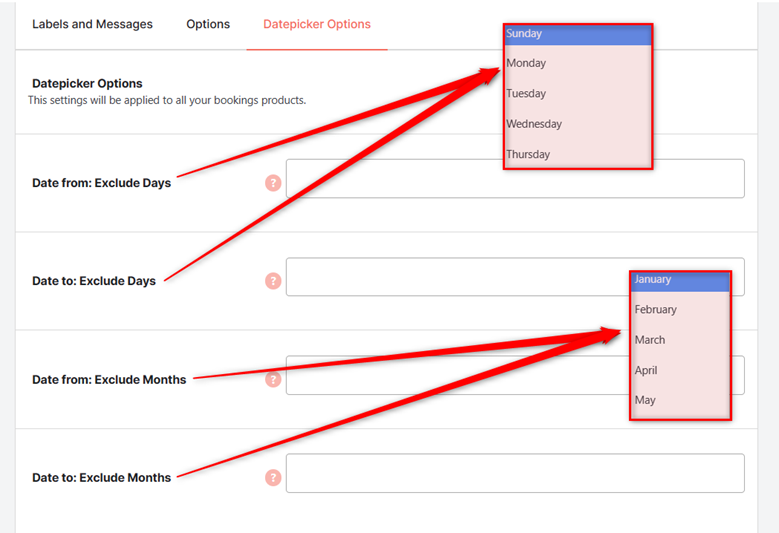
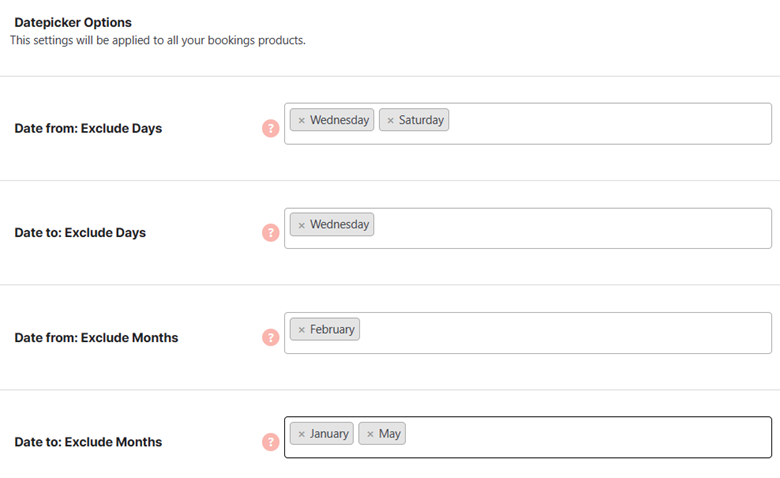
Change the Datapicker Options settings to include or exclude the days and months from your booking availability.
If your services are not available for a particular weekday or month in the year, this option can be used. Utilizing the date picker options, it is easy to prevent bookings that cannot be served. This way, you will be able to iterate your availability in a great manner to your customers.
Here is an example to show you can add none, one, or multiple options in each of the Datepicker options fields.
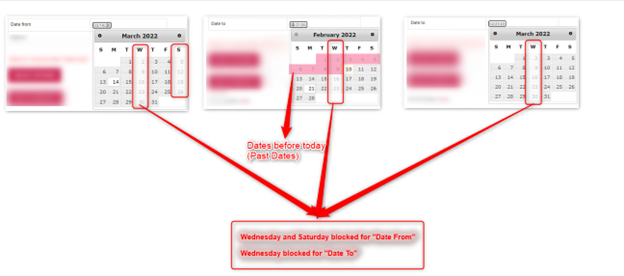
Demo – Date Picker Options enabled using the WooCommerce Bookings Plugin
Resetting WooCommerce Bookings Settings for your Store #
Use the Reset Settings button on the WooCommerce Bookings page to reset the booking functionality configured for different products in your store.
Accessible through WooCommerce > Settings > Booster > PRODUCTS > Bookings (settings), this option will reset the settings related to WooCommerce bookings and the values of Booster: Bookings meta-boxes in product pages (editor mode).
Step-by-Step Guide: How to Enable WooCommerce Bookings for Store Products? #
To enable Booking functionality for any of your products in the WooCommerce store, you need to follow these steps:
1.Enable the WooCommerce Booking Plugin using the information provided in previous sections on this page. Configure related settings as per your preference.
2.Go to the desired product page and scroll down to the Booster: Bookings meta-box.
3. Select the value for Enabled as Yes.
4. Click on the Update button to save your changes.
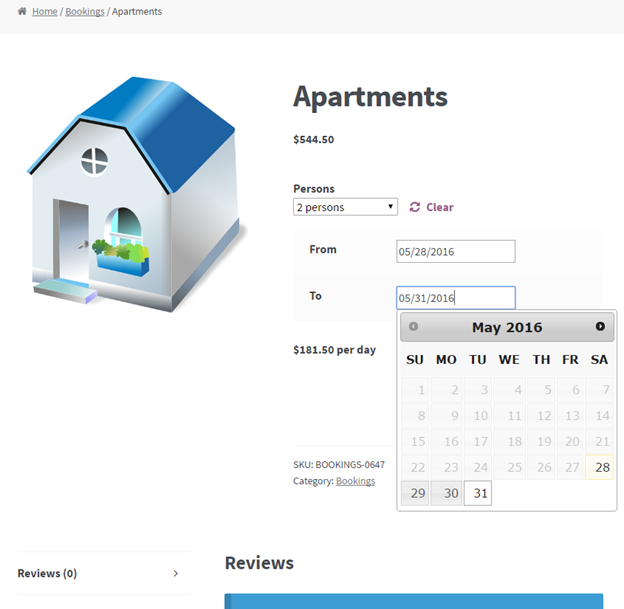
Store Preview: WooCommerce Bookings Functionality Enabled for a Product in a Store

