- When Do I Need Sale Flash Functionality in WooCommerce?
- How Do I Enable the WooCommerce Sale Flash Plugin for my Online Shop?
- Adding a Sale Related Label on your Store Products Globally
- How to Highlight the Products on Sale Individually [Per Product WooCommerce Sale Flash]
- How to Run a Sale for a whole Category [Per Category WooCommerce Sale Flash]
- How to Run a Sale for Particular Tag(s) [Per Tag WooCommerce Sale Flash]
- How to Clear or Reset Sale flash Labels from your Store at Once
The WooCommerce Sale Flash plugin enables WooCommerce store owners to run sale campaigns without investing a lot of time in activating them. With this plugin at your disposal, you can put different products on sale on different days, as it is really easy and fast to configure its settings.
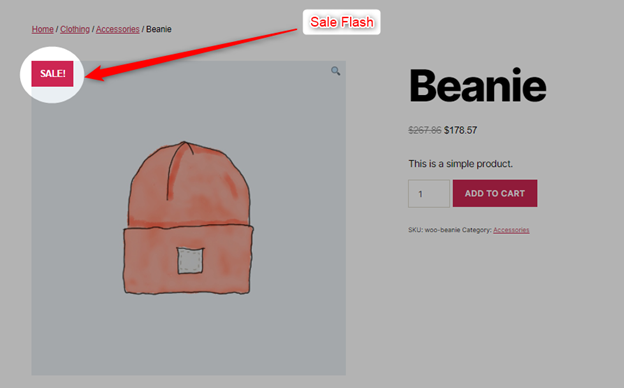
You can just add a sale price to the products on sale and add a highlighted label to your single product and archive/category pages to notify your buyers about the same. This ‘sale flash’ label is more than enough to attract your buyers’ attention towards the discounted-price offer that is ongoing for the marked product.
Using the Booster’s WooCommerce Sale Flash plugin, you will be able to:
- Set a global sale-related flash label to show. You can choose to hide this label on single pages, hide it on category/archive pages, and hide it from everywhere in your store.
- Set a sale flash label per product.
- Set a sales flash label per product category.
- Set a sale flash label per WooCommerce tag.
- Style your label by changing the HTML input
Note: Product must have a Sale Price. Otherwise, the ‘Sale Flash’ tag won’t be visible for your product even if it falls within the scope of plugin configuration.
When Do I Need Sale Flash Functionality in WooCommerce? #
Store owners must keep enabling sales and special offers to attract new customers and retain the old ones. And, to do it frequently in your store, you must have an arrangement that could help you enable sales without the assistance of developers or other experts.
The Sale Flash plugin can help you in this regard, as with it, you just need to specify sale prices for the products on sale and enable the label for selective products, categories, tags, or the whole store. It is super-easy to do and takes no time.
How Do I Enable the WooCommerce Sale Flash Plugin for my Online Shop? #
To get started with the sale flash feature, follow the steps enlisted:
- Download the Booster for WooCommerce plugin.
- Install and activate it in your store.
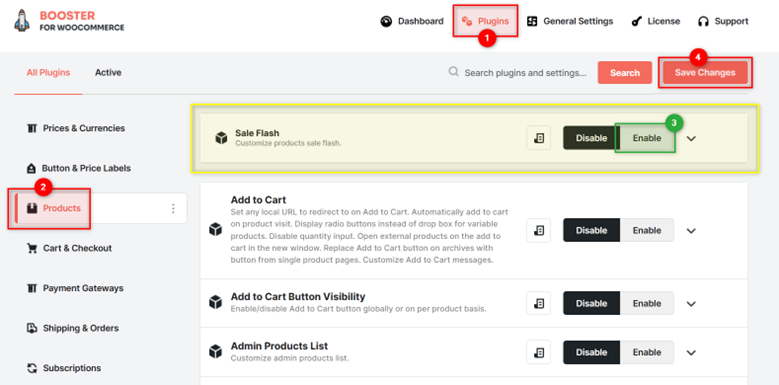
- Navigate to the Booster > Plugins > PRODUCTS category.
- Go to the Sale Flash plugin in the current screen and select the Enable option.
- Click on the Save Changes button.
Adding a Sale Related Label on your Store Products Globally #
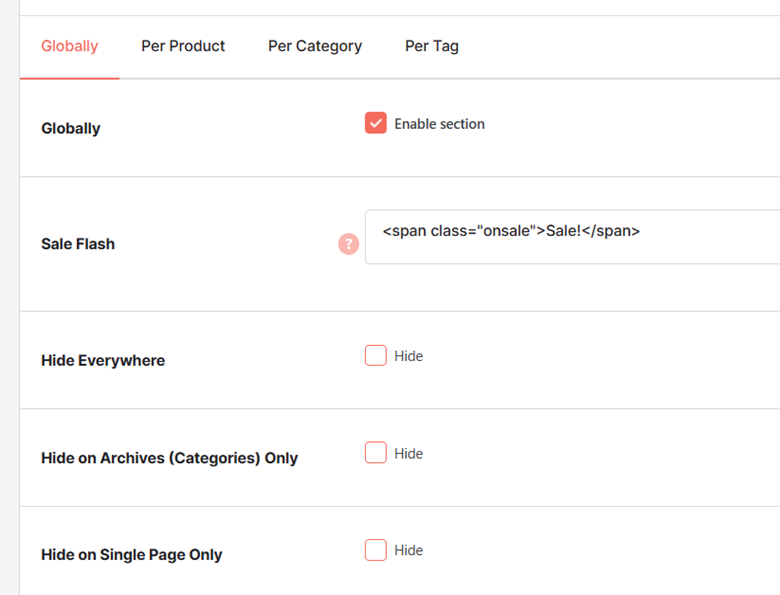
The Globally section has multiple options that affect the global visibility of the WooCommerce Sale Flash label in your store.
- Select the Enable section option to make the settings of this section work on your eCommerce store.
- Leave as is, or edit the Sale Flash content. It is the HTML content that appears on products that are on sale.
- To hide all sale flash labels throughout your store at once, select Hide for the Hide Everywhere checkbox.
- To hide the sale flash labels for your category pages, select Hide for the Hide on Archives (Categories) Only checkbox.
- To skip showing the sale flash label for your single product pages, select the Hide checkbox for the label Hide on Single Page Only.
- Save changes after configuring these changes. This action will apply required changes to your store.
IMPORTANT: Add a Sale Price to All Products that Should have the Sale Flash Label #
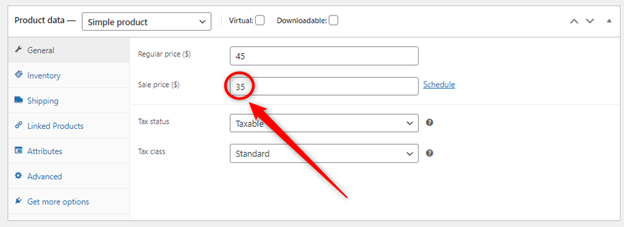
To run a sale campaign with sale flash label(s) on your products, you must make sure that your products have a Sale Price set. This price should be less than the Regular Price of the product.
The label will only be visible on the products that have a sale price set.
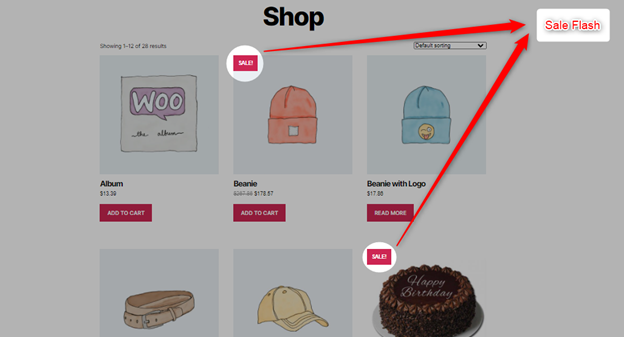
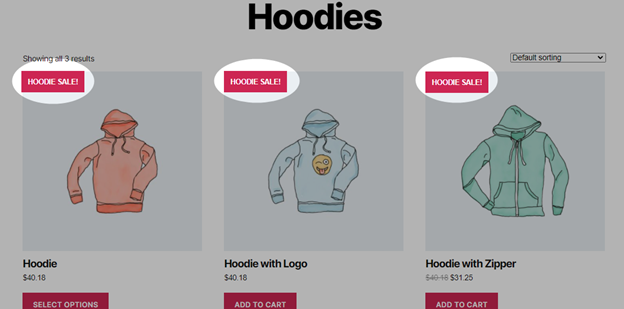
Store Preview: Products with Sale Flash Label in a WooCommerce Shop
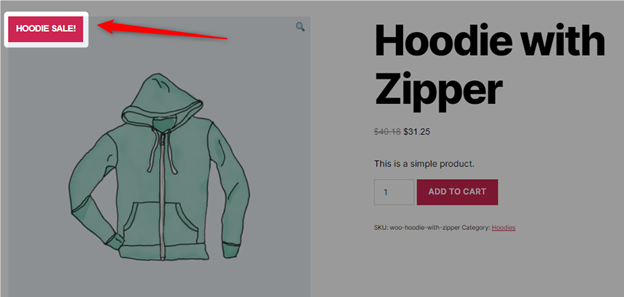
Store Preview: A Single Product Page with Sale Flash Label Enabled
How to Highlight the Products on Sale Individually [Per Product WooCommerce Sale Flash] #
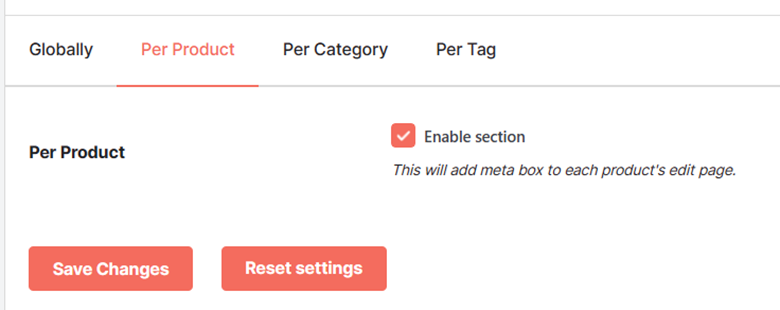
1. Go to the Per Product section in Booster > Plugins > Products > Sale Flash. It will add a metabox named Booster: Sale Flash to your product pages, visible for the store administrators on product pages in the editor.
2. Go to the product, for which, you want to enable Sale Flash. Make sure that your product has a Sale Price set. If it does not exist, you must specify it now.
3. Navigate to the Booster: Sale Flash section.
4. Set the value for Enabled as “Yes”.
5. Edit the HTML content, controlling the text/HTML to be displayed on your product.
6. Click on the Update button in editor, to save your changes.
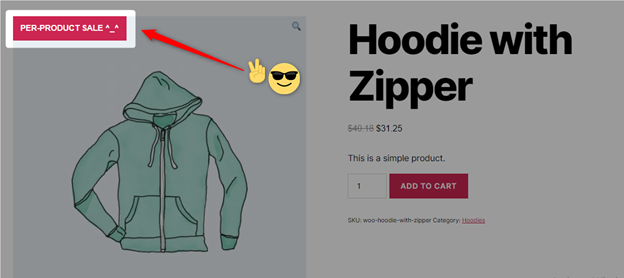
Store Preview: A Single Product Page with a “Per Product” Sale Flash Label Enabled
How to Run a Sale for a whole Category [Per Category WooCommerce Sale Flash] #
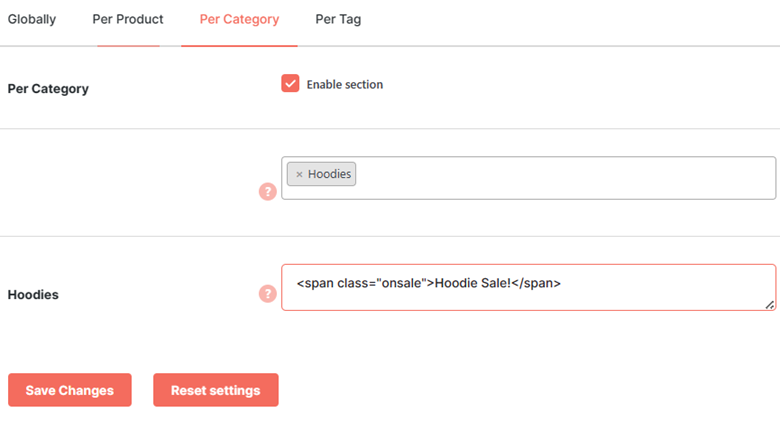
To run a sale for one or multiple categories in your WooCommerce store, you can configure Per Category settings on the Sale Flash plugin dashboard page, which is accessible from Booster > Plugins > Products > Sale Flash in your store.
Steps are as enlisted:
- Scroll down to the Per Category Section.
- Select the Enable Section checkbox for the Per Category option.
- Select the categories, for which, you want to enable the Sale Flash functionality.
- Save changes to load options related to each of the selected categories.
- Specify the Sale Flash content (HTML) for each category.
- Save changes.
Store Preview: A Category Page with a “Per Category” Sale Flash Label Enabled
Store Preview: A Single Product Page with a “Per Category” Sale Flash Label Enabled
How to Run a Sale for Particular Tag(s) [Per Tag WooCommerce Sale Flash] #
If you want to run a sale for several products belonging to different categories, using the same tag for those products can help you enable the Sale Flash Label for them at once. It’s because the WooCommerce Sale Flash Plugin allows you to enable sale labels per tag too.
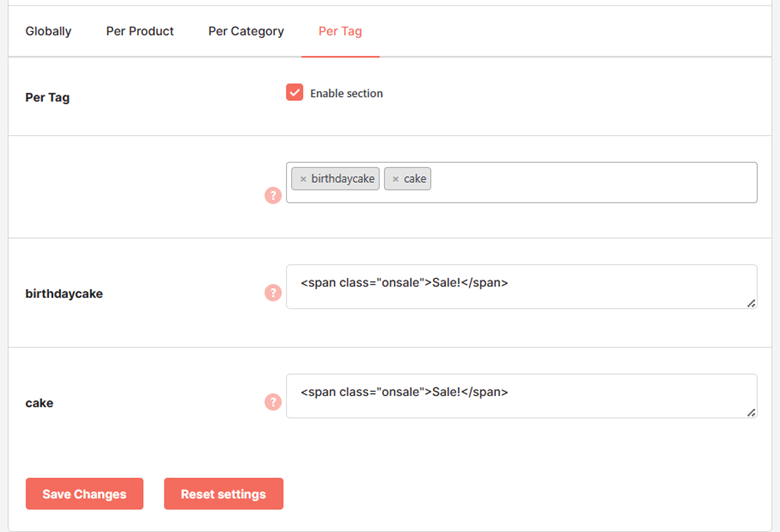
- Go to the Per Tag section on the Booster > Plugins > Products > Sale Flash page.
- Select the Tags to specify sale flash labels for them.
- Save changes to load more options in this section.
- Enter HTML-formatted labels for each of your tags.
- Click on the Save Changes button.
How to Clear or Reset Sale flash Labels from your Store at Once #
Not sure how to correct the mistake that you’ve made in Sale Flash settings, or do you want to enable all-new sale-flesh configurations for your store?
To simplify your work, Booster WooCommerce Sale Flash Plugin has the feature of resetting all enabled settings. It helps store owners in restoring the default settings of the plugin, whenever it is essential.
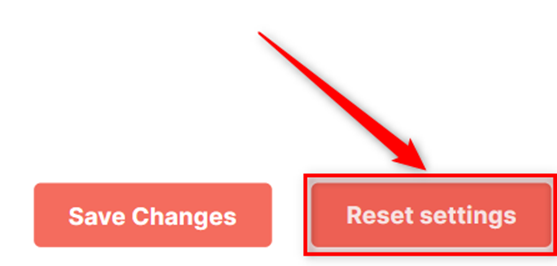
To reset all sale flash labels in your store, click on the Reset Setting button, present at the end of the Sale Flash Plugin setting dashboard.

