Overview #
SKU creation in your physical store is generally done while following a pattern. However, if you are not using an SKU-generation plugin, you or your team members will end up entering all SKUs manually in the online store. It is not only a boring task but has a high probability of errors.
SKU is an advanced option in WooCommerce to auto-generate SKUs for your products in bulk. Using this plugin, WooCommerce store owners can generate SKUs by product ID, a sequence, a pseudorandom hash, or an advanced hashing option.
One can specify a start counter for sequential number generation, an SKU prefix, an SKU suffix, and an SKU attributes separator. If required, you can create different sequential counters for different categories.
The SKU in WooCommerce plugin allows you to create an SKU template (pattern), combining the variables that it accepts for your simple as well as variable products. Besides the above, you can do many other things using the plugin, such as:
- Enable the auto-generation of SKUs for new products
- Generate variable product SKUs as you save them
- Create product SKUs on first published only
- Allow duplicates
- Enable SKU-based searching
- Only generate SKUs with no SKU added
- Add/hide SKUs to customer emails for reference
- Remove/show SKUs in admin emails
- Disable SKU functionality for your WooCommerce store
How to Install the SKU in WooCommerce Plugin on your Online Store? #
To install the SKU plugin for WooCommerce and make it work for your online store. Download Booster for WooCommerce Plugin first. Follow these steps next:
- Install and activate Booster on your eCommerce store.
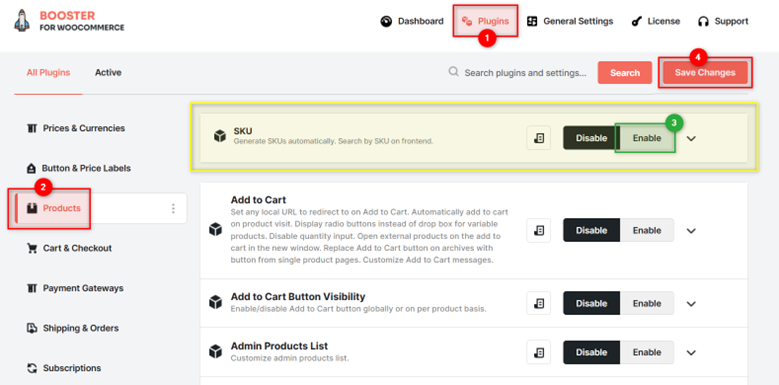
- Go to Booster > Plugins > Products page to modify plugin settings.
- In the SKU plugin section on this page, select Enable as your option.
- Click on the Save Changes
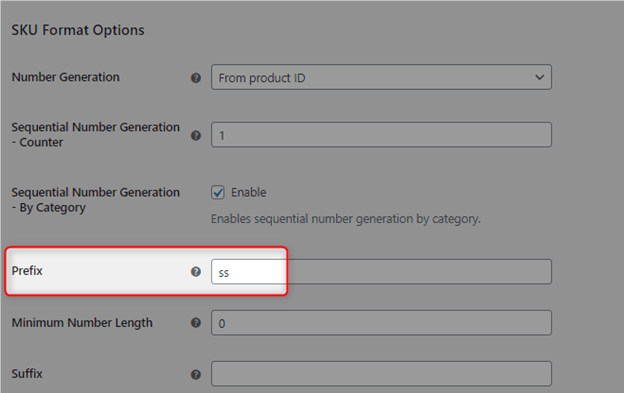
SKU Format Options #
The SKU Format Options section has the options for adding prefix, suffix, number sequence, attributes separator, in order to create a template for SKU auto-creation.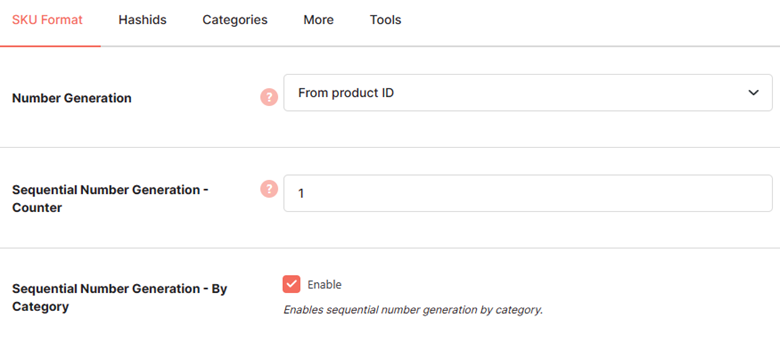
- Number Generation: Let the plugin auto-create a number sequence in a sequential manner, by the product ID, by a hashing function (pseudorandom), or by advanced hash options.
- Sequential Number Generation – Counter: If you select the sequential method for SKU number generation, enter the value of the initial or current counter (digit) here.
- Sequential Number Generation – By Category: Select Enable to start separate sequential number generation for all your categories.
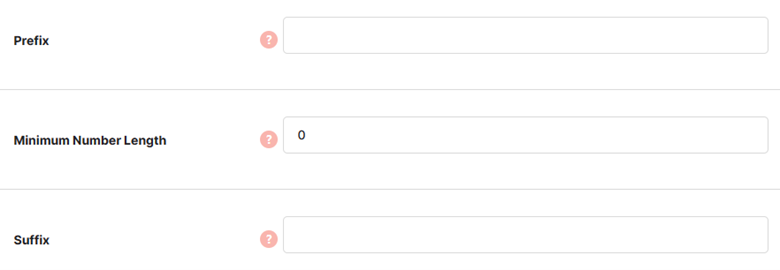
- Prefix: Specify if you want to add a string before every product SKU.
- Minimum Number Length: Enter the minimum length for the SKU number part here.
- Suffix: Specify if you want to add a string after every product SKU.
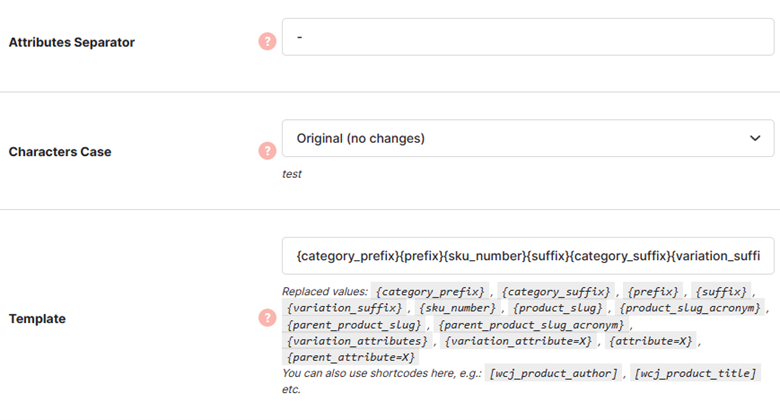
7. Attributes Separator: Enter the separator that you would like to add to your SKU for separating different parts of your SKU. It could be a “-” or a character/digit/symbol.
8. Character Case: Retain the same character case as you type, convert all characters to lower case, or change them to the uppercase for SKU creation.
9. Template: If you want to use a different format than the default for SKU generation, use this option.
For your information, the default template for SKU creation is:
{category_prefix}{prefix}{sku_number}{suffix}{category_suffix}{variation_suffix}
However, during editing, you may use a large range of variables in this template.
{category_prefix}, {category_suffix}, {prefix}, {suffix}, {variation_suffix}, {sku_number}, {product_slug}, {product_slug_acronym}, {parent_product_slug}, {parent_product_slug_acronym}, {variation_attributes}, {variation_attribute=X}, {attribute=X}, {parent_attribute=X}
Not just these variables, you can also use the product shortcodes, such as:
,

- Variable Products Variations: For variable products, you can retain the same SKU as parent, generate different SKU for each variation, or SKU same as parent’s product + variation letter suffix.
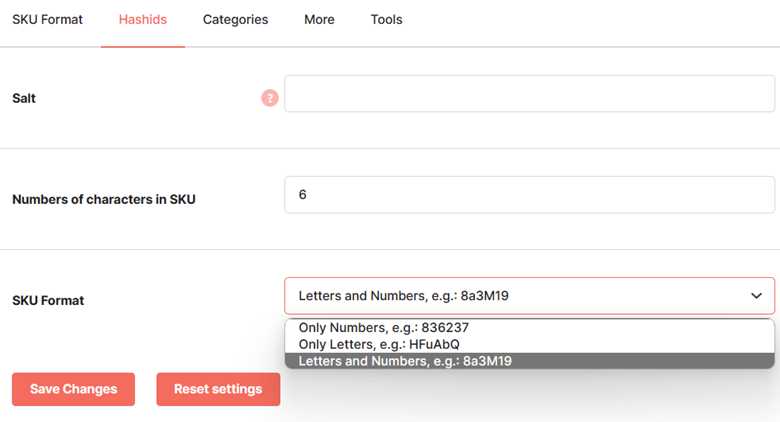
Hashids Options #
If you have selected the option Hashids – Advanced Options as your Number Generation method, you can control the value of your SKUs through these variables.
- Salt: This function will create a unique string for your SKU
- Number of characters in SKU: The length of your number string.
- SKU format: Use numbers only, characters only, or numbers & characters.
Category Options for Automated SKU generation in WooCommerce #
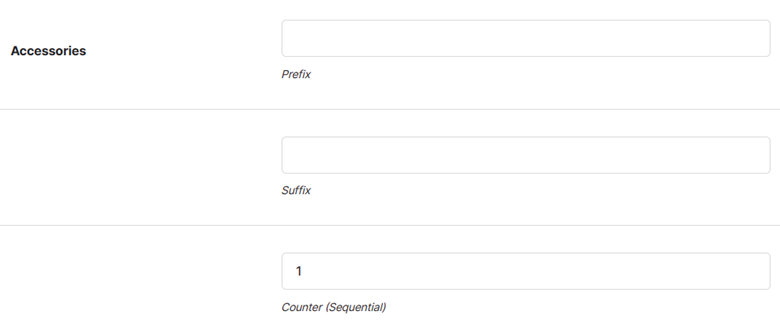
Use the options in the Categories Options section to resolve the conflict when a product belongs to multiple categories and set the prefix, suffix & sequential counter per category.
- Select between Use First Category and “Glue” Categories options for Multiple Categories. In the case of “Glue Categories” being your choice, add a category separator.
For example, if a product belongs to categories “Accessories” and “Clothing” at once & you have added the separator as “-”, the category string for the product will be “accessories-clothing”.
For each category, you can specify a prefix, a suffix, and a sequential counter in this section.
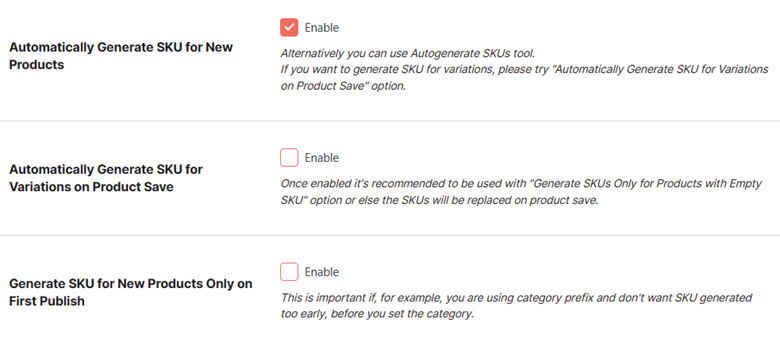
- To enable the generation of SKUs for new products automatically, enable the Automatically Generate SKU for New Products.
- Enable the Automatically Generate SKU for Variations on Product Save, if you want to allot different SKUs for your variable products.
- Select the Generate SKU for New Products Only on first Publish option, if you want to generate a product’s SKU only when it is published and assigned a category. It will a good idea to do so, as it won’t take unuseful strings as a part of your product SKU.
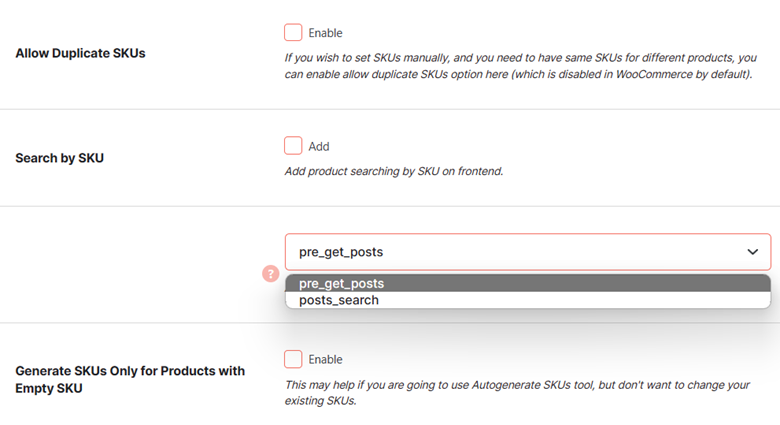
- SKUs are unique by default. If you want to allow non-unique or duplicate SKUs for your products, Enable the Allow Duplicate SKUs
- To add an option for searching products by their SKUs, select Add for the Search by SKU
- If you are using the “Autogenerate SKUs” tool to create SKUs in bulk for the existing products and willing to auto-generate SKUs for products with no SKUs only, Enable the Generate SKUs only for Products with Empty SKU
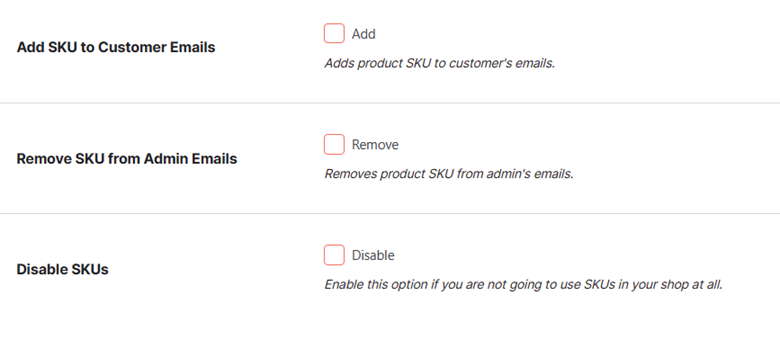
- Select the Add for the Add SKU to Customer Emails option to display product SKU in the emails being sent to your customers. It will help them track orders with more ease.
- To skip adding SKU details in the admin emails, Enable the Remove SKU from Admin Emails.
- To disable the use of product SKUs through your online store, select the Disable option for Disable SKUs
Tool – Autogenerate SKUs (Auto-generate SKUs for Existing Products in Bulk) #
Use the AutoGenerate SKUs tool to create product SKUs when the product already exists or when you have not enable the auto-generation of SKUs for new products. These SKUs will be generated as per the settings on Booster > Plugins > PRODUCTS > SKU page.
For example, let’s say we have configured the following details for an online store through the SKU in WooCommerce plugin.
It should set the same SKUs as the product IDs for your online store, while prefixing “ss” before the SKUs.
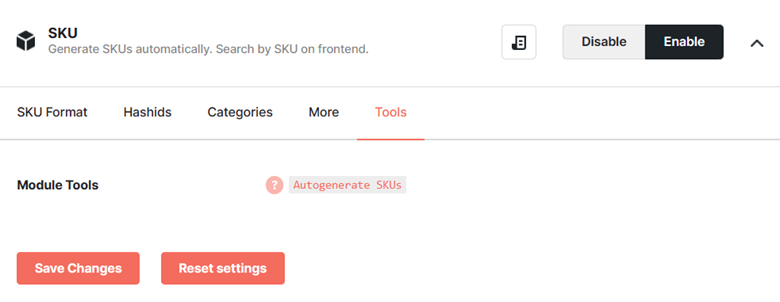
Now, in the Tools section on the Booster > PRODUCTS > SKU page, click on the Autogenerate SKUs link.
Click on the Preview SKUs button to see the new (proposed) and old values of product SKUs for your online store.
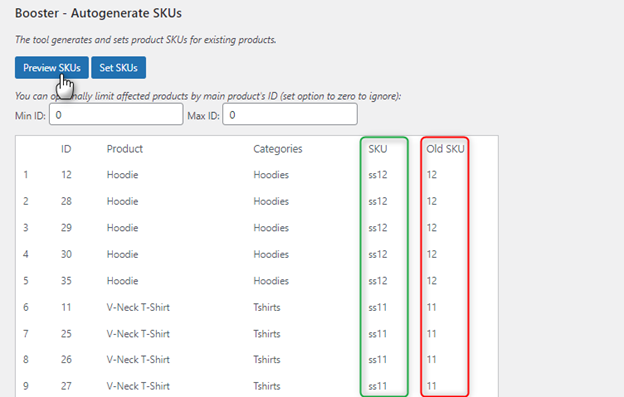
If details look correct, click on the Set SKUs button.
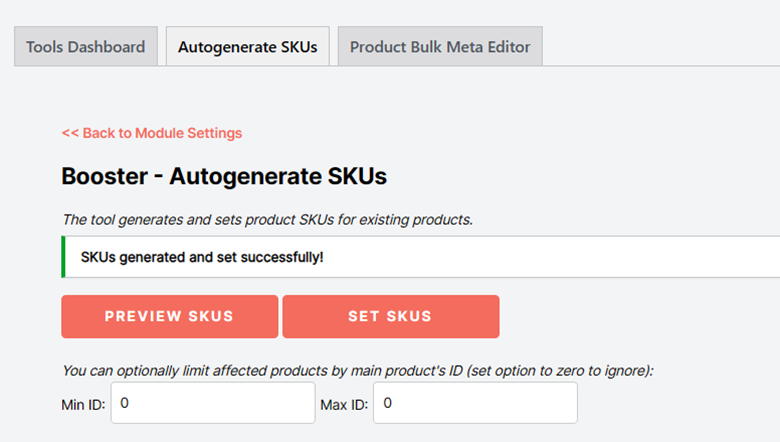
You will see a notification that says “SKUs generated and set successfully” if all went well.
Reset Settings #
Click on the Reset Settings button to restore the plugin’s default settings. It will clear your manual settings related to SKUs and restore the default values for the options in the plugin settings.