- Overview
- How to Install the WooCommerce Sorting Plugin with Booster?
- How to Add a Custom Sorting Section to your WooCommerce Shop Pages?
- How to Rearrange Sorting in WooCommerce (Custom and Default)?
- How to Hide Default WooCommerce Sorting Option or Change its label?
- Change the Label for “Default Sorting”
- Change the Label for “Sort by Popularity” or Hide this option
- Hide the “Sort by average rating” option or Change its Label
- Change the Label for “Sort by Newness” or Hide this option
- Change the Label for “Sort by Price” (Ascending) or Hide this option
- Change the Label for “Sort by Price” (Descending) or Hide this option
- Remove Default and Custom Sorting Options from your Shop
- Restore Default WooCommerce Sorting
- Reset Plugin Settings for the WooCommerce Sorting Plugin in Booster
Overview #
Online buyers prefer the convenience of searching/finding (what they want to buy) over everything. If they cannot find the product, they will not waste a lot of time, but look for other options (e.g., going to your rival store).
Such cutting-throat competition among online stores demands you to enable upgraded “searchability” and an easy way of “navigation” throughout the store.
The WooCommerce Sorting Plugin gives you the solution for both.
It lets store owners enable a sorting dropdown with various methods of sorting enlisted for your customers. For better readability of dropdown options, you have the privilege of setting customized labels for your sorting options.
As per their preference, customers can sort the store products and find what they are looking for. WooCommerce Sorting Plugin allows you to add the following sorting options –
- Menu order
- Product Popularity
- Product Rating
- Product Publishing date
- Product Price (Ascending or Descending)
- Product Title (Ascending or Descending)
- Product SKU (Ascending or Descending)
- Product Stock Quantity (Ascending or Descending)
Besides the above, you can also remove WooCommerce Sorting totally from your products and display them randomly in your shop if you prefer.
How to Install the WooCommerce Sorting Plugin with Booster? #
The plugin is useful for enabling your buyers to find the most suitable products for purchase, so installing it on your WooCommerce store is definitely a good idea. To do so, follow the steps enlisted below:
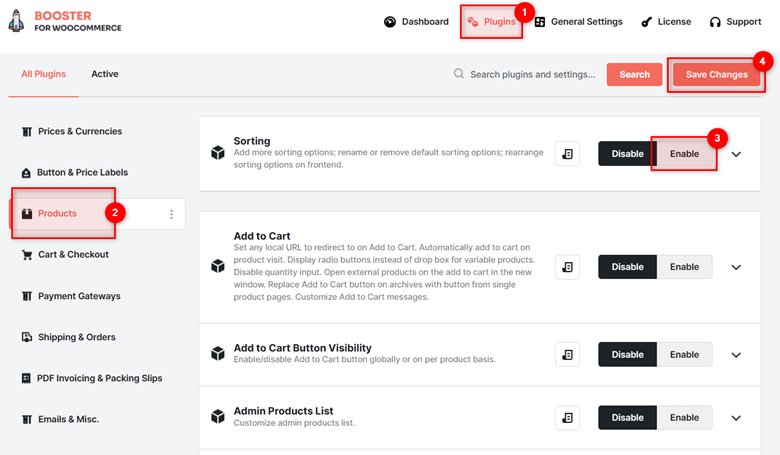
- Install the Booster for WooCommerce Plugin on your online store using the WordPress admin dashboard. For this, download it from this link, go to Plugins > Add New, upload the zipped file, and activate Booster in the end. [Find the detailed guide here]
- Go to the Booster > Plugins > PRODUCTS
- You will find the plugin Sorting installed here. Select Enable for the Sorting plugin and click on the Save Settings
How to Add a Custom Sorting Section to your WooCommerce Shop Pages? #
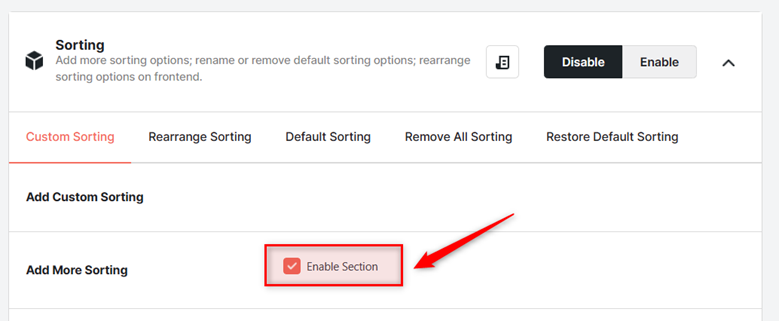
Go to the Add Custom Sorting section in the Booster > Plugins > PRODUCTS > Sorting page.
To enable custom sorting on your category pages, search results, and archive pages using the WooCommerce Sorting plugin, select Enable Section as the value for the Add More Sorting option.
The plugin will let you add 3 more sorting filters through it, namely – Product Name, SKU, and Stock Quantity.
Next, in the Rearrange Sorting section, you can select the order where each of these options should appear in your sorting options’ dropdown.
Details on the 3 custom sorting options are given in detail below:
Sorting by name #
Set a label for sorting in ascending order and another label for sorting in descending order.
Sorting by SKU #
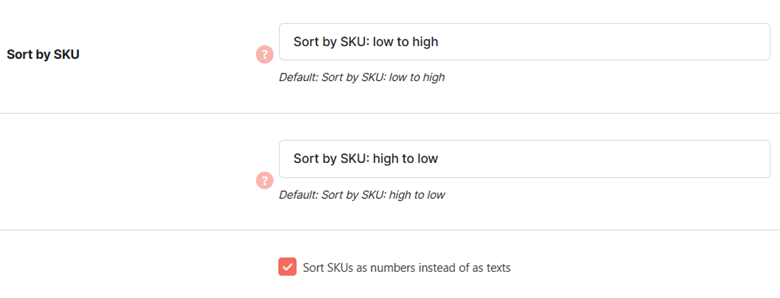
Sort your products in your shop pages by product SKU in ascending order and descending order. Use the respective fields for specifying the sorting criteria labels here.
Note: By Default, Product SKU is treated and sorted as text. To treat it as numbers, select the checkbox below the input fields.
Sorting by Stock Quantity #
If you want to sort your products according to their quantity in your inventory, use this custom sorting criterion. Buyers can sort their products in ascending or descending order using this option.
Set a label for both options so that they could understand the purpose of each of these options.
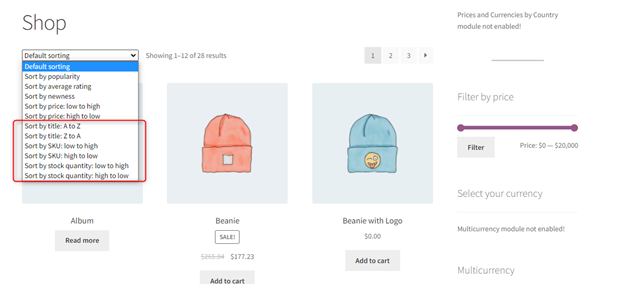
Frontend Preview: Online Store with Custom Sorting Options in WooCommerce
How to Rearrange Sorting in WooCommerce (Custom and Default)? #
By default, the sorting criteria list will appear in the following order on your shop pages:
| Sorting Criteria Code | Description |
| menu_order | Default sorting |
| popularity | Sort by product popularity |
| rating | Sort by product rating |
| date | Sort by product publishing date |
| price | Sort by product price |
| price-desc | Sort by product price in descending order |
| title_asc | Sort by product title |
| title_desc | Sort by product title in descending order |
| sku_asc | Sort by Product title (as text or numbers, depending upon your selection in plugin settings) |
| sku_desc | Sort by product title in descending order (as text or numbers, depending upon your selection in plugin settings) |
| stock_quantity_asc | Sort by product quantity in stock in ascending order |
| stock_quantity_desc | Sort by product quantity in stock in descending order |
To enable changing the sorting order as you want, select the Enable Section checkbox for the Rearrange Sorting option in the Rearrange Sorting section.
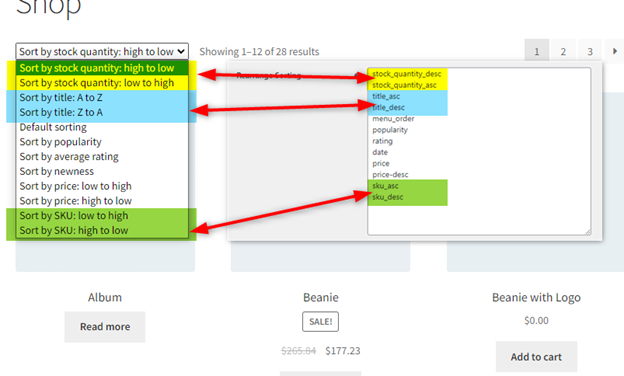
Change the order of sorting criteria present in the Rearrange Sorting field.
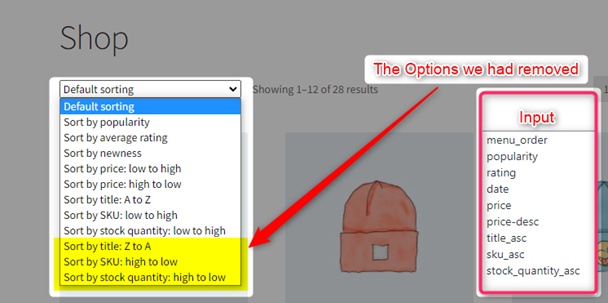
Output 1: Deleting Values won’t remove Sorting Options from your Store. #
Note that if you will remove any, few, or all sorting criteria from the list, they will be appended at the end of your list, following the default sorting order.
Output 2: Changing the Sorting order #
On changing the sorting order, you will see the sorting options arranged in your specified manner in your shop.
How to Hide Default WooCommerce Sorting Option or Change its label? #
See if you need to do the following(s):
- Change the label of default sorting options
- Hide any of the default sorting options
If you want to, then scroll down to the Default WooCommerce Sorting section and select the Enable Section checkbox for the Default Sorting Options.
Now, you can do a lot of things with your default sorting options, such as:
Change the Label for “Default Sorting” #
You just need to edit the text in the Default Sorting input field to change this label.
Change the Label for “Sort by Popularity” or Hide this option #
- Edit the label of the Sort by Popularity input field if required.
- Select the Remove “Sort by Popularity” checkbox to hide this option in your shop.
Hide the “Sort by average rating” option or Change its Label #
- Change the label of the Sort by Average Rating input field if needed.
- Click on the Remove “Sort by average rating” checkbox to select it and hide this sorting criterion for your buyers.
Change the Label for “Sort by Newness” or Hide this option #
- Enter the edited label for the Sort by Newness criteria in the input field.
- Tick the Remove “Sort by Newness” checkbox to hide it.
Change the Label for “Sort by Price” (Ascending) or Hide this option #
- Change the label of the Sort by Price: Low to High input field if needed.
- Click on the Remove “Sort by Price: Low to High” checkbox to select it and hide this sorting criterion for your buyers.
Change the Label for “Sort by Price” (Descending) or Hide this option #
- Change the label of the Sort by Price: High to Low input field if needed.
- Click on the Remove “Sort by Price: High to Low” checkbox to select it and hide this sorting criterion for your buyers.
Remove Default and Custom Sorting Options from your Shop #
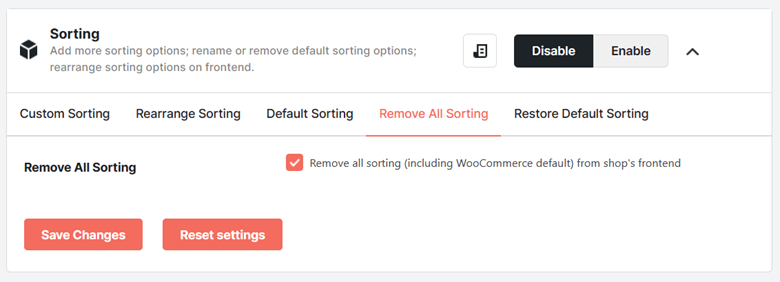
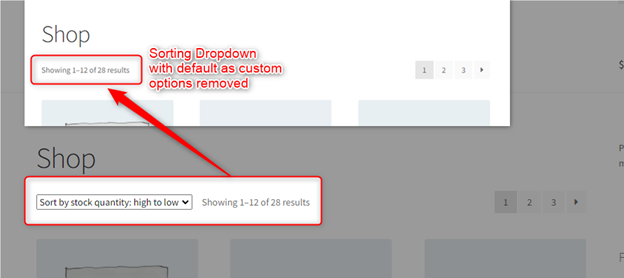
Select the value as Remove all sorting (including WooCommerce default) from shop’s frontend option in the Remove All Sorting section. It will hide the dropdown list with sorting options in it, be it a default sorting option or a custom sorting option.
Store Preview: Sorting Dropdown Disabled #
Restore Default WooCommerce Sorting #
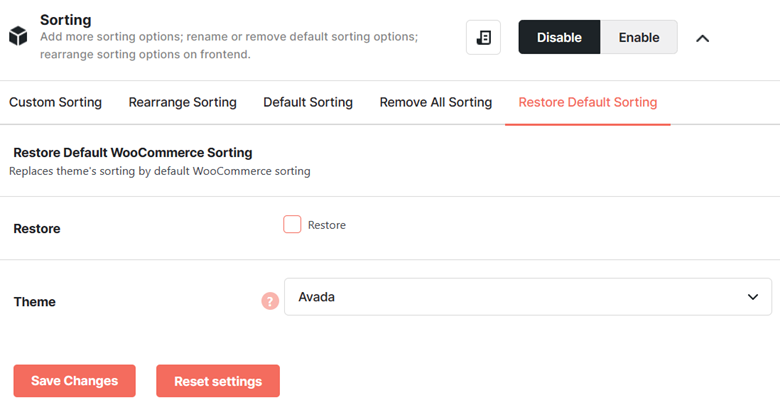
If you want to override the theme’s sorting dropdown options with WooCommerce’s default sorting options, select the Restore checkbox and select the Theme for which you want to enable WooCommerce sorting.
Reset Plugin Settings for the WooCommerce Sorting Plugin in Booster #
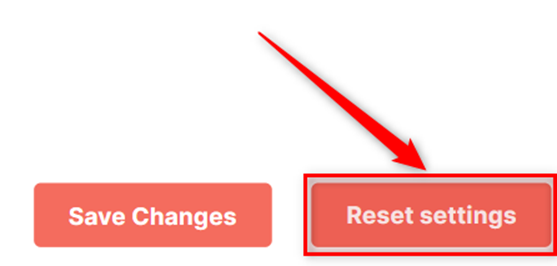
If you want to restore the WooCommerce sorting plugin’s default settings instead of your current configuration, you can reset the settings in one click. Click on the Reset Settings button.

