- Overview
- How to Crowdfund through a Product/Campaign Page in WooCommerce?
- How to Reset Your Crowdfunding Campaigns in WooCommerce?
Overview #
For the eCommerce stores or the NGOs, it is almost impossible to run Crowdfunding campaigns while using the basic or default WooCommerce settings. However, not when you have the Crowdfunding Plugin for WooCommerce to back you.
This plugin lets you turn any of your single product pages into a crowdfunding campaign’s landing page. The core plugin functionality is controlled through shortcodes, HTML, and CSS. So, it is very easy to use. Responsiveness and flexibility make WooCommerce Crowdfunding Plugin the favorite of top companies and developers.
You can show the following data on product pages via Booster Products Crowdfunding Shortcodes:
- Crowdfunding goal amount;
- Campaign’s start date;
- Campaign’s deadline / end date;
- Total products or units to be donated/sold required to achieve the goal;
- Total orders/donations happened till yet;
- Number of units (items/basic donation amount) ordered or donated;
- Amount required to attain the crowdfunding goal;
- Crowdfunding goal (in progress bar format);
- Days remaining before the campaign ends;
- Time remaining before the campaign ends as progress bar;
From editing product information to labels, button visibility, item counter visibility, to showing essential crowdfunding campaign details – there is nothing you cannot do with the WooCommerce Crowdfunding Plugin. However, doing so requires using various other booster plugins, such as Product Info, Add to Cart Labels, Product Open Pricing, etc.
Store Preview: WooCommerce Crowdfunding
How to Crowdfund through a Product/Campaign Page in WooCommerce? #
Step 1 – Get Started with WooCommerce Crowdfunding #
Follow these steps to use the WooCommerce Crowdfunding functionality with your store:
-
- Download the Booster for WooCommerce plugin.
- Log in to your store’s administrator side using valid credentials.
- Install and activate Booster for your WordPress shop.
- Go to Booster > Plugins.
- Go to the PRODUCTS category.
- Click Enable for the Crowdfunding plugin.
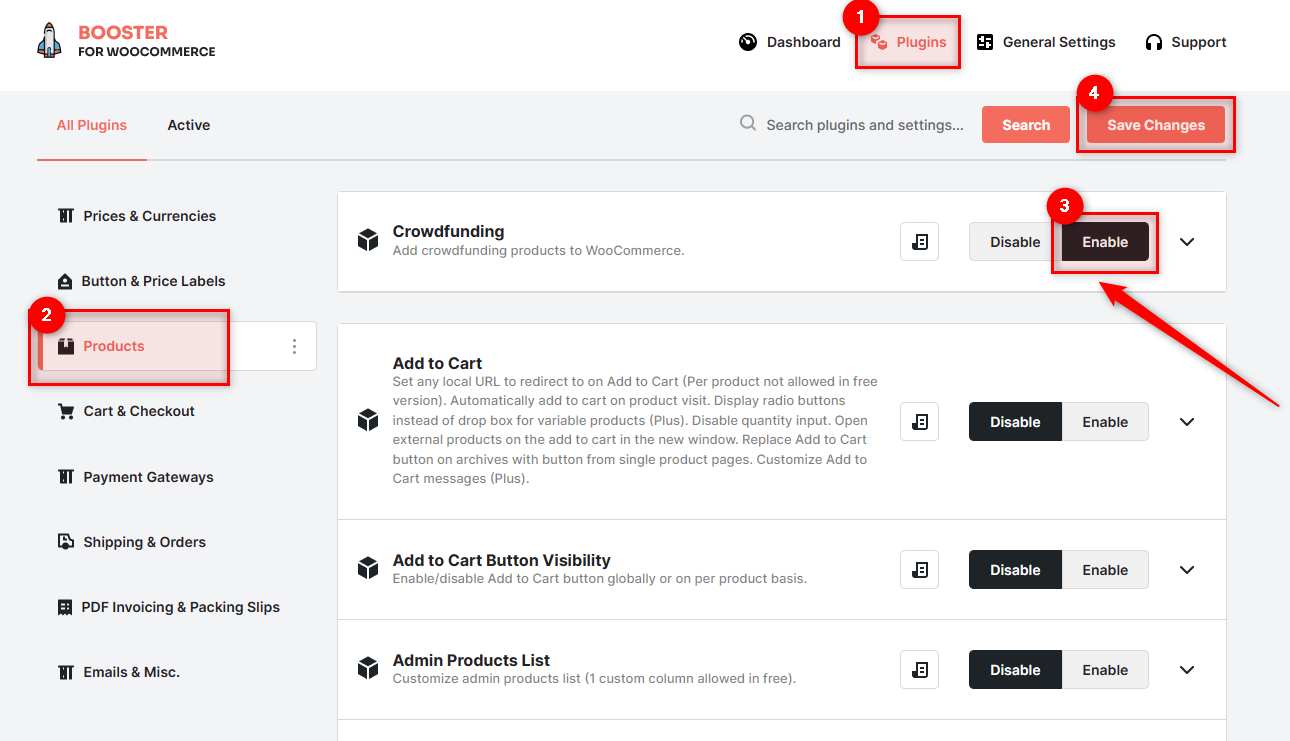
-
- Click on the Save Changes button.
Step 2 – Decide Crowdfunding Method for WooCommerce #
To get started with your WooCommerce campaign, you must think about your method of crowdfunding. For example, some stores crowdfund by selling products at a higher price while others take donations. Details about the same can be specified on your campaign page. However, you also need to determine the price/amount for this.
The WooCommerce Crowdfunding Plugin lets you enable several types of campaigns (as per how you want to specify the donation/product amount –
Method 1 – Select a minimum donation amount and let people donate in its multiples. #
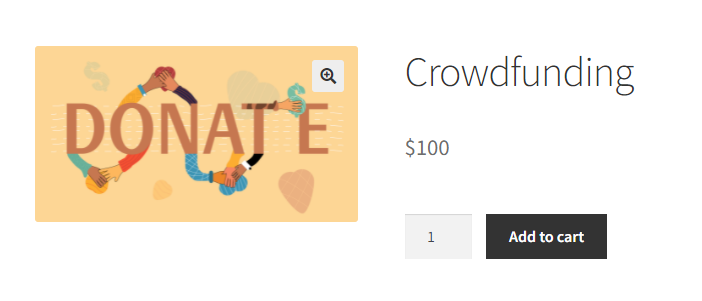
For this, you should turn your single product into a crowdfunding campaign page. Also, do not hide the field to enter item count, but change the labels and button texts on the page to deploy the functionality.
For example, if the crowdfunding product price is $100, people will be able to donate $100 or its multiples (e.g., $200, $300, and so on).
Method 2 – Give People Several Options for the Donation Amount #
Want to let donation givers add $10, $25, or $50 to your campaign money? Use variable products.
Let’s say, you create a variable product for crowdfunding with 3 variants, namely – small, medium, and big.
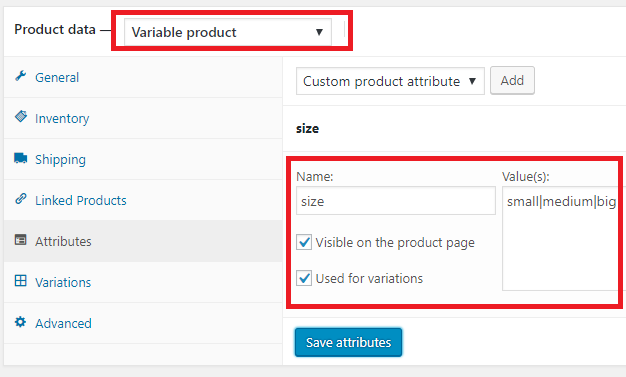
Next, we have set the price for each variant as different crowdfunding amount variations you accept.
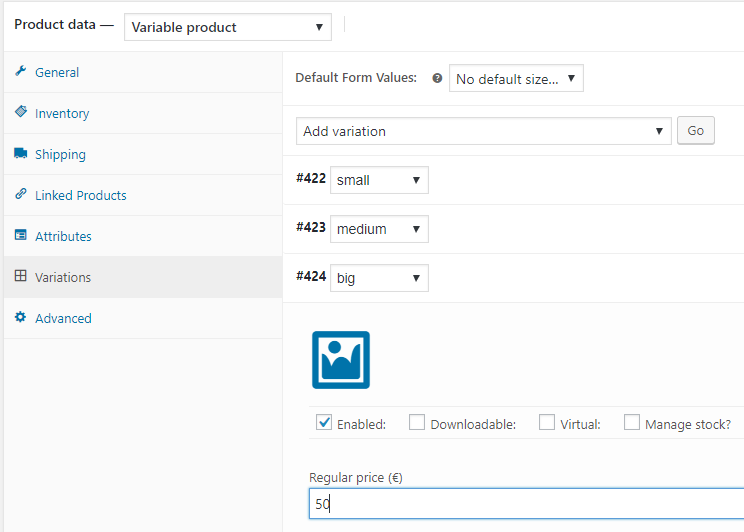
In the end, saved the changes made for this variable product.
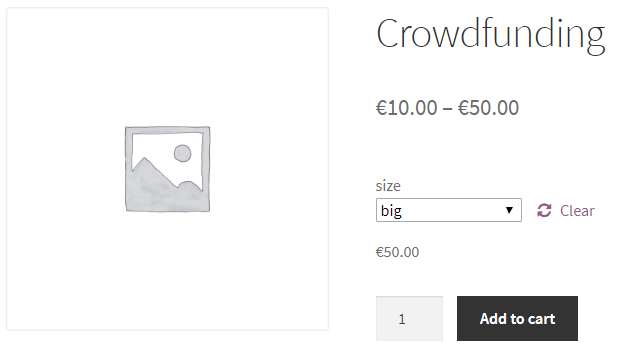
Now, your store visitors will be able to choose the amount of their preference for crowdfunding and send it to you.
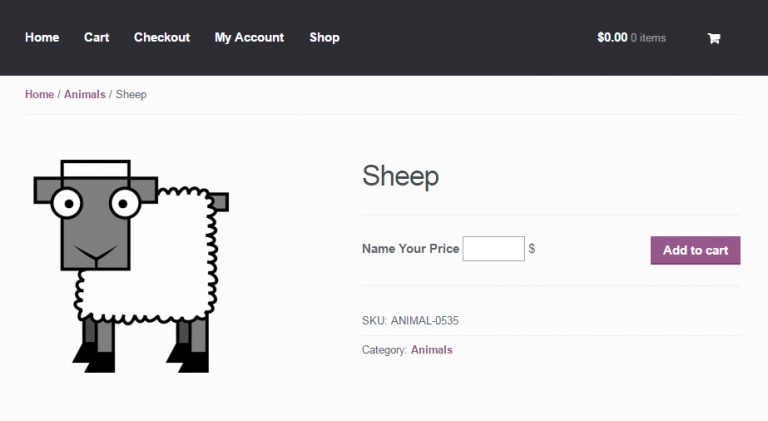
Method 3 – Let People Set their Donation Amount on Their Own #
If you do not want to specify any donation amount for crowdfunding but let your store users donate as per their preference, you must use the Open Pricing Plugin – Booster for this. Optionally, the plugin will also allow you to set lower and upper limit on the amount being sent through the crowdfunding campaign.
Step 3 – Align Button Texts, Product Information, and Labels to your Campaign #
As the product page with labels like “Add to Cart”, “Product Cost”, “Discount”, etc. are not suitable for crowdfunding objects, you should change the product information, button texts, and the add-to-cart label.
For this, activate Product Info and Add to Cart Labels Plugins through your Booster dashboard and configure details for crowdfunding as you want.
It will help your store users understand the purpose of your crowdfunding page, increasing the campaign’s conversion rate and its chances of success.
Step 4 – Set Crowdfunding Details in WooCommerce #
Once you have selected the crowdfunding method and set the texts & layout as desired, it is time to start the campaign in the store. For this, the steps are as under:
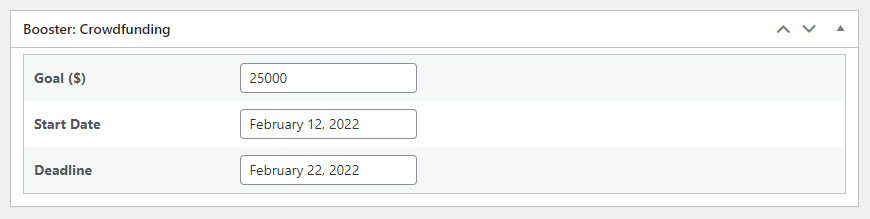
- Open the product to be used for crowdfunding in Editor. However, befor that, make sure that you have enabled the WooCommerce Crowdfunding Plugin for your Store.
- In the Booster: Crowdfunding metabox, enter the Goal Amount, Start Date, and the Deadline for your crowdfunding campaign.
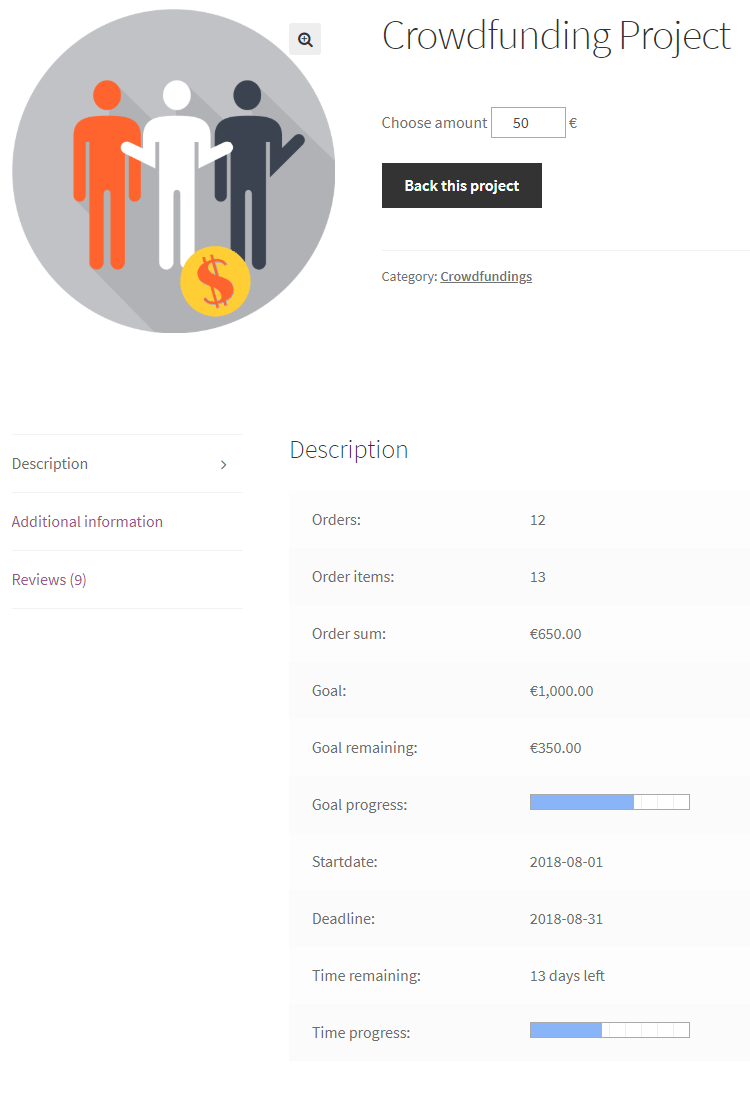
- Use Booster’s crowdfunding shortcodes anywhere in your product page to display crowdfunding details. For example, here, we have created a table showing all necessary details to visitors.
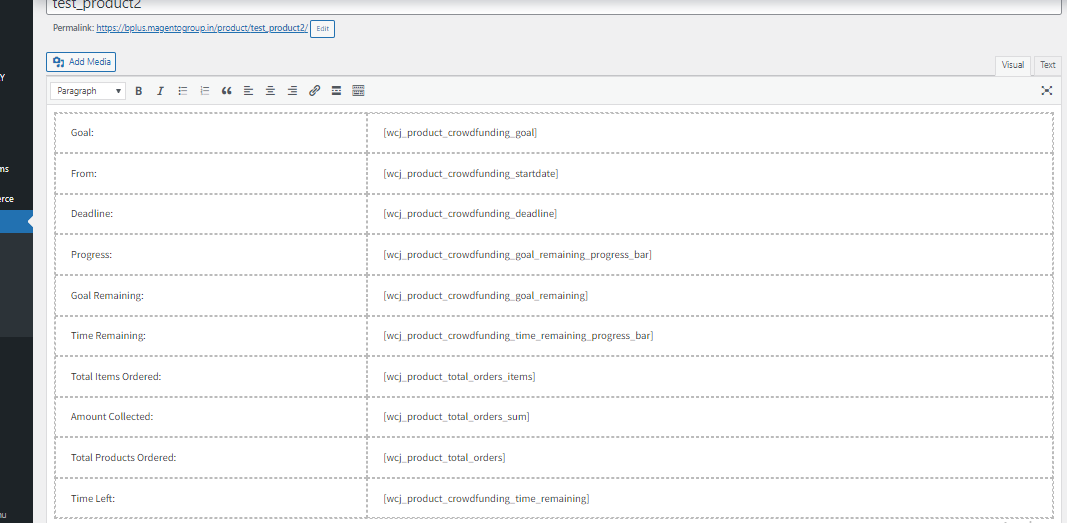
Output:
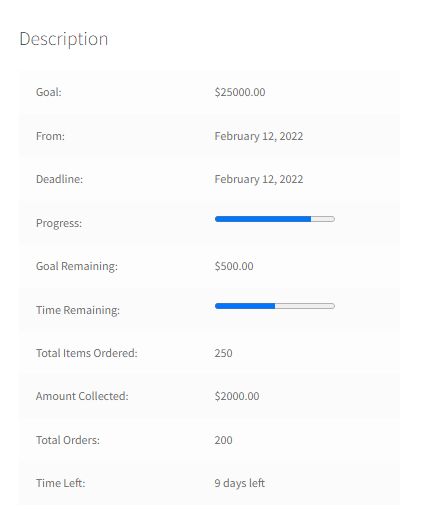
As you can use Crowdfunding shortcodes in your pages, you have full control over what your Crowdfunding details will look like on the frontend. Different HTML and CSS will create different appearances for your crowdfunding page.
All about WooCommerce Crowdfunding Shortcodes #
Use the following shortcodes across your WooCommerce shop as and when required:
[wcj_product_total_orders]
Displays the total number of orders (donations) placed yet. Details here.
[wcj_product_total_orders_items]
Shows how many items (or units of donations) are ordered till the present moment. Details here.
[wcj_product_total_orders_sum]
Displays the amount collected or total ordered products’ worth in real-time. Details here.
Note:
You may specify offset, prefix text, postfix text, and currency symbol visibility details as args for the shortcodes above.
Alternatively, set the values for attributes related to product visibility, WPML language, location, currency sign visibility, prefix text, postfix text, and fixed product ID for all the shortcodes below this section. Details on respective shortcode details pages.
[wcj_product_crowdfunding_goal]
Displays crowdfunding goal amount. More details here.
[wcj_product_crowdfunding_goal_remaining]
Shows the amount remaining in order to achieve the crowdfunding goal. More details here.
[wcj_product_crowdfunding_goal_remaining_progress_bar]
Displays crowdfunding goal progress bar (collection vs. remaining). More details here.
[wcj_product_crowdfunding_startdate]
Shows the date when the campaign began. Click here for further details.
[wcj_product_crowdfunding_deadline]
Displays crowdfunding deadline on the frontend. More details here.
[wcj_product_crowdfunding_time_remaining]
Shows the number of days left before the campaign ends. More details here.
[wcj_product_crowdfunding_time_remaining_progress_bar]
Adds a progress bar that depicts time passed vs time remaining for the campaign. More details here.
How to Reset Your Crowdfunding Campaigns in WooCommerce? #
After running several Crowdfunding campaigns, you might feel the need for clearing all existing campaigns and run them with totally different configurations. Doing it one by one could be tiring, as the number of active/inactive campaigns is high.
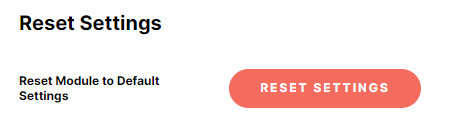
No worries, as you can always restore the plugin’s default settings in 2 clicks for your store. For this:
- Use the Reset Settings button, present on the WooCommerce > Settings > PRODUCTS > Crowdfunding page.
- Confirm deletion when the browser warning appears.
Please keep in mind that clearing or resetting WoCommerce Crowdfunding will not change the labels, texts, and buttons edited through other Booster plugins for the related products or campaigns. You need to reset each plugin separately, in order to reset the settings enabled through it.


