As an online store owner, you might want to add payment gateways fees to WooCommerce. What this means is that customers pay any additional costs that come with their order. In other words, you don’t have to spend extra on sending out customer’s orders. This also means that you don’t have to pay hefty amounts of transaction fees which can quickly ramp up business costs.
However, WooCommerce by default doesn’t have built-in functionality that lets you add payment gateways fees and pass on additional charges to customers. An easy way to do that is by using the Booster Plus for WooCommerce plugin. It lets you add different types of payment gateways fees to your WooCommerce store.
In this article, we’ll show you how you can add payment gateways fees to your online store using Booster Plus for WooCommerce.
Why add payment gateways fees to your WooCommerce store?
Adding payment gateways fees to your WooCommerce store can help you cover all extra fees and costs that come with each customer’s order. These costs may include payment processor fees, labor costs to package the orders, or warehouse expenses to ship orders quickly.
Since customers will pay the payment processor’s transaction fee, you don’t have to deal with the additional expenses that come with the orders you send out.
This can also be a great way to motivate customers to use your preferred payment gateway. You can offer less (or no fees) on preferred payment gateways to incentivize customers to use your preferred payment processor for fewer transaction fees.
Let’s take a look at different types of fees store owners might need to add to payment gateways in WooCommerce:
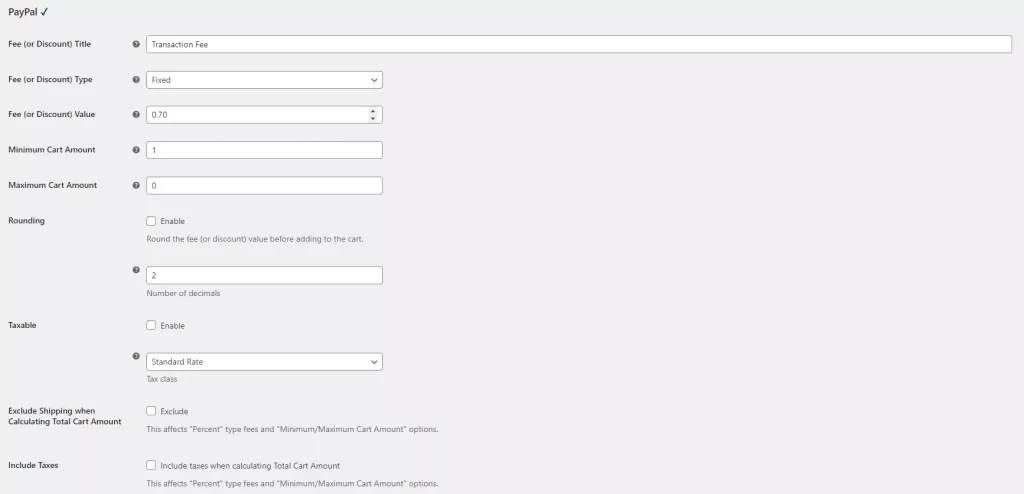
- Transaction fee. If you use popular payment processors such as PayPal or Stripe on your WooCommerce store, you will need to pay fees per transaction. You can add a transaction fee based on what the specific payment processor charges per transaction. When customers select that payment gateway, the transaction fee will automatically be added to their order total.
- Handling charges. If you sell fragile products or products that require special handling during shipping, courier or logistics services may charge you an additional fee. Products such as glassware items, food items, and flowers require extra care while they’re being shipped to customers. This means that you’ll have to pay extra fees for each order you send out. Adding handling charges to your payment gateways in WooCommerce can help cover the additional handling charges.
- Packaging charges. If you have special packaging, you’ll need to hire staff that will pack and manage orders. It can cost you an additional amount to hire labor for kitting and packaging. So, you can pass on the charges to customers. You can add packaging charges to your payment gateways in WooCommerce. This can help cover any additional hidden costs that come with customers’ orders.
You can add payment gateway fees to any payment gateway you offer on your online store.
How to add payment gateways fees in WooCommerce
Here, we’ll show you how you can add payment gateways fees in WooCommerce using Booster Plus’s WooCommerce Payment Gateways Fees and Discounts module.
Step #1: Enable the WooCommerce Payment Gateways Fees and Discounts module
Start by getting the Booster Plus for WooCommerce plugin and installing it on your WordPress website. Navigate to WooCommerce → Settings → Booster from the admin panel to access the different modules.
Here you’ll see a list of different modules. Select the Gateways Fees and Discounts module under the Payment Gateways section. You can select the checkbox next to the module to enable it. Once you’re done, click the Save changes button at the bottom of your screen to continue.
Step #2: Configure plugin settings
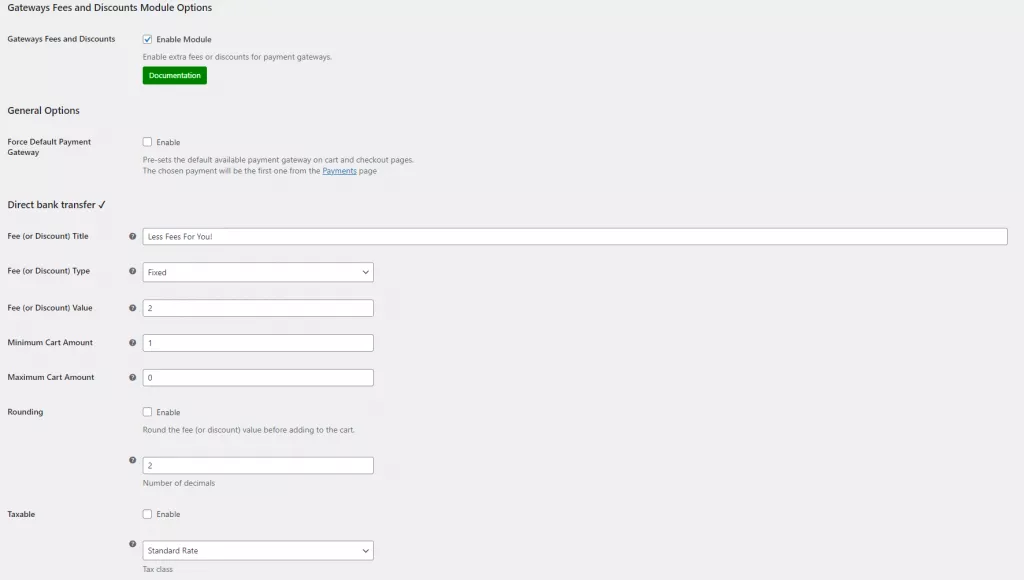
Navigate to Booster → Products → Gateways Fees and Discounts to configure the module’s settings.
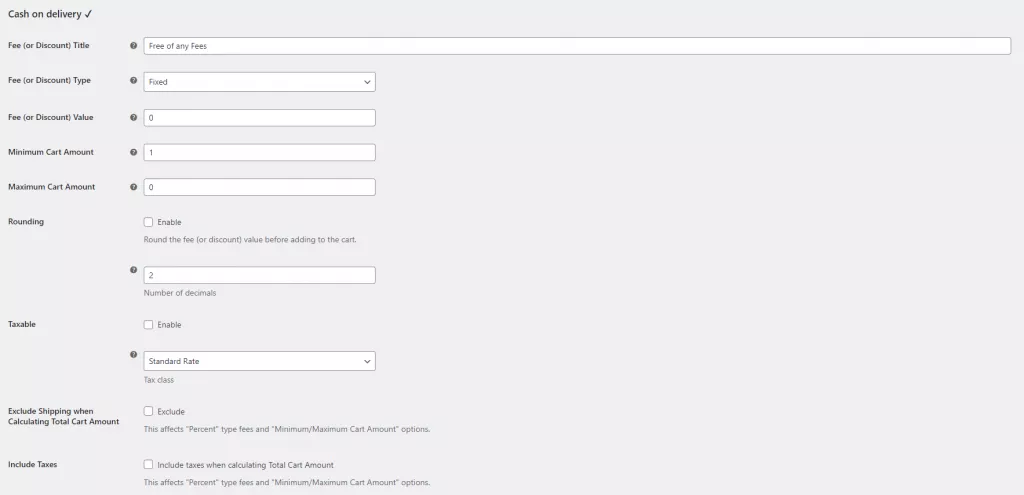
Here, you can add fees to all the default and custom WooCommerce payment gateways that you offer. Start by scrolling down to the payment gateways you want to add fees to. Next, enter a name or title for your payment gateways fees in the text field next to Fee (or Discount) Title. Next, select the type of fees either fixed or percentage from the drop-down menu next to Fee (or Discount) Type. You can set the value of fees in the text field next to Fee (or Discount) Value. It’s important to note that you can offer a discount by entering a negative number.
Similarly, you can add multiple payment gateways fees to your WooCommerce store. You can also offer no fees or zero additional fees on specific payment gateways. This can help incentivize customers to use your preferred payment gateway when buying from your WooCommerce store.
You can also display transaction fees for payment processors you use on your WooCommerce store. This way, you can be transparent with your customers about what additional costs you charge. This not only boosts customer loyalty but also increases customer retention for your business.
Step #3: Preview
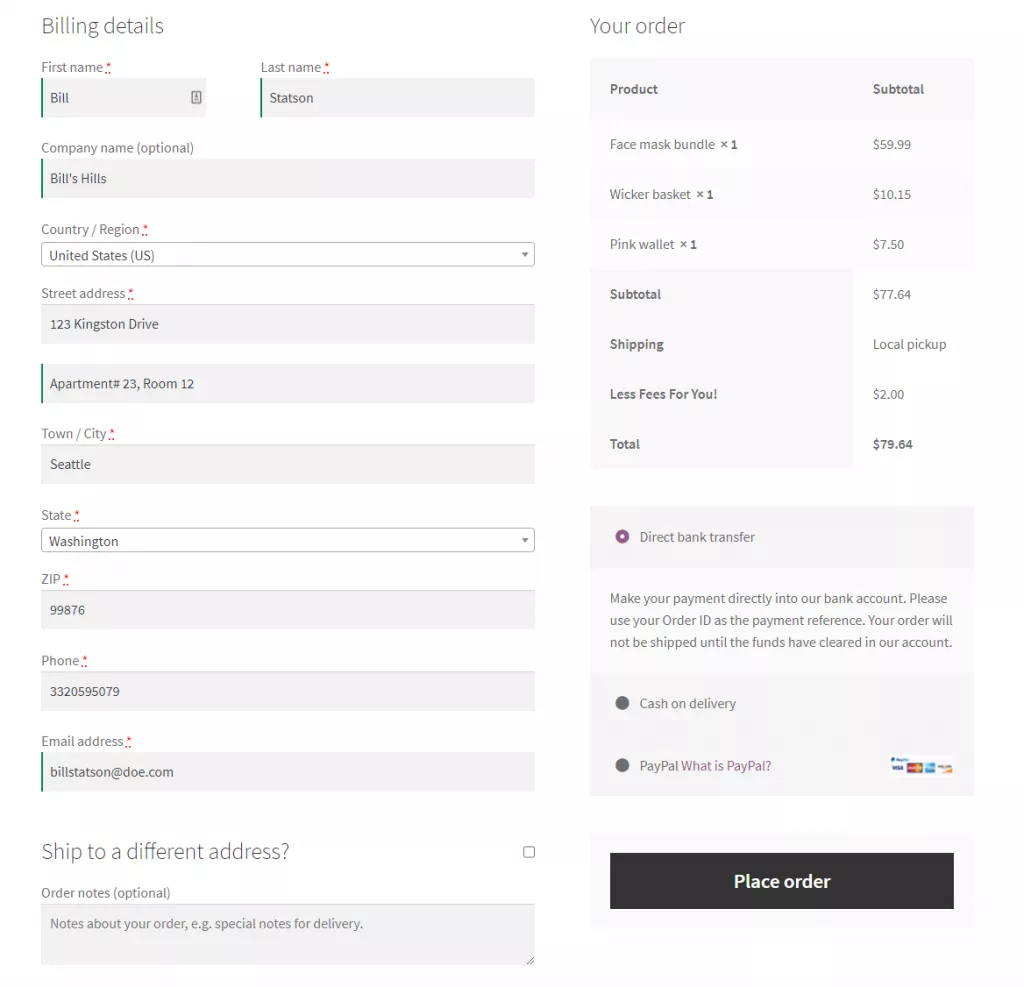
Now, you might be wondering what the customer will see on the front-end.
Here’s how customers who select the Direct Bank Transfer payment gateway will see fees added to their order:
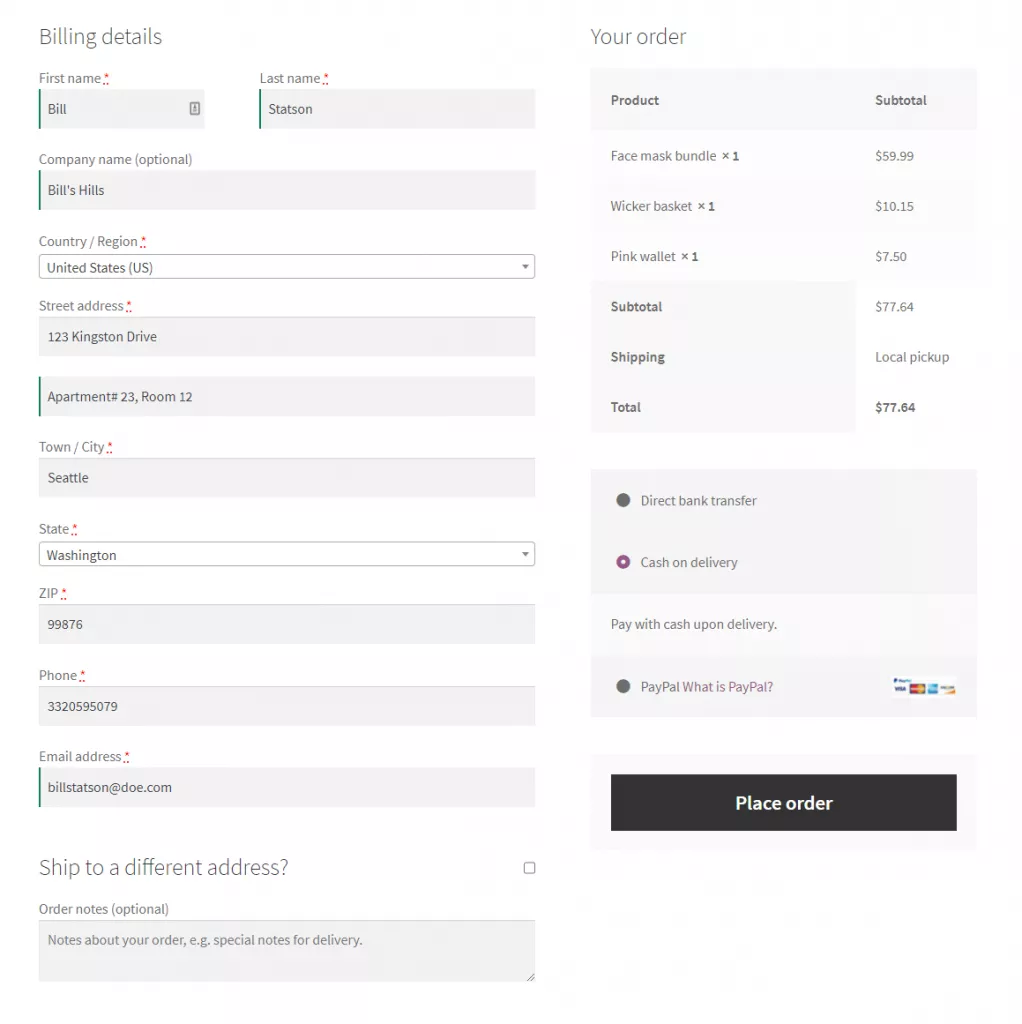
For customers who select the Cash on Delivery payment gateway:
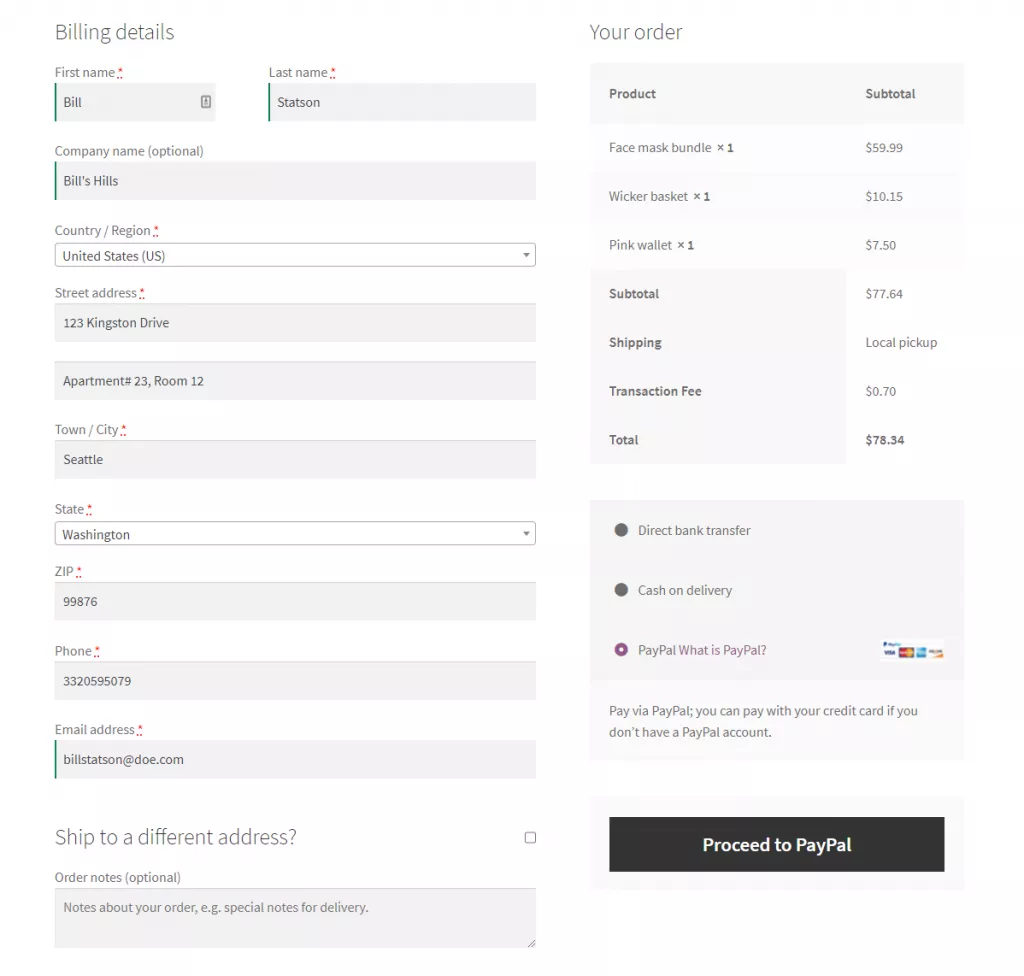
For customers who decide to pay using PayPal:
Conclusion
Adding payment gateways fees in WooCommerce lets you pass payment processor fees or handling fees on to your customers. This allows you to offer multiple payment gateways on your WooCommerce store and charge different fees for each one. Additionally, you can also offer discounts to customers for using your preferred payment gateways.
Booster Plus lets you customize the look and feel of your WooCommerce store. This not only improves user experience on your online store but also helps you stand out from the competition. Booster Plus gives you the ability to select and customize from 110+ powerful modules that can help add new functionality, improve the shopping experience, and give your store a unique look.
Ready to start adding payment gateways fees to your WooCommerce store? Get Booster Plus today!


